Triggers
What is a trigger?
Triggers in Gadget are events or conditions that initiate an action within an application. They parse external events, such as incoming webhooks or API calls, and then run your action with parameters. Default triggers are already established in many actions, such as the API endpoint trigger for integrating the action into your app's API or the Shopify data trigger that executes actions in response to Shopify webhooks.
How triggers work
Each trigger in Gadget does two things:
1. Activates on a certain event: Each trigger is designed to execute at a specific point, determined by various conditions or events. For instance, an API endpoint trigger executes when its corresponding mutation in the GraphQL API is invoked, while a Scheduler trigger activates at pre-set time intervals like a cron job might.
2. Sends the params and trigger to the action: Upon activating, the trigger tests authorization. If successful, the action is run with the params and trigger variables parsed out by the trigger. The contents of the params object depend on the trigger, and the contents of the trigger object describe which trigger ran and why.
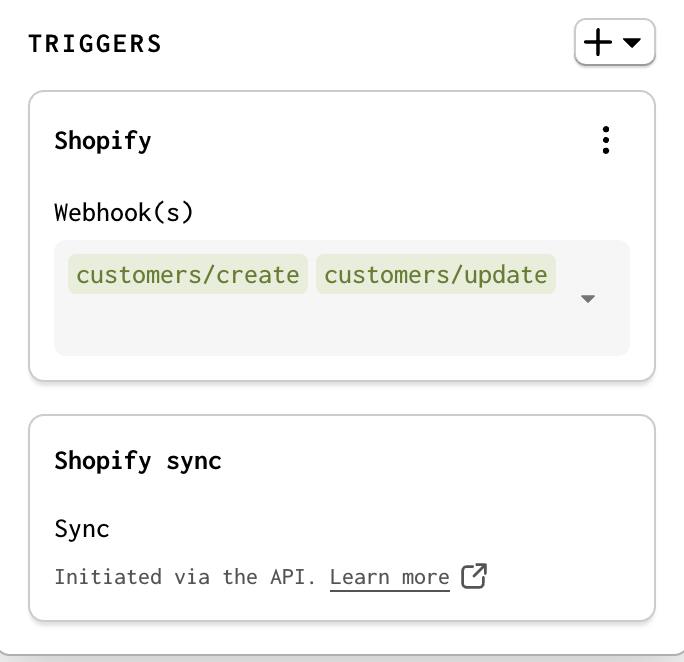
Adding Triggers to Actions via the Gadget UI
To add a trigger to an action, click on the action in the Gadget Dashboard's Actions Panel. This will open the action's configuration, where you can define and manage its triggers.
When you select the action, the input parameters will be presented to you, allowing you to fill them out. Clicking the Run button will immediately execute the action, triggering the associated code and applying any changes in real-time.
This feature simplifies the process of running actions by giving you an intuitive interface where you can quickly interact with your actions without having to manually write API calls.
Benefits of Using Gadget's UI for Actions
No-Code Execution - Trigger actions without needing to manually write API calls.
Real-Time Debugging - View the action's execution result or any errors immediately after running the action.
User-Friendly Interface - The UI is simple to use, making the process of triggering actions and debugging easier.
Types of triggers
API endpoint trigger
The API endpoint trigger invokes your action when an incoming API call is made to your application's API. For more on your application's API and how to make API calls, see the API Reference.
By default, most actions have an api trigger already registered. If you want to explicitly register an api trigger, you can do so by adding an api property to the triggers object in the action's options.
How the API actions are run
The API trigger runs your actions when the corresponding mutation is run in your application's generated API. When this mutation is called, the trigger assesses if the caller has permission to run the action using your application's access control.
If permitted, the action's run function is executed, passing any incoming parameters. For model-scoped actions, the resulting record is sent back to the API caller, and for globally-scoped actions the return value of the run function is sent back. If any errors are thrown during processing, those errors are instead sent back to the caller.
The generated API endpoints for your API triggers can be called using the api object within your application, or using the React hooks from @gadgetinc/react hooks library, or any other GraphQL client.
API endpoint trigger params
The API endpoint trigger validates that incoming parameters match the expected types for the action, and then passes the params to the action.
For model-scoped actions, API triggers add automatic params for each field on the model. For globally-scoped actions, there are no params by default.
You can customize the parameters passed to your actions to suit your specific needs. For more details and examples on adding and customizing parameters, see the action guide.
API endpoint trigger object
When an action is invoked via an API call, the passed trigger object will look like this:
an example API trigger objectjson{ "type": "api", "mutationName": "updateWidget", "rootAction": "update", "rawParams": { "id": "123", "widget": { "title": "New Widget Title", "inventoryCount": 10 } } }
type: will always be set toapi.mutationName: the string name of the mutation called in the API.rootAction: the API identifier of the action triggered by the mutation.rawParams: the params passed to this API call.
Background action trigger
The background-action trigger invokes your action when an enqueued background action is dispatched and run.
Unlike other triggers, the background-action trigger params are set when the background action is enqueued with api.enqueue.
Background action trigger object
When an background action is dispatched and run, the passed trigger object will look like this:
an example background action trigger objectjson{ "attemptNumber": "3", "finalAttempt": false, "id": "job-1234567890ABCDEF", "mutationName": "createPost", "priority": "default", "rawParams": { "backgroundOptions": { "priority": "DEFAULT" } }, "rootAction": "create", "rootModel": "post", "type": "background-action" }
type: will always be set tobackground-action.attemptNumber: if retries are enabled, this will be the number of the attempt.finalAttempt: whether this is the final retry attempt.id: the ID of the background action record.mutationName: the string name of the GraphQL mutation called in the API.priority: the priority of the background action.rawParams: the params passed to this background action.rootAction: the API identifier of the action triggered by the mutation.rootModel: the model of the record being created.
Scheduler trigger
The Scheduler trigger invokes your globally-scoped action at a regular interval. For example, scheduler triggers can be used to send out periodic emails, build database aggregates, or sync data from external systems.
The Scheduler trigger has a scheduler property which describes how often the action should be run, and at what specific times. For example, you can create a scheduler that runs every day at 10:00 AM UTC:
Scheduler triggers also support multiple individual schedules and will invoke your action at each time specified by any included scheduler. For example, we can set up a scheduler to run an action every day at midnight UTC, as well as every Wednesday at noon:
Scheduler triggers can also be expressed using cron syntax, which is a more powerful way to define schedules. For example, the following scheduler options will run an action every day at midnight UTC:
The minimum interval supported by the scheduler trigger is once a minute.
How scheduled actions are run
To add a scheduler trigger, you must specify a time or cron statement that will instruct Gadget on when to run the globally-scoped action. Unlike api triggers, no params will be passed to the action.
Overlapping executions
If a scheduled action is still running when the next scheduled invocation arrives, that next invocation will be skipped. For example, if an action is scheduled to run every minute and it takes 3.5 minutes to complete, the executions that were scheduled during that 3.5-minute window will be skipped.
Schedule trigger params
The Scheduler trigger passes an empty params object when it invokes an action.
If you need to know the current time for executing your action, you can use new Date().
Schedule trigger object
The Scheduler trigger passes a simple trigger object describing the trigger type:
json{ "type": "scheduler" }
Trigger Types
Before we dive into filtering, let's first understand Trigger Types. Trigger types define when an action should be executed. Different trigger types exist, such as:
Create - Runs when a new record is created.
Update - Runs when an existing record is modified.
Delete - Runs when a record is deleted.
These trigger types determine when your logic will be executed.
Filtering the trigger type
In addition to using the Gadget UI, you also have the option to define the logic for these actions through code. Here’s an example of how you can define the behavior that runs when an action is triggered programmatically.
Shopify triggers
There are six different Shopify-related triggers in Gadget that execute actions in response to various Shopify events:
- Shopify webhook trigger - Runs when Shopify sends a webhook to your Gadget application
- Shopify sync trigger - Runs when a sync is manually triggered and data differences are detected
- Shopify webhook reconciliation trigger - Runs when Gadget detects missed webhooks during automatic reconciliation
- Shopify OAuth trigger - Runs when a shop finishes the OAuth process to install an app (on the
ShopifyShopmodelinstallaction) - Shopify admin trigger - Runs when a Shopify admin app is installed (on the
ShopifyShopmodelinstallaction) - Shopify customer account login trigger - Runs when a customer UI extension calls the app with a new customer (on the
ShopifyCustomermodelcreateaction)
Shopify data triggers on global actions look like this within your action's options:
In v1.7+ apps, global actions use a triggerKey to link to a webhook subscription defined in your primary TOML file. Framework v1.7.0+
The corresponding TOML file entry defines the webhook topics, filters, and include fields for this trigger:
shopify.app.tomltoml[[webhooks.subscriptions]] topics = ["products/create"] uri = "https://webhooks.gadget-services.net/shopify/v1/myGlobalAction?domain=my-app--development.gadget.app"
When you add a Shopify data trigger to a global action via the Gadget editor's trigger panel, Gadget automatically generates the triggerKey and creates a matching [[webhooks.subscriptions]] entry in your TOML file. You can also write or customize the triggerKey value directly in your action code. The key must match the last path segment of a subscription URI in the TOML file.
In v1.7+ apps, webhook topics, filters, and
includeFields for global action triggers are
stored in your TOML file. You can configure these values through the editor's trigger panel or by editing the TOML file directly. Global
action code only accepts the triggerKey property, not topics, filters, or include fields.
Pre-framework v1.7
Before framework v1.7, global actions specified webhook topics directly in action code using the webhooks array:
To reduce boilerplate, Shopify models do not need to include explicit shopify triggers in their options, Gadget will apply the correct
triggers by default. It's fine to include a shopify trigger in Shopify models if you want to customize the options, but it's not
required.
Shopify webhook trigger
The Shopify webhook trigger executes model-scoped actions when Shopify sends a webhook to your Gadget application. When a webhook is received, the trigger:
- Parses the payload from Shopify, performing HMAC validation to ensure authenticity
- Transforms the payload into appropriate
paramsfor each record described in the payload - Executes the action for each record in the payload, including nested records
Shopify webhook triggers can also be added to globally-scoped actions to process webhooks there. For more information on how to use Shopify data triggers in globally-scoped actions, check out the guide here. You can include a shopify trigger in Shopify models, but not other models.
Webhook configuration by framework version
How Shopify webhook triggers are configured depends on your app's framework version.
| Aspect | Pre-1.7 | 1.7+ |
|---|---|---|
| Global action topics | webhooks: ["topic"] in action code | topics in TOML file |
| Filters | shopifyFilter in action code | filter in TOML file |
| Include fields | includeFields in action code | include_fields in TOML file |
| Linking mechanism | N/A | triggerKey in action code links to a TOML subscription URI |
| Priority | priority in action code | priority in action code (unchanged) |
| Model actions | Managed automatically by Gadget | TOML-managed by Gadget. Metafield models are per-shop, see below. |
In v1.7+ apps, the triggerKey value in your action code corresponds to the last path segment of a webhook subscription URI in your TOML file. When Shopify sends a webhook to that URI, Gadget routes it to the matching action.
Models with Shopify metafield fields enabled are an exception. Their
webhooks are registered per-shop via the Shopify GraphQL API rather than through the TOML file. For these models, shopifyFilter and
includeFields remain in action code even in v1.7+ apps, and triggerKey is not supported.
How Shopify webhook actions are run
When Shopify sends a webhook to your Gadget application, the Shopify webhook trigger is activated. The trigger validates the webhook's authenticity using HMAC validation, then processes the payload and runs the appropriate actions for each record described in the webhook.
Shopify webhook priority
You can control the priority of webhook processing by setting the priority option in your Shopify trigger configuration. This allows you to ensure that time-sensitive webhooks are processed before less critical ones.
The priority option accepts one of three values:
"high": Highest priority, processed before all other priorities"default": Standard priority for background actions"low": Lowest priority, processed after higher priority actions
For example, you might set "high" priority on order-related webhooks to ensure they're processed quickly, while using "low" priority for product catalog updates that aren't time-sensitive.
Priority can only be set on root-level model actions that directly receive webhooks, or on global actions. You cannot set priority on
child model actions that inherit webhooks from a parent model (like shopifyProductVariant or shopifyOrderLineItem). When a webhook
triggers multiple actions across parent and child models, Gadget uses the highest priority among the root-level actions to determine the
webhook's processing priority.
Shopify webhook trigger params
For model-scoped actions, the Shopify webhook trigger pulls out the right parameters for the current record from the incoming webhook payload and adjusts the keys to have consistent JavaScript style-casing. For example, when a webhook for product/create arrives, Gadget chops up the payload into the chunk to create params for the root-level product, and then another set of params for each shopifyProductVariant record described in the payload. For this example webhook on the shopifyProduct model, the params object will look like this:
example model-scoped action Shopify Webhook trigger paramsjson{ "id": "12345", "shopifyProduct": { "title": "Example T-Shirt", "tags": ["example", "t-shirt"], "publishedAt": "2024-01-01T00:00:00Z", "productCategory": { "id": "12345", "name": "Shirts" } // ... etc } }
and for the shopifyProductVariant model, the params object will look like this:
example model-scoped action Shopify Webhook trigger paramsjson{ "id": "5678", "shopifyProductVariant": { "title": "Example T-Shirt", "sku": 10, "price": 10.99, "inventoryPolicy": "continue", "fulfillmentService": "manual" // ... etc } }
For global-scoped actions, the incoming Shopify webhook payload is delivered as the params unchanged. For a product/create webhook, the params object will look like this:
example global-scoped action Shopify Webhook trigger paramsjson{ "topic": "products/create", "payload": { "admin_graphql_api_id": "gid://shopify/Product/788032119674292922", "body_html": "An example T-Shirt", "created_at": null, "handle": "example-t-shirt", "id": 788032119674292922 // ... etc } }
The params delivered for each different webhook topic are different, and they can change when Shopify makes changes. Shopify's field changes are handled by their API versioning system, ensuring that changes are predictable and managed. For more information on managing Shopify API versions, see Managing Shopify API Versions
Example webhook trigger object
When a Shopify webhook is received by your Gadget application, the trigger object passed to your action will look like this:
json// An example Shopify Webhook trigger { "type": "shopify_webhook", "topic": "products/update", "payload": { "id": 788032119674292900, "title": "Example T-Shirt", "body_html": "An example T-Shirt", "vendor": "Acme", "product_type": "Shirts", "created_at": null, "handle": "example-t-shirt" // ... etc matching Shopify's format exactly }, "shopId": "shop123", "retries": 0 }
type: Will always be set toshopify_webhooktopic: The string representing the topic of the incoming webhook from Shopify, likeproducts/updateororders/createpayload: The raw incoming payload from Shopify, which includes all the data sent by the webhook unchangedshopId: The identifier for the Shopify store that received the webhookretries: The number of times this webhook has been retried
The complete payload of the webhook received is accessible within the trigger object that is passed to your action code.
Shopify sync trigger
The Shopify sync trigger executes model-scoped actions when a sync is run and data differences are detected between Shopify and Gadget. This pulls in historical data from a Shopify shop into Gadget and is commonly run after a shop is installed or reinstalled.
How Shopify sync actions are run
When a sync process runs, Gadget compares data between Shopify and your application using the shopifyUpdatedAt field on Shopify model records. If differences are found, the Shopify sync trigger is activated to run the appropriate action, updating the data in Gadget to match Shopify.
This is only run when the sync is manually triggered via the editor or sync API. Webhook reconciliations are handled by the Shopify webhook reconciliation trigger.
Example sync trigger object
When a sync of a particular Shopify shop is run and detects differences, the trigger object passed to your action will look like this:
an example shopify sync triggerjson{ "type": "shopify_sync", "shopId": "123456", "shopDomain": "example.myshopify.com", "apiVersion": "2025-10", "shopifyScopes": ["write_customers", "read_customers"], "syncId": "sync-789", "syncSince": "2025-01-01T00:00:00Z", "models": ["shopifyCustomer", "shopifyOrder"], "force": false, "startReason": "Manual sync from editor", "priority": "high" }
type: Will always be set toshopify_syncshopId: The identifier of the Shopify shop being syncedshopDomain: The domain of the Shopify shop being syncedapiVersion: The version of the Shopify API being used for the syncshopifyScopes: The available OAuth scopes of the Shopify shop being syncedsyncId: The identifier of the sync record tracking the state of this sync (optional, only available if set)syncSince: The specified date range of this sync (optional, only set if specified when the sync was started)models: The list of model API identifiers that this sync will work onforce: Indicates if this sync is being run in 'force' mode, which will always run actions even if the 'updated_at' timestamps match between Gadget and Shopifypriority: The execution priority for this sync (optional, values:low,default,high)startReason: The string describing the reason why this sync was started (optional, only set if specified when the sync began)
Shopify webhook reconciliation trigger
The Shopify webhook reconciliation trigger executes model-scoped actions with webhook triggers when Gadget detects missed webhooks during the reconciliation process. This ensures that your Gadget application stays up-to-date with changes in your Shopify store even if some webhooks were missed or failed to be processed initially.
How Shopify webhook reconciliation actions are run
Gadget reconciles webhook delivery once every 24 hours by checking for missed webhooks using shopifyUpdatedAt timestamps. When missed webhooks are detected during reconciliation, the Shopify webhook reconciliation trigger is activated to run the appropriate actions, ensuring that any data changes that occurred in Shopify are properly reflected in your Gadget application.
This is only run when Gadget automatically detects and reconciles missed webhooks. Manual syncs are handled by the Shopify sync trigger.
Example webhook reconciliation trigger object
When a webhook reconciliation detects missed webhooks for a particular Shopify shop, the trigger object passed to your action will look like this:
an example shopify webhook reconciliation triggerjson{ "type": "shopify_webhook_reconciliation", "shopId": "123456", "shopDomain": "example.myshopify.com", "apiVersion": "2025-10", "shopifyScopes": ["read_products"], "reconciledTopics": ["products/create", "products/update", "products/delete"] }
type: Will always be set toshopify_webhook_reconciliationshopId: The identifier of the Shopify shop being reconciledshopDomain: The domain of the Shopify shop being reconciledapiVersion: The version of the Shopify API being used for the reconciliationshopifyScopes: The available OAuth scopes of the Shopify shop being reconciledreconciledTopics: The list of webhook topics that were reconciled during this process
Shopify OAuth trigger
The Shopify OAuth trigger executes the install action on the ShopifyShop model when a shop finishes the OAuth process to install an app.
How Shopify OAuth actions are run
When a Shopify merchant completes the OAuth flow to install your app, the Shopify OAuth trigger is activated on the ShopifyShop model's install action. This allows you to run custom logic when a shop is first installed or reinstalled through the OAuth process.
Example Shopify OAuth trigger object
When a shop finishes the OAuth process to install an app, the trigger object passed to your action will look like this:
an example shopify OAuth triggerjson{ "type": "shopify_oauth" }
type: Will always be set toshopify_oauth
Shopify admin trigger
The Shopify admin trigger executes the install action on the ShopifyShop model when a Shopify admin app is installed into Gadget.
As of January 1, 2026, Shopify will no longer support admin apps created directly in the Shopify Admin.
How Shopify admin actions are run
When a Shopify app is provisioned in a Shopify shop's admin panel and installed into your Gadget application, the Shopify admin trigger is activated on the ShopifyShop model's install action. This allows you to run custom logic when a shop is installed via the Shopify admin panel.
Example Shopify admin trigger object
When a Shopify admin app is installed, the trigger object passed to your action will look like this:
an example shopify admin triggerjson{ "type": "shopify_admin" }
type: Will always be set toshopify_admin
Shopify customer account login trigger
The Shopify customer account login trigger executes the create action on the ShopifyCustomer model when a customer UI extension calls the app with a new customer.
How Shopify customer account login actions are run
When customer account authentication is enabled in Gadget and a Shopify customer makes a request to a Gadget app from a customer account UI extension, the customer is assigned a unique session record that is linked to their shopifyCustomer model record. If this shopifyCustomer record does not exist in Gadget, this trigger will be activated to fetch the customer data from Shopify so the customer can be linked to their current session.
This trigger is automatically added to the shopifyCustomer model's create action when customer account authentication is enabled in Gadget. If customer account authentication is disabled, this trigger will be automatically removed.
Example customer account login trigger object
When a customer UI extension calls the app with a new customer, the trigger object passed to your action will look like this:
an example shopify customer account login triggerjson{ "type": "shopify_customer_account_login" }
type: Will always be set toshopify_customer_account_login
BigCommerce webhook trigger
The BigCommerce webhook trigger allows you to run globally-scoped actions in response to BigCommerce webhooks.
When this trigger runs, it:
- Parses the payload from BigCommerce, following the BigCommerce best practices for webhook security
- Adds the raw webhook payload to
params - Executes the action
When you add a BigCommerce webhook trigger to a globally-scoped action, Gadget will automatically register the webhook. You can specify which BigCommerce webhooks should trigger your action by adding a bigcommerce property to the triggers object in the action's options, or by using the Gadget editor to add the trigger and select the webhook topics.
This is what a BigCommerce webhook trigger looks like in your action's options:
BigCommerce webhook trigger params
BigCommerce webhook payloads typically contain minimal information, often just an ID, about the store and event. Gadget will pull out the important information from the payload and pass it to the action as params. You can then use the included BigCommerce API clientto fetch the full resource data in the action.
For example, this is what the params object might look like for a store/product/created webhook:
example of a params payload for a store/product/created webhookjson{ "id": 1, "storeHash": "<your-store-hash>", "type": "product" }
It is common for BigCommerce webhooks to only include an ID. You will need to use the BigCommerce API client to retrieve the full object data. Here is an example:
BigCommerce webhook trigger object
The trigger object passed to your action contains the entire webhook payload, as well as additional information about the trigger itself.
This is what the trigger object might look like for a store/product/created webhook:
example of a trigger object for a store/product/created webhookjson{ "createdAt": 1723578525, "data": { "id": 1, "type": "product" }, "hash": "<your-hash-value>", "retries": 0, "scope": "store/product/created", "storeHash": "<your-store-hash>", "type": "bigcommerce_webhook" }
For BigCommerce webhook triggers, the trigger object will always contain the following properties:
type: will always be set tobigcommerce_webhookscope: the string representing the topic of the incoming webhook from BigCommerce, likestore/product/createdorstore/order/updatedstoreHash: the hash of the BigCommerce store that received the webhookhash: the hash value of the webhook payloadretries: the number of times this webhook has been retriedcreatedAt: the timestamp of when the webhook was createddata: the raw incoming payload from BigCommerce, which includes all the data sent by the webhook unchanged
Google OAuth sign up trigger
This trigger is part of the authentication process that integrates Google as an OAuth provider in your application. The entire profile payload from Google plus the additional data from the user model to the action to receive the necessary information from the user's Google profile.
Google OAuth sign up trigger params
When a new user signs up using Google OAuth, the trigger will run your action with params describing the new user, like this:
example Google OAuth Sign Up paramsjson{ "user": { "email": "[email protected]", "emailVerified": true, "firstName": "Giz", "googleImageUrl": "https://gmail.com/some/image.png", "googleProfileId": "113836975668244786030", "lastName": "Mo", "roles": ["signed-in"] } }
These params are derived from the Google OAuth callback data passed by Google and adjusted by the trigger to match the fields of the user model. The raw data returned by Google is available in the trigger object.
Google OAuth sign up trigger
The trigger object contains the raw data returned by Google at user object.
example Google OAuth Sign Up triggerjson{ "type": "google_oauth_signup", "user": { "email": "[email protected]", "email_verified": true, "family_name": "Mo", "given_name": "Giz", "hd": "gadget.dev", "name": "Giz Mo", "picture": "https://gmail.com/some/image.png", "sub": "113836975668244786030" } }
ChatGPT App Install trigger
This trigger allows you to hook into the ChatGPT OAuth process and run custom logic on a session or user action.
By default, no actions have this trigger configured, it must be added manually.
For more details and example usage, see the ChatGPT connection OAuth docs.
Default email/password authentication triggers
Every Gadget web app template by default comes with several out-of-the-box authentication triggers associated with the corresponding authentication actions.
The following authentication triggers although named differently all have the same behavior of the API endpoint trigger.
- Sign up
- Sign in
- Verify email
- Reset password
- Send reset password
- Send verify email
- Change password