OpenAI
The OpenAI connection in Gadget enables you to build apps using the OpenAI API endpoints.
If you are looking to build apps embedded in ChatGPT using the Apps SDK, see the ChatGPT connection docs.
What does the OpenAI connection provide?
The OpenAI connection allows you to interact with the OpenAI API using a pre-authenticated client. It's designed to simplify the process of integrating OpenAI's powerful language models into your Gadget application.
Setting up the OpenAI connection
In your Gadget application, click Settings on the sidebar and open Plugins to view the list of connections. Click on the OpenAI connection to configure it.
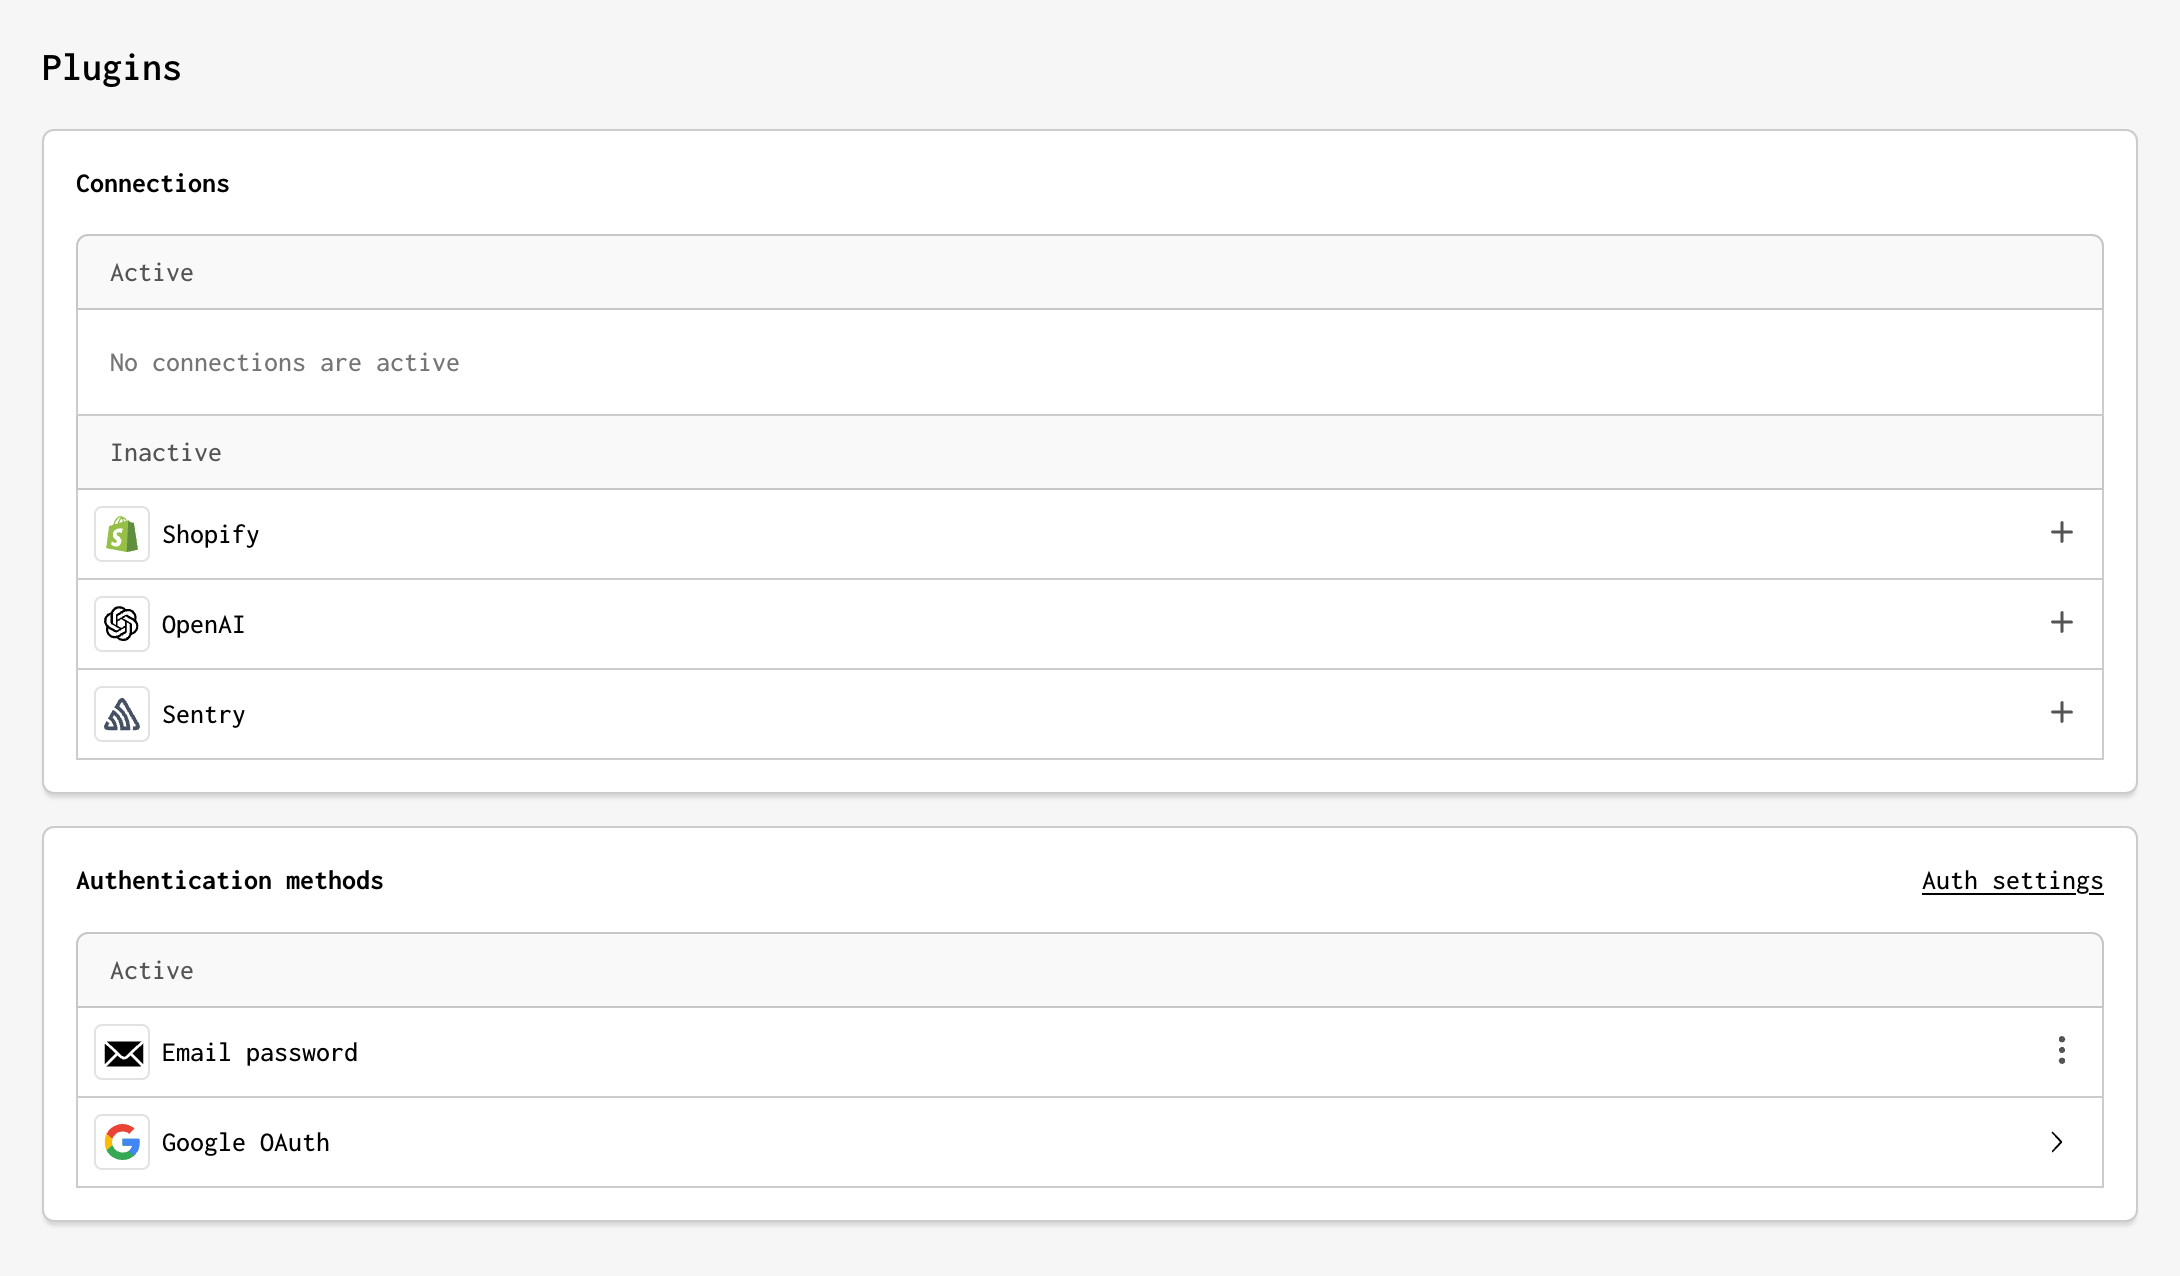
Choose between using Gadget's managed OpenAI API key or using your own API keys.

Option 1: Use Gadget's keys
For a quick start without signing up for an OpenAI account, choose Gadget managed keys. They come pre-configured and include $50 in OpenAI credits to begin. Keep in mind that Gadget managed keys have rate limits and are meant for development purposes only. When you're ready for production, replace them with your own OpenAI keys.
Option 2: Use your own API keys
If you already have an OpenAI account or desire greater API control, simply use your own OpenAI keys. This grants you the ability to manage API rate limits and access the full range of OpenAI platform features.
How does the OpenAI connection work?
With the OpenAI connection set up, you can now start using the OpenAI API in your Gadget actions and routes to leverage the power of OpenAI's models.
Example: Using a chat completion in a global action
Create a new global action with the API Identifier useOpenAI and add the following code to the action's run function:
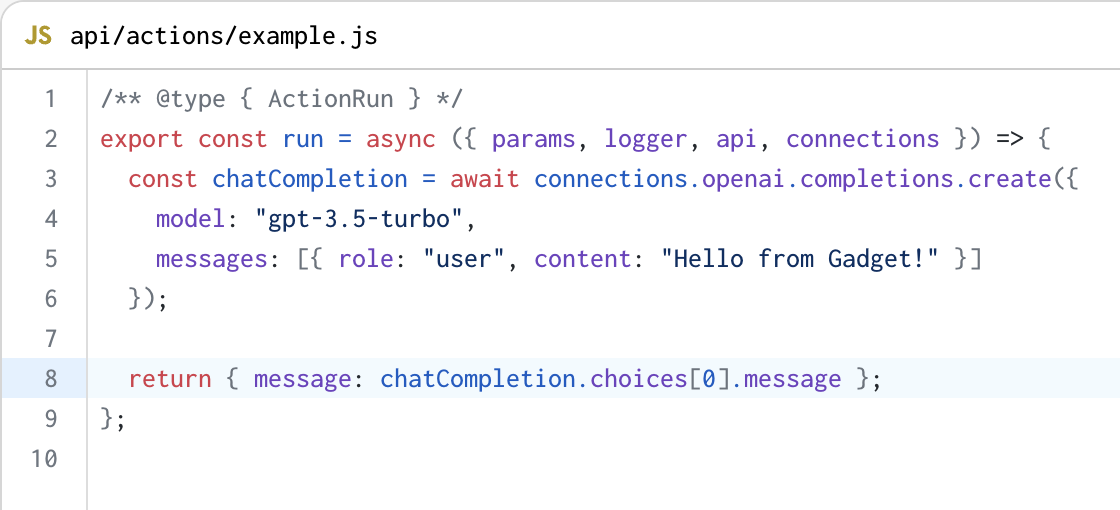
Now click the Run action button to go to your API playground and test the action. You should see a result like this:
json{ "data": { "useOpenAI": { "success": true, "errors": null, "result": { "message": { "role": "assistant", "content": "Hello Gadget! How can I assist you today?" } } } }, "extensions": { "logs": "https://links.ggt.dev/logs/3/bda7ac999cd8ec291ecdb47f12319720", "traceId": "bda7ac999cd8ec291ecdb47f12319720" } }
Using LangChain with Gadget-managed credentials
If you are working with LangChain, please note that with gadget-managed keys, passing the required API key is not enough; you also need to include a baseURL parameter. The snippets below show how to set up two models using LangChain: ChatOpenAI and OpenAIEmbeddings.