Source control
Each Gadget application's definition can be fully captured in text files which are great for version controlling using Git!
Use Gadget's CLI ggt which allows you to clone your app's files into a local directory and manage any changes between your local directory and the Gadget editor (in real time!).
Using git with Gadget
Cloning your code to a local directory allows you to use source control tools like Git to track changes to your code and collaborate with others, as well as all of the standard Github ecosystem, like Github Actions for CI and CD.
ggt syncs files to and from a local filesystem, but your Gadget app still runs in the cloud. This means you get all the benefits of your local development setup, like your editor with your plugins and configuration, as well as your command line tools for things like linting and formatting. You also get all the benefits of Gadget's managed development and production environments where you don't need to manage any infrastructure, software versions, containers, etc.
Changes made locally are immediately reflected in Gadget with ggt dev, so you can code as you might normally, and still use all of Gadget's web-based tools for building. The editor, API playground, and your application's API will all live-update to reflect your changes.
Setup source control with ggt
To use source control for your app, you'll need to have a Gadget account, a Gadget app, and a local terminal for running commands.
- To get started, run the following command into your local terminal (“test-app” should be replaced with the name of your Gadget app in the command).
terminalnpx ggt@latest dev ./test-app --app=test-app
This command will download ggt, Gadget's CLI tool, and begin a sync session that two-way syncs between your local copy and Gadget's cloud infrastructure.
- Change directories into your app's directory, and notice all your apps' files:
terminalcd ./test-app ls
- Create a repository on Github, and initialize the git repository locally within your app directory:
terminalgit init
- From Github grab the remote url for your Github repository and add it to your Gadget app git repo.
terminalgit remote add origin https://github.com/ehmerasim/your-app.git
- Commit all your locally synced Gadget files to the repository.
terminalgit commit -m "adding synced gadget files"
- Push your commit to Github.
terminalgit push -u origin main
Voila, you've now successfully pushed your Gadget code to be managed by source control!
Git/Github workflow (PR changes) - example
Create a new Gadget app and set up your Gadget app on GitHub using the above steps. Head back to Github and ensure your repository contains your pushed Gadget files.
Create and checkout to a new branch within your local directory.
terminalgit checkout -b add-shopify-connection
- Head back to Gadget and under the Settings page navigate to Plugins and click on the Shopify connection to add it.

Now follow the steps to add the Shopify connection to your Gadget app. If you need a refresher check out our connection quickstart.
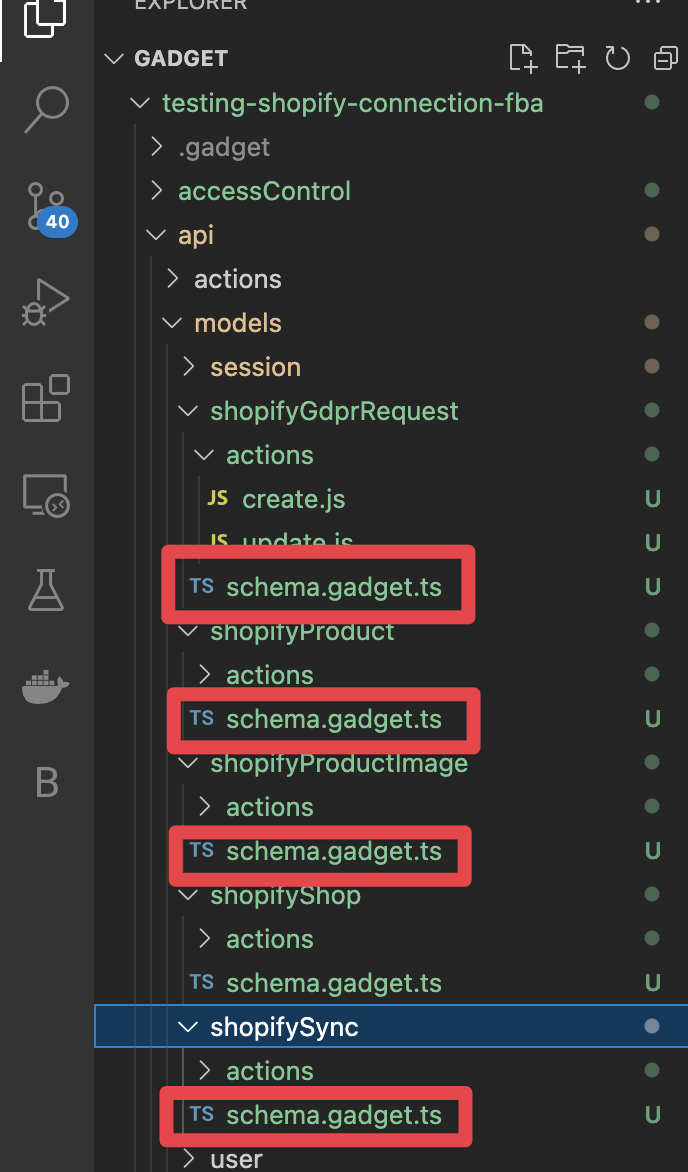
Once your Gadget app is now successfully connected head back to your local Gadget files and notice the instant changes within the model files added for your Shopify models. Also, head to your
settings.gadget.tsfile and you'll now notice the meta information representing you've successfully connected to Shopify.
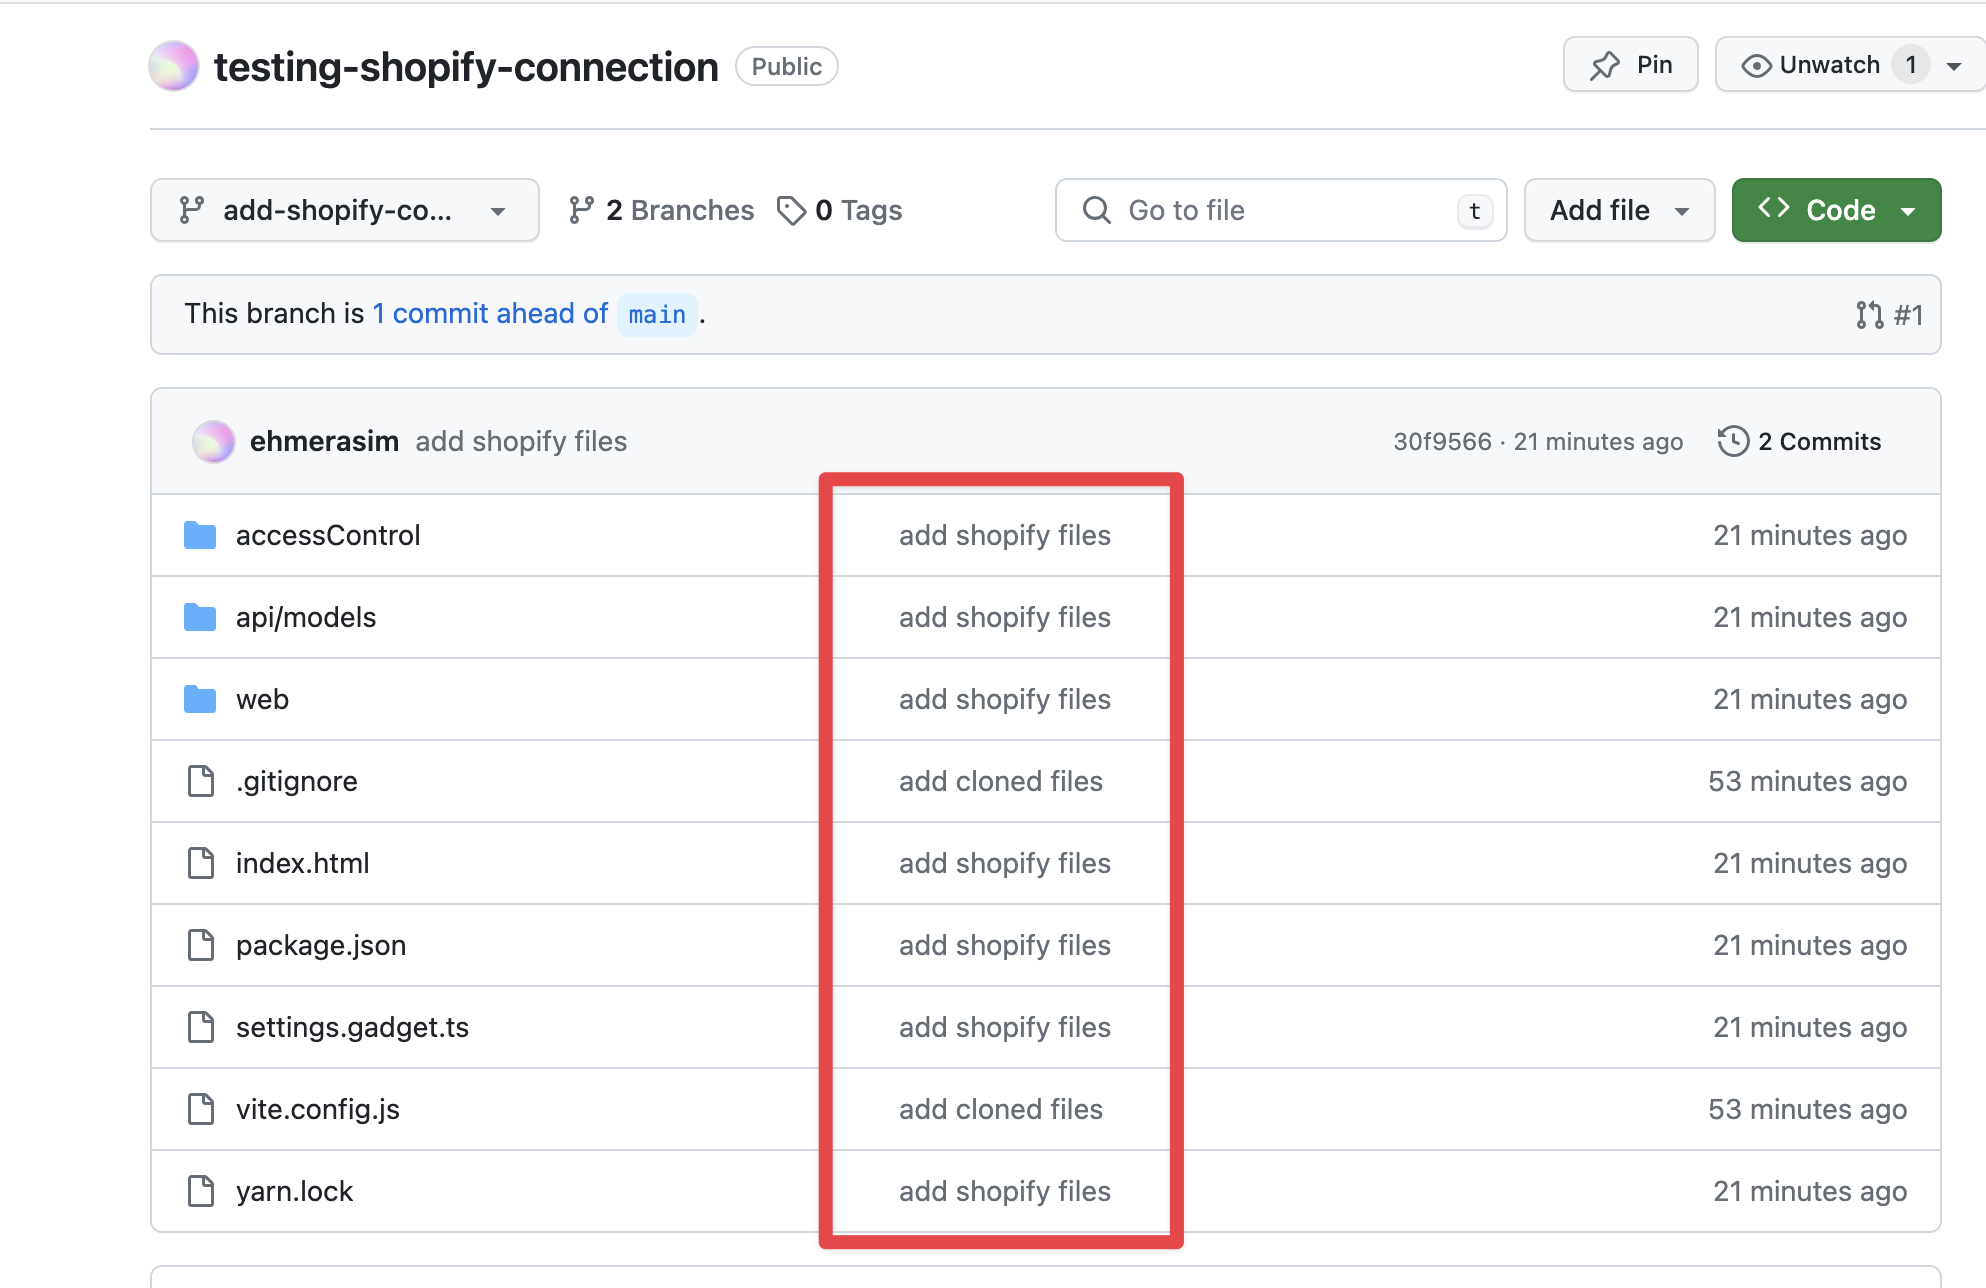
- Now commit and push the new file changes from the addition of the Shopify connection to the branch.
terminalgit commit -m "adds shopify files"
- Head back over to GitHub and you'll notice the commit changes.
- Switch back to your main branch and head to the
settings.gadget.tsfile and now you'll notice the Shopify connection is removed.
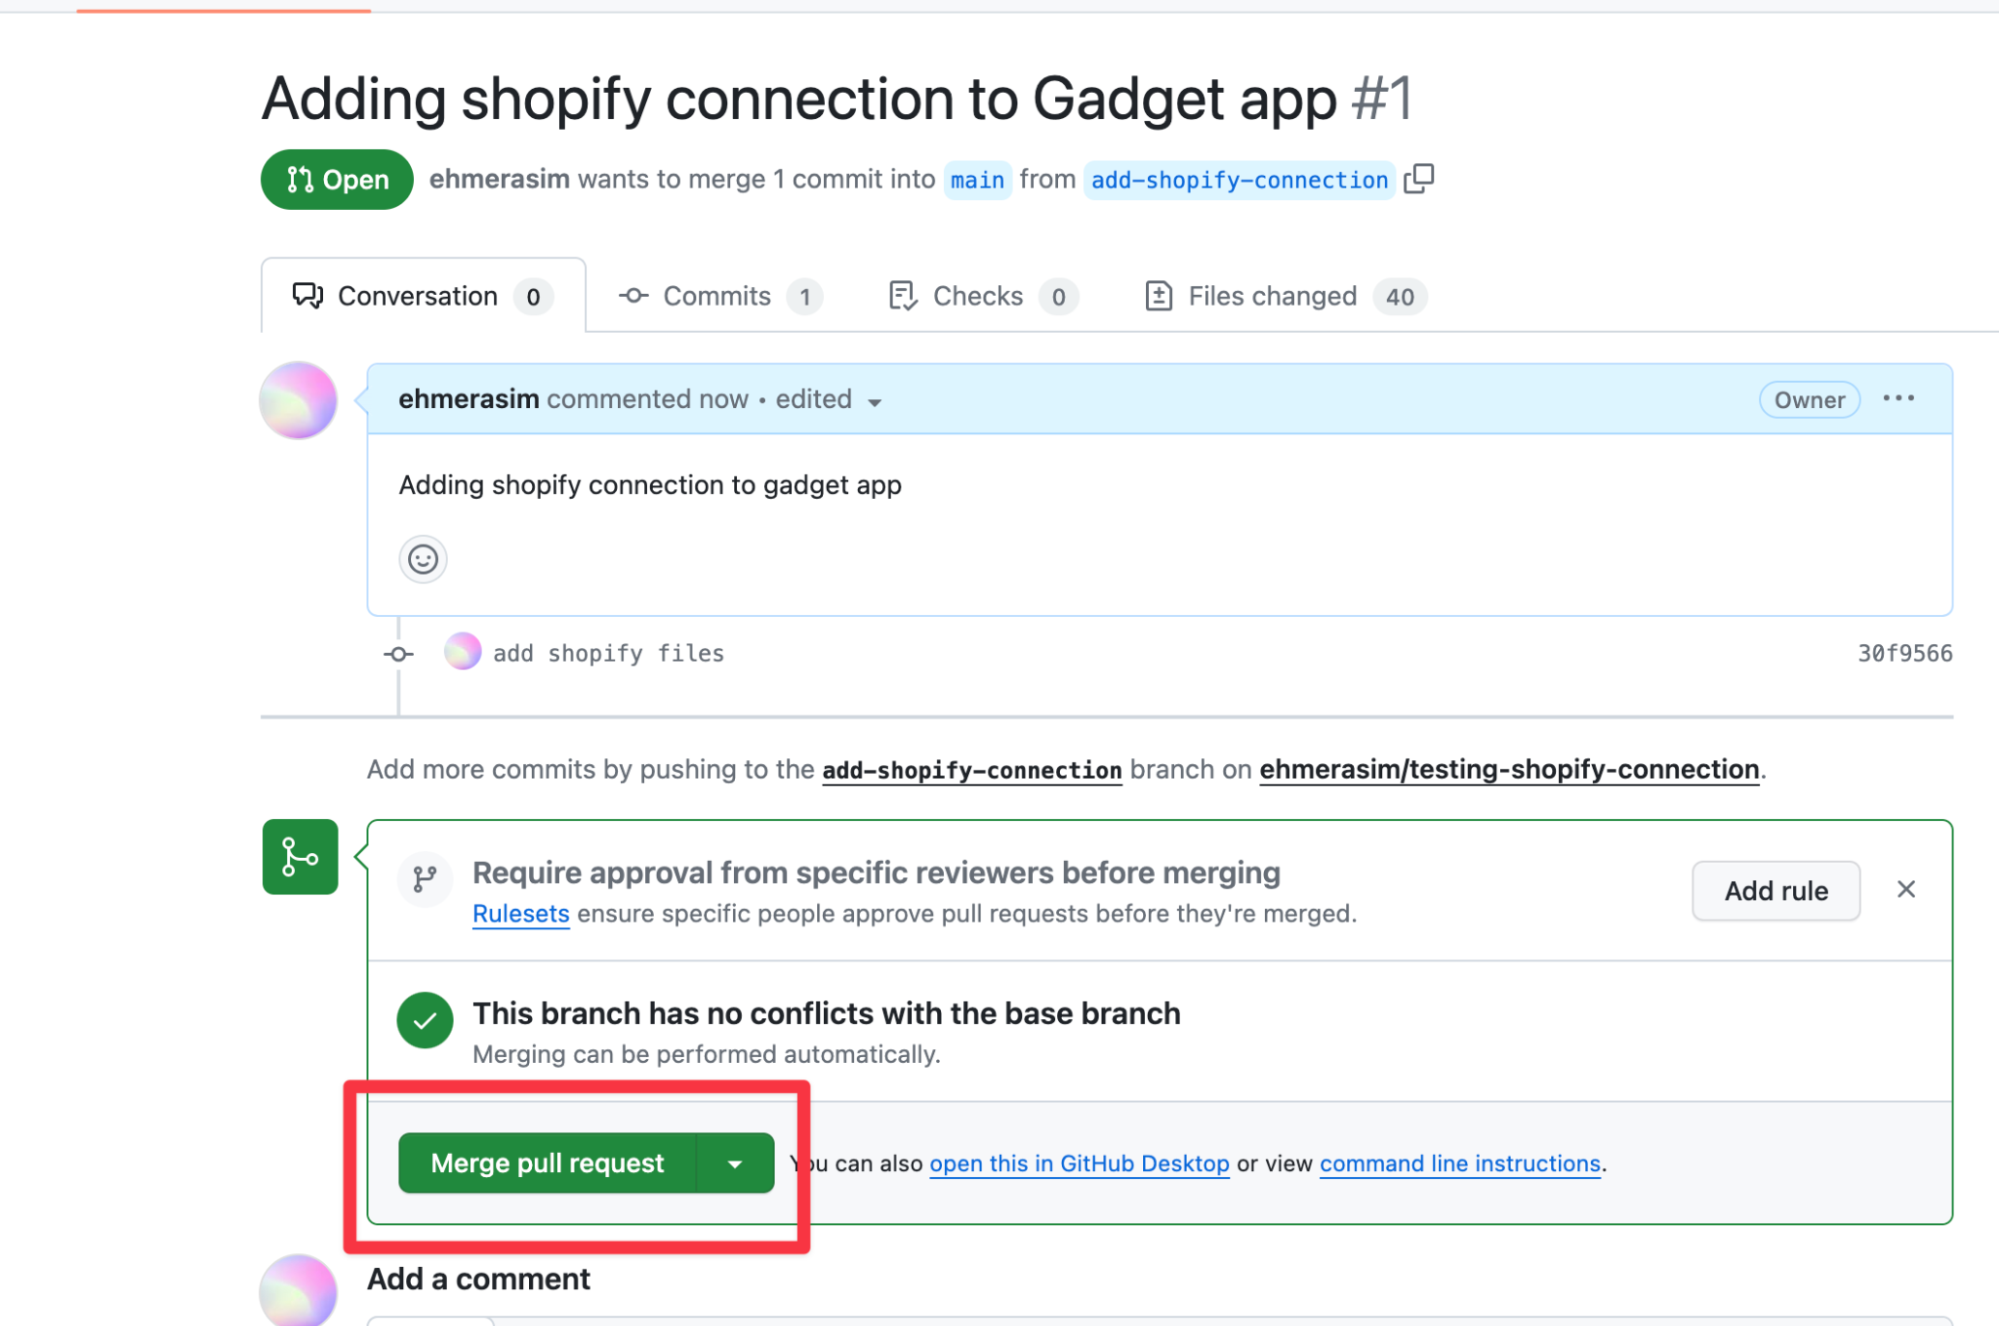
- Back in Github, create a pull request based on your commit and merge it into the main branch.
Branching within environments workflow - example
Continuing from the walkthrough example above, let's take a look at branching through different environments.
When creating multiple branches within different environments always ensure you are synced up to the appropriate environment
Stop
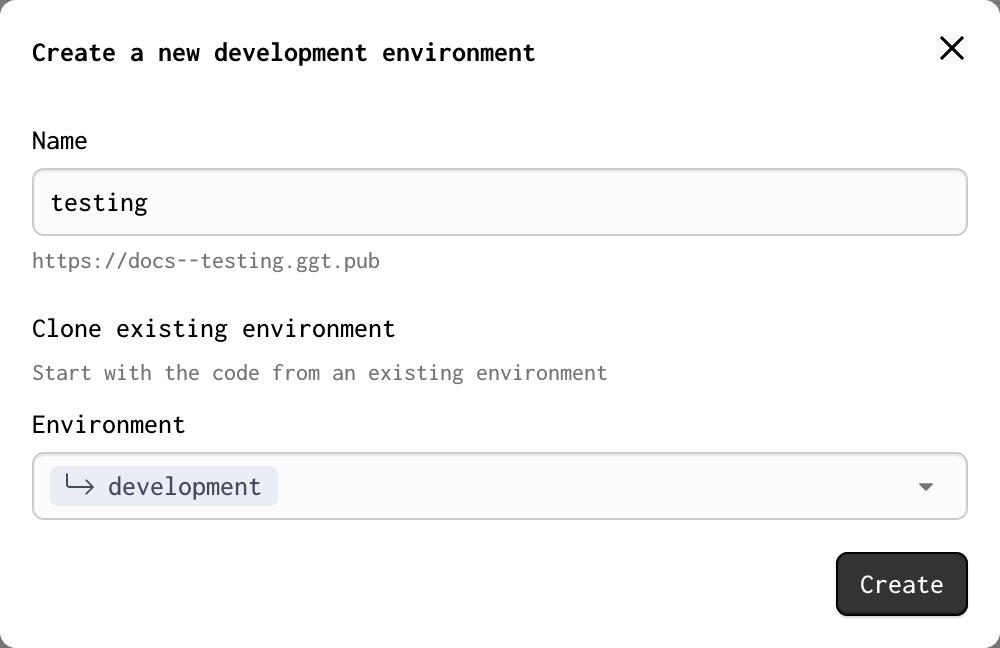
ggtrunning on your current environment by hittingCTRL + C.Head back to Gadget and create a new development environment.
- Back in your local directory run
ggtagain but this time pass the environment flag specifying the name of the newly created environment soggtdoesn't automatically sync back up with the previous environment.
terminalggt dev --env=testing
- And now that my local is set up to my testing environment I can go ahead and create a new branch as I normally would.
terminalgit checkout -b test-branch
Deploying changes to production
When you're ready to deploy any changes to production:
Double-check your development environment: Before you initiate the deployment, make sure your local filesystem is synchronized with your Gadget development environment..
Pull any changes from merged PR's: After your PR is merged, switch to the main branch in your codebase and pull your changes.
Choosing your deployment method:
Terminal (using
ggt): Alternatively, you can useggtto deploy your application.ggt deploywill execute a deploy from where ever you run it.ggtwill check if you are in the correct environment and confirm that your local and Gadget filesystems are synchronized. If there are any discrepancies or conflicts,ggtwill notify you before proceeding with the deployment.
GGT source control reference commands.
terminalUSAGE
  ggt [COMMAND]

COMMANDS
  sync           Clone your local filesystem with your environment's filesystem
  status         Show the status of your local and environment's filesystem
  push           Push your local filesystem
  pull           Pull your environment's filesystem
  deploy         Deploy your environment to production
  list           List your available applications
  login          Log in to your account
  logout         Log out of your account
  whoami         Print the currently logged in account
  version        Print this version of ggt

FLAGS
  -h, --help     Print how to use the command
  -v, --verbose  Print more verbose output
      --json     Print all output as newline-delimited JSON

Run "ggt [COMMAND] -h" for more information about a specific command.
ggt status -h
Show changes made to your local filesystem and
your environment's filesystem.

Changes will be calculated from the last time you ran
"ggt dev", "ggt push", or "ggt pull" in the chosen directory.
ggt push -h
Push changes from your local filesystem to your environment's filesystem.

Changes will be calculated from the last time you ran
"ggt dev", "ggt push", or "ggt pull" on your local filesystem.

USAGE
  ggt push

EXAMPLES
  $ ggt push
  $ ggt push --force
  $ ggt push --force --env=staging
  $ ggt push --force --env=staging --allow-unknown-directory

FLAGS
  -a, --app=<name>   The application to push files to
  -e, --env=<name>   The environment to push files to
      --force        Discard un-synchronized environment changes

  Run "ggt push --help" for more information.

ggt pull -h
Pull changes from your environment's filesystem to your local filesystem.

Changes will be calculated from the last time you ran
"ggt dev", "ggt push", or "ggt pull" on your local filesystem.

USAGE
  ggt pull

EXAMPLES
  $ ggt pull
  $ ggt pull --force
  $ ggt pull --force --env=staging
  $ ggt pull --force --env=staging --app=example --allow-unknown-directory

FLAGS
  -a, --app=<name>   The application to pull files from
  -e, --env=<name>   The environment to pull files from
      --force        Discard un-synchronized local changes

  Run "ggt pull --help" for more information.

ggt deploy
Deploy your development environment to production.

Your local filesystem must be in sync with your development
environment before you can deploy.

Changes will be calculated from the last time you ran
"ggt dev", "ggt push", or "ggt pull" on your local filesystem.

USAGE
  ggt deploy

EXAMPLES
  $ ggt deploy
  $ ggt deploy --from=staging
  $ ggt deploy --from=staging --force
  $ ggt deploy --from=staging --force --allow-problems

FLAGS
  -a, --app=<name>      The application to deploy
  -e, --from=<env>      The environment to deploy from
      --force           Discard un-synchronized environment changes

Run "ggt deploy --help" for more information.
Working with Gadget metadata files
When you clone your Gadget app using ggt, you'll find metadata files in your local directory that define your app's models, settings, and permissions:
api/models/**/<model-name>/schema.gadget.ts- Model schemas defining fields and structuresettings.gadget.ts- App-level settings, connections, and authenticationaccessControl/permissions.gadget.ts- Role-based access control
These metadata files correspond exactly to Gadget's web interface, and changes made in one will be reflected in the other when using ggt dev. For complete documentation of all metadata file properties and field types, see the Gadget metadata files reference.
An example app's filesystem looks like this locally:
textapi/ // the backend folder powering your app's api models/ foo/ schema.gadget.ts // the metadata for the foo model actions/ create.js update.js delete.js bar/ schema.gadget.ts // the metadata for the bar model actions/ create.js update.js delete.js actions/ globalActionA.js globalActionB.js web/ // the frontend folder powering your app's experience pages/ index.js about.js components/ header.js footer.js accessControl/ permissions.gadget.ts // the metadata for the app's roles and permissions settings.gadget.ts // the metadata for the app's settings
Understanding storageKeys
The storageKey property in metadata files identifies the actual data on disk for your model or field in Gadget's underlying database. When you rename a model or a field, Gadget uses the storage key to continue to serve the data from the old name. Without this storageKey, Gadget wouldn't know which field got renamed when, so storageKey is a required property on all models and fields.
Changing the storage key for a model or a field will reset the data for that model or field immediately! It is strongly advised to not
edit, rename, or remove any storageKey within the metadata files as doing so can result in your app breaking.
Data stored under a particular storageKey in the Gadget database will remain stored under that key for at least 7 days after it stops being used. If you delete a model (and thus delete it's storageKey), but then revert and re-create the model with the same storageKey, the data from before you deleted the model will still be stored and will be found when you make API calls for the model.
Risks of manual modification
It is highly recommended that if you need to make changes to your model schema, connections, or roles and permissions you do not directly do so by editing the metadata file. Changes should be configured within Gadget's web interface.
Adding objects and properties directly to metadata files in most instances will be invalid and your app will not work as expected. This is usually due to the unique storageKeys Gadget generates for models and fields.
Removing properties from metadata files can work at times but is also highly risky and should be done with caution.
Fatal errors
Fatal errors in Gadget refer to critical issues that arise due to incorrect, corrupted, or incompatible modifications in the metadata files or folder structure within your local directory. These errors are deemed "fatal" because they prevent the proper functioning of how your Gadget app works.
If you have a fatal error you won't be able to edit anything in the web editor. Instead, you are presented with a list of errors. You must resolve the errors locally using ggt to push or sync changes to the cloud environment in order for your app to continue functioning properly.
Reverting changes with git is also a good way to rollback your app to a previous working state.
Metadata file reference
For complete documentation of all metadata file formats, field types, properties, and validations, see the Gadget metadata files reference. This reference covers:
- Model schemas - All field types, validations, relationships, and Shopify configuration
- Permissions - Role configuration, model permissions, and filter files
- Settings - Framework versions, connections like Shopify, BigCommerce, ChatGPT, OpenAI, Sentry, and authentication methods