External frontends
When to use external frontends?
Gadget has built-in support for developing and hosting frontends using Vite, a modern frontend build tool. Gadget's frontend hosting is reliable, performant, and grouped in with the deploy process for the rest of your application, so we recommend using Gadget's frontend hosting if possible for the best experience. Gadget's frontend hosting has a number of limitations currently however that may merit using a different, purpose-built frontend host.
- Currently, JS frontends built with Gadget's Vite integration are not rendered server-side and are only rendered client-side. This is generally ok for applications that live behind user-specific authentication, like Shopify apps or other SaaS tools, but not ok for marketing websites, blogs, or other web-page-like content. If you need server-side rendering, you may want to pick a hosting platform with good server-side rendering or static-site generation support.
- Gadget has great support for serverless functions and business logic via models, actions, and HTTP routes, but Gadget doesn't have support for edge functions. If you need server-side code to run extremely close to your users for maximum performance, other hosting platforms have edge function support. Note: Edge functions on other platforms can still access data from a Gadget backend, and if they need to, the performance benefits of edge functions are largely negated. Gadget recommends edge functions only for stateless workloads that don't need to adjust their responses based on server-side state, or workloads which can use stale data. For applications that need an up-to-date view of backend data, Gadget recommends Gadget's hosting.
Setting up an external frontend for a Gadget application works like any other JavaScript application project -- you create a codebase, install the Gadget API client, and use it to communicate with your Gadget backend. Gadget's full-featured React hooks library @gadgetinc/react is the easiest way to communicate from a frontend back to Gadget, so Gadget recommends using one of the React stacks to build an external frontend.
Using external an React app
create-react-app is a simple environment for building React applications maintained by the React team. create-react-app works great for structuring a React frontend app that talks to a Gadget backend app over GraphQL, and is easy to deploy on platforms like Vercel or Netlify.
create-react-app apps integrate with Gadget by installing the API Client for your app and the @gadgetinc/react hooks library.
1. Setting up an external React app
If you don't already have a create-react-app application, you can create one:
Next, you need to install your Gadget backend app's client package.
To install the example-app node package, register the Gadget NPM registry for the @gadget-client package scope:
Then, install the example-app client package and the @gadgetinc/react package using your package manager:
These instructions are examples for an example app. When you create your own Gadget app, they'll update to reflect the right name and commands for your specific application.
Create your own app at gadget.new
As you make changes to example-app, Gadget will publish new versions of your API client to its NPM registry. See Client Regeneration for more details on when updates are necessary.
With your client package installed, you can instantiate it in any file, but we usually name the file src/api.js:
Once you have the required packages, you must complete the @gadgetinc/react setup and provide the API client to the hooks library. For simplicity, we'll add the Provider from @gadgetinc/react to src/index.js like so:
With the provider in place, you can now use the @gadgetinc/react hooks library in your app. For example, we can fetch a list of Task records from your app's GraphQL API with the useFindMany hook in the App component:
Your create-react-app frontend is set up and ready for use with your Gadget backend!
Using Next.js
Next.js is a popular framework for building React applications that require minimal setup to get going, and it works great for building frontends for Gadget applications. Next.js has built-in support for server-side rendering and is straightforward to deploy on platforms like Vercel or Netlify.
next.js apps integrate with Gadget by installing the API Client for your app, and the @gadgetinc/react hooks library.
Gadget supports both the next.js App Router and the Pages Router.
Setting up a Next.js app
If you don't already have a next.js application, you can create one with the create-next-app utility:
plainnpx create-next-app@latest // or yarn create next-app // or pnpm create next-app
Next, you need to install your Gadget backend app's client package.
To install the example-app node package, register the Gadget NPM registry for the @gadget-client package scope:
Then, install the example-app client package and the @gadgetinc/react package using your package manager:
These instructions are examples for an example app. When you create your own Gadget app, they'll update to reflect the right name and commands for your specific application.
Create your own app at gadget.new
As you make changes to example-app, Gadget will publish new versions of your API client to its NPM registry. See Client Regeneration for more details on when updates are necessary.
With your client package installed, you can instantiate it in any file, but usually, we name the file api.js:
For users of Next.js' App Router and React Server Components, you can now start making requests to your Gadget backend from the server side within server components.
Setting up client-side data access
Gadget's API client object can be used to make server-side requests with await like any other API client. But, if you want to allow access to data straight from your app's frontend in the browser, you can also use the client-side React hooks from @gadgetinc/react. See the sections below for more details on server-side vs client-side data access.
To setup @gadgetinc/react for client-side data access, you must install the package and set up the <Provider/> component with an instance of your API client. React providers in next.js are usually added in the _app.js file like so:
With the provider in place, you can now use the @gadgetinc/react hooks library in your next.js pages. For example, we can fetch a list of Task records from your app's GraphQL API with the useFindMany hook:
You can find more examples of next.js frontends built using Gadget in the Gadget examples repo.
Server-side vs client-side API access
Next.js supports two main ways of accessing data:
- requests made by the Node.js process running server-side in a React Server Component,
getStaticPropsorgetServerSidePropsfunction - requests made by the browser running client-side in a React hook, like
use-fetch,react-query,urqlor@gadgetinc/react.
Your Gadget app's API supports both of these methods of data access.
Gadget generally recommends client-side data access for your next.js applications. Client-side data access is fastest for the user, as their browser isn't making extra requests to a server-side process that then makes requests to a Gadget API. Client-side access also allows the API to customize responses for the user to limit data access permissions and to power things like logged in/logged out state. However, server-side data access allows further data processing and is sometimes necessary to power things like next.js' getStaticPaths for static site generation, or to allow access to a limited subset of data.
If you'd like to discuss your use case, we're always happy to help in our Discord.
Client-side data access
For accessing data on the client, Gadget recommends using the @gadgetinc/react hooks library:
Then, after wrapping our app in the <Provider/> from @gadgetinc/react, we can use React hooks to access data:
Server-side data access
For accessing data on the server, Gadget recommends using the standard, imperative style API client object without hooks from @gadgetinc/react. It's easiest to instantiate your Gadget API client with an API key for authentication and then use it when generating server-side props.
Then in your next.js pages, we can make API calls using the api.model.findMany style finders and actions.
For users of the Next.js App router, you can make these calls in your React Server Components:
For users of the Next.js Pages router, you can make these calls in your getServerSideProps or getStaticProps functions:
Using a Gadget API key to initialize your Gadget client on the server gives you full read or write access to the database. If working on a Shopify app, shop tenancy is not enforced.
This key should never be exposed in a browser, and users should never be able to see it. This should only be used when connecting to another secure server.
Alternative frameworks
Gadget currently doesn't have specific adapter libraries built for client-side frameworks other than React, like Vue, Svelte, or Solid. However, your Gadget application has a rich GraphQL API ready to read and write data, which means you can use any existing GraphQL client for these frameworks to interface with your Gadget app right out of the box.
urql for Vue and Svelte
Gadget recommends urql as a high-quality GraphQL client with built-in support for Vue and Svelte. Your generated JS API Client package uses urql under the hood, so it's easy to re-use the existing API authentication and connectivity code from the Gadget API client within a Vue or Svelte app.
For example, we can wire up a generated api Client instance for use within a Vue app by accessing the api.connection.currentClient urql.Client instance for use in Vue:
Read more about @urql/vue in urql's docs.
For Svelte support, you can also use the generated Gadget API Client to set up the @urql/svelte bindings:
Read more about @urql/svelte in urql's docs.
Alternative libraries
Because your Gadget app's GraphQL API is spec compliant, any GraphQL client can be used to make requests to it. You can use libraries like graphql-request in JS, apollo-client for JS, Swift, and Kotlin, or even any HTTP request library that can send and receive JSON.
For example, we can make an API call to Gadget using the cURL command line utility:
Deploying and hosting external frontends
Frontends built using React or other client-side frameworks need to be deployed to a hosting provider. Gadget recommends using Vercel or Netlify for hosting your frontends, as both make it easy to deploy and work great with existing Gadget tooling.
Vercel
You will need a Vercel account.
- Setting up your Vercel project
First, we need to ensure that Vercel will be able to install your @gadget-client package by adding the Gadget NPM registry. If you haven't already, ensure that you have a .npmrc file your repo next to the package.json referring to the @gadget-client repo. For example, if your frontend resides in the web/frontend folder of your repo, create the file web/frontend/.npmrc with these contents:
.npmrc next to your frontend package.json@gadget-client:registry=https://registry.gadget.dev/npm
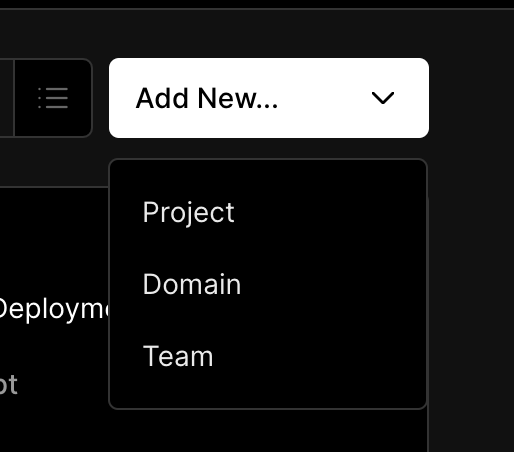
Next, we can log in to Vercel and create a new project. To do so, click on the Add New... dropdown on the right side and select "Project".
From here we can click on "Continue with GitHub" and search for the repository we want to deploy from.
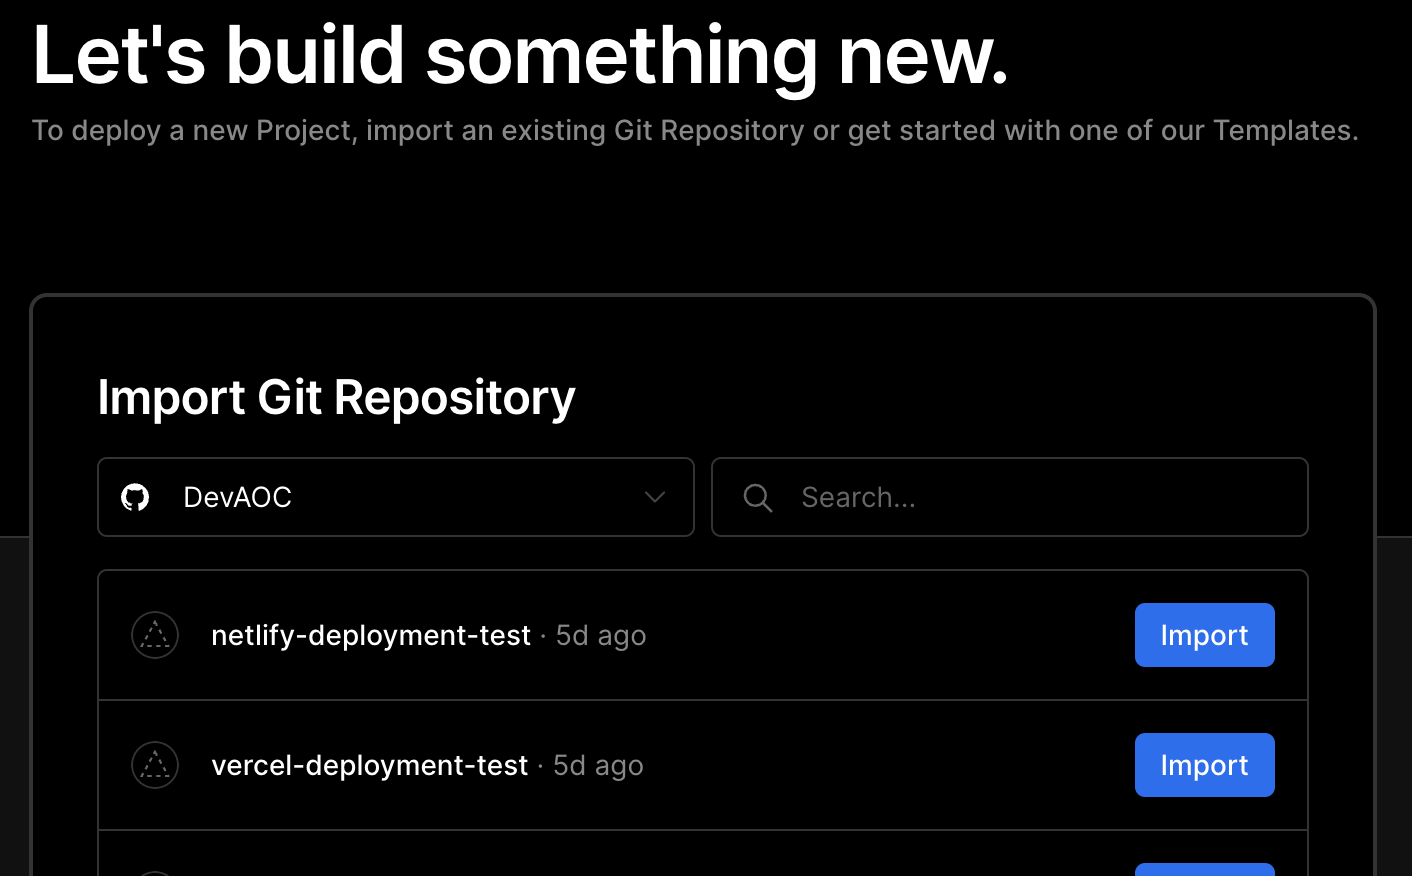
Clicking Import will bring you to the next page where we can configure the project. From here you can apply build and output settings as well as environment variables.
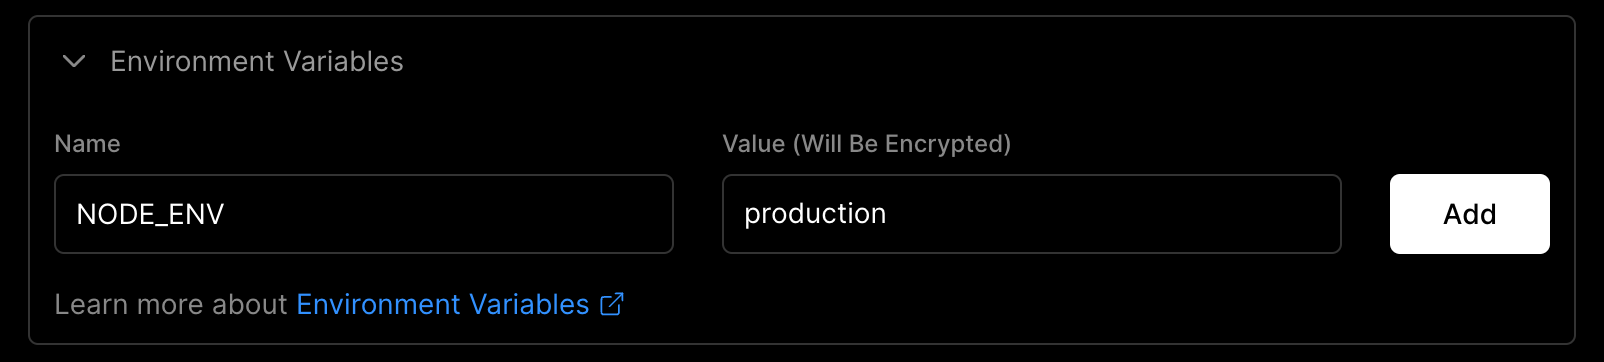
To ensure Vercel connects to the Production environment of your Gadget application set the NODE_ENV environment variable to production in the Vercel configuration:
If you need to modify the build settings or environment variables in the future, you can do so on the Settings page.
Embedded Shopify apps
To deploy Shopify applications using external frontends to Vercel, some more set-up is required.
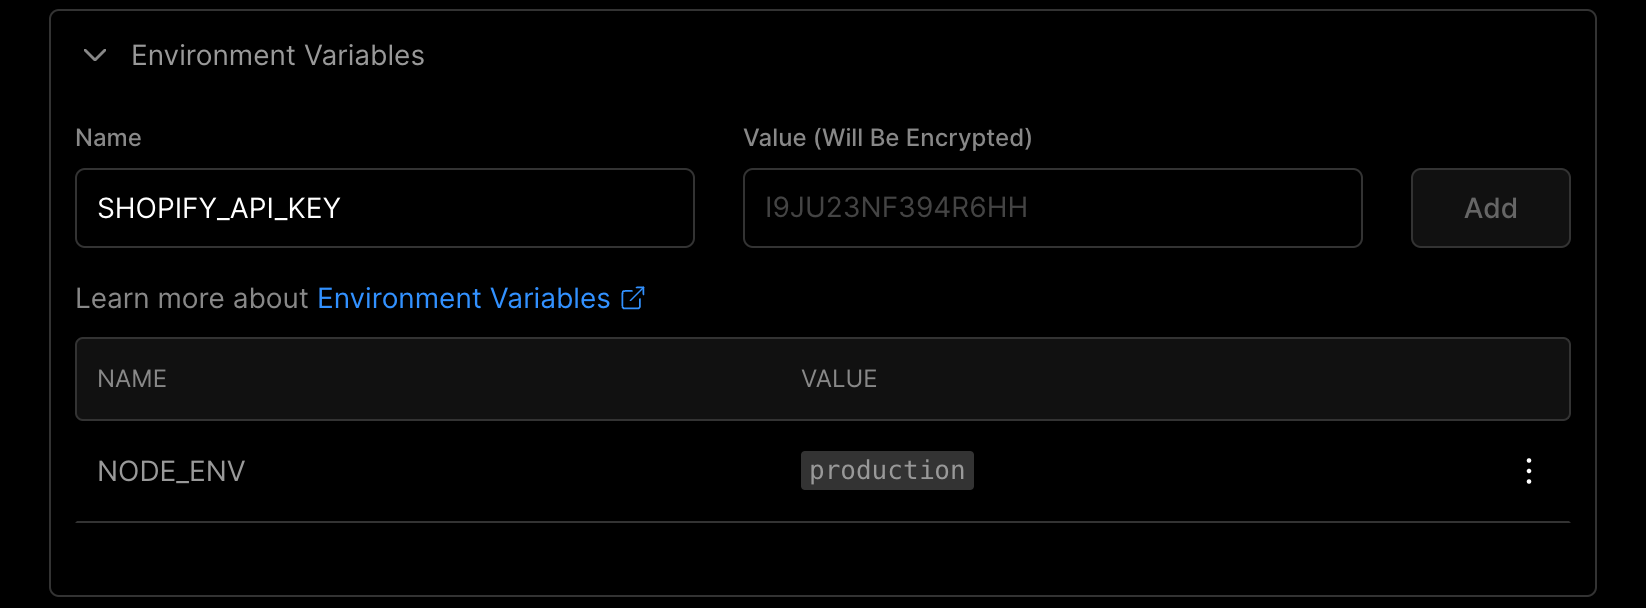
First, open the Environment Variables dropdown and add your SHOPIFY_API_SECRET and value for your Production Shopify application. You can find the value for SHOPIFY_API_SECRET on the Settings page for your app in the Shopify Dev Dashboard under the Secret header.
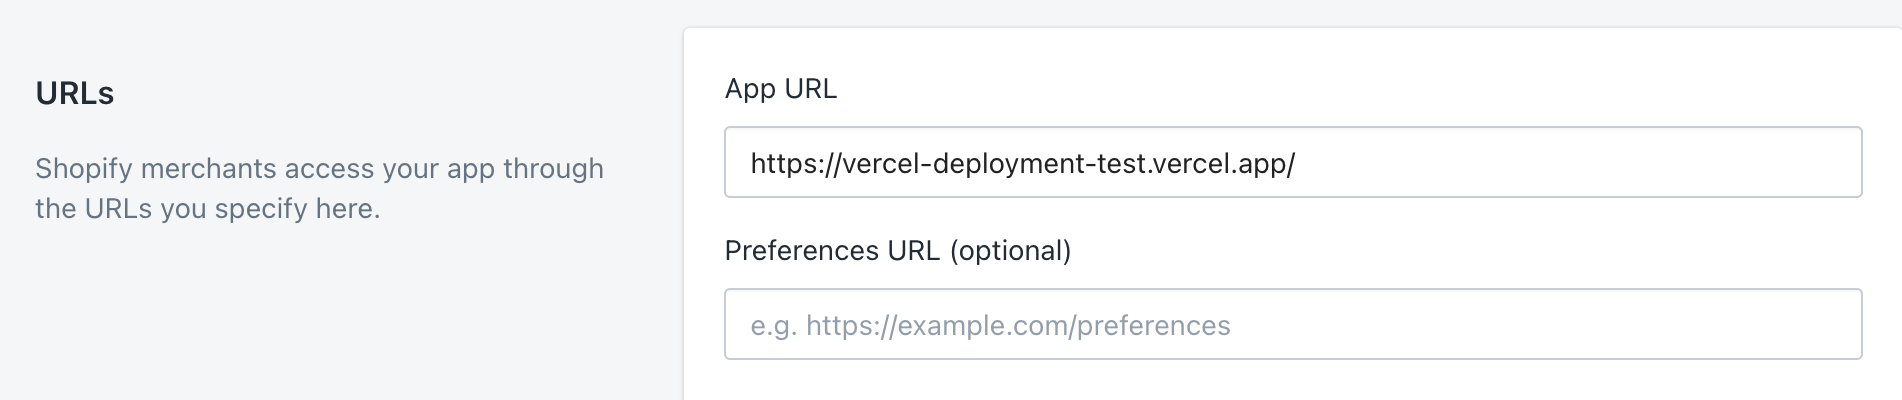
For your Vercel frontend to access your Gadget backend, you must also ensure the App URL value on the Shopify Dev Dashboard and the Gadget Connections page reflect your new Vercel application's URL. In the Vercel dashboard for your deployed project, copy the URL beside the site preview, under the header "DOMAINS".
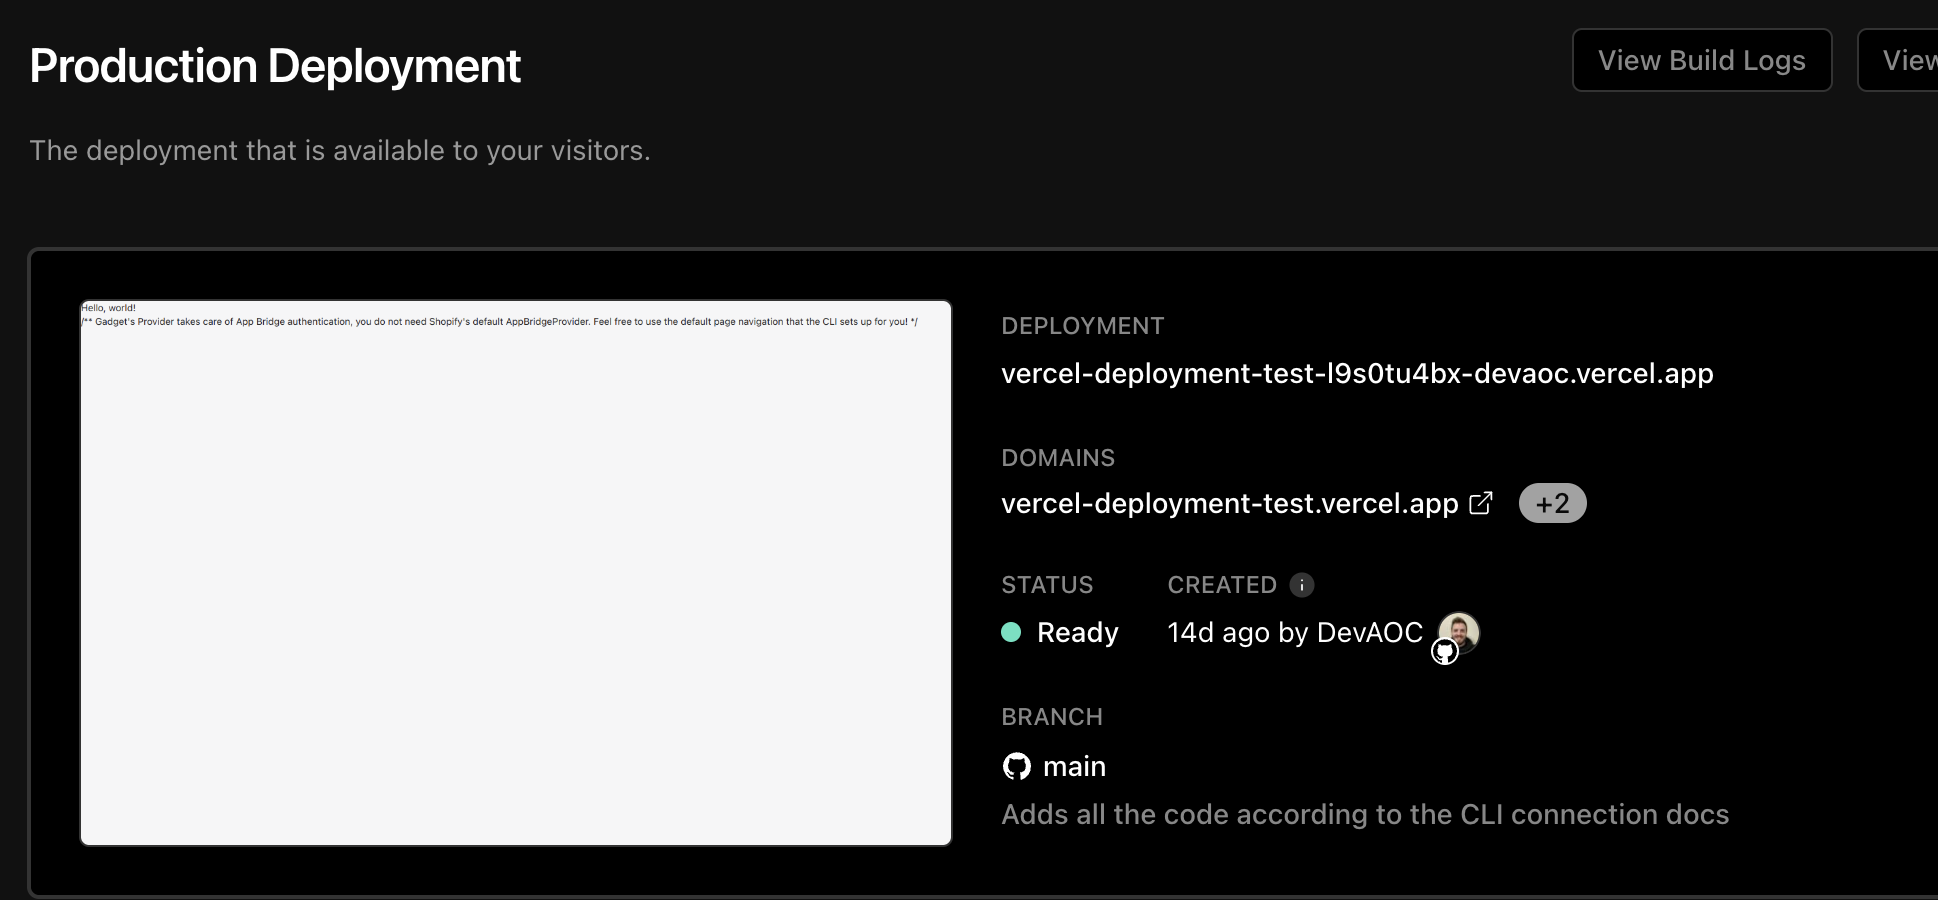
In Gadget navigate to your active Shopify connection. Click on the pencil icon to the right of the Shopify Apps section to edit your connection, and replace the App URL with your deployed application's domain.

On the Shopify Dev Dashboard, navigate to the Versions page, then click Create a version. Replace the current App URL with your deployed application's domain and click Release to confirm your changes.
- Next.js
If you're using next.js to build your external frontend, you need to take one extra step if you intend to deploy to the Shopify App Store. Shopify requires that each Shopify App returns security headers when rendering the application for the iframe Shopify embeds it in. To ensure your next.js app replies with the correct Content-Security-Policy header, add a middleware.js file to your next.js application root:
Read more about Shopify's iframe security requirements in Shopify's docs.
- Shopify CLI 3.X
If you're using the Shopify CLI to build and deploy a Shopify application, you need to take some extra steps for it to deploy correctly to Vercel. You can follow the Shopify iFrame protection
example
to test that you are setting the CSP header correctly.
First, we need to tell Vercel what command to run to build this app. We need to add theEnsure you have completed all the steps to set up your Shopify CLI application for Gadget backends in the Shopify CLI Connection tutorial before deploying to Vercel
vercel-buildscript withinweb/package.json:
web/package.jsonjson{ "scripts": { "vercel-build": "cd frontend && npm install && npm run build" } }
This script instructs Vercel to install dependencies for both the Node.js file server application and frontend Vite application, and then build the production assets for the frontend.
Second, add a new file to the web directory of your Shopify app called vercel.json with the following contents.
web/vercel.jsonjson{ "version": 2, "outputDirectory": ".", "builds": [ { "src": "index.js", "use": "@vercel/node", "config": { "includeFiles": ["./frontend/dist/**"] } } ], "routes": [{ "src": "/(.*)", "dest": "/" }] }
This file instructs Vercel to:
- copy the built production assets for the Vite app into the serverless function for serving the application
- run the
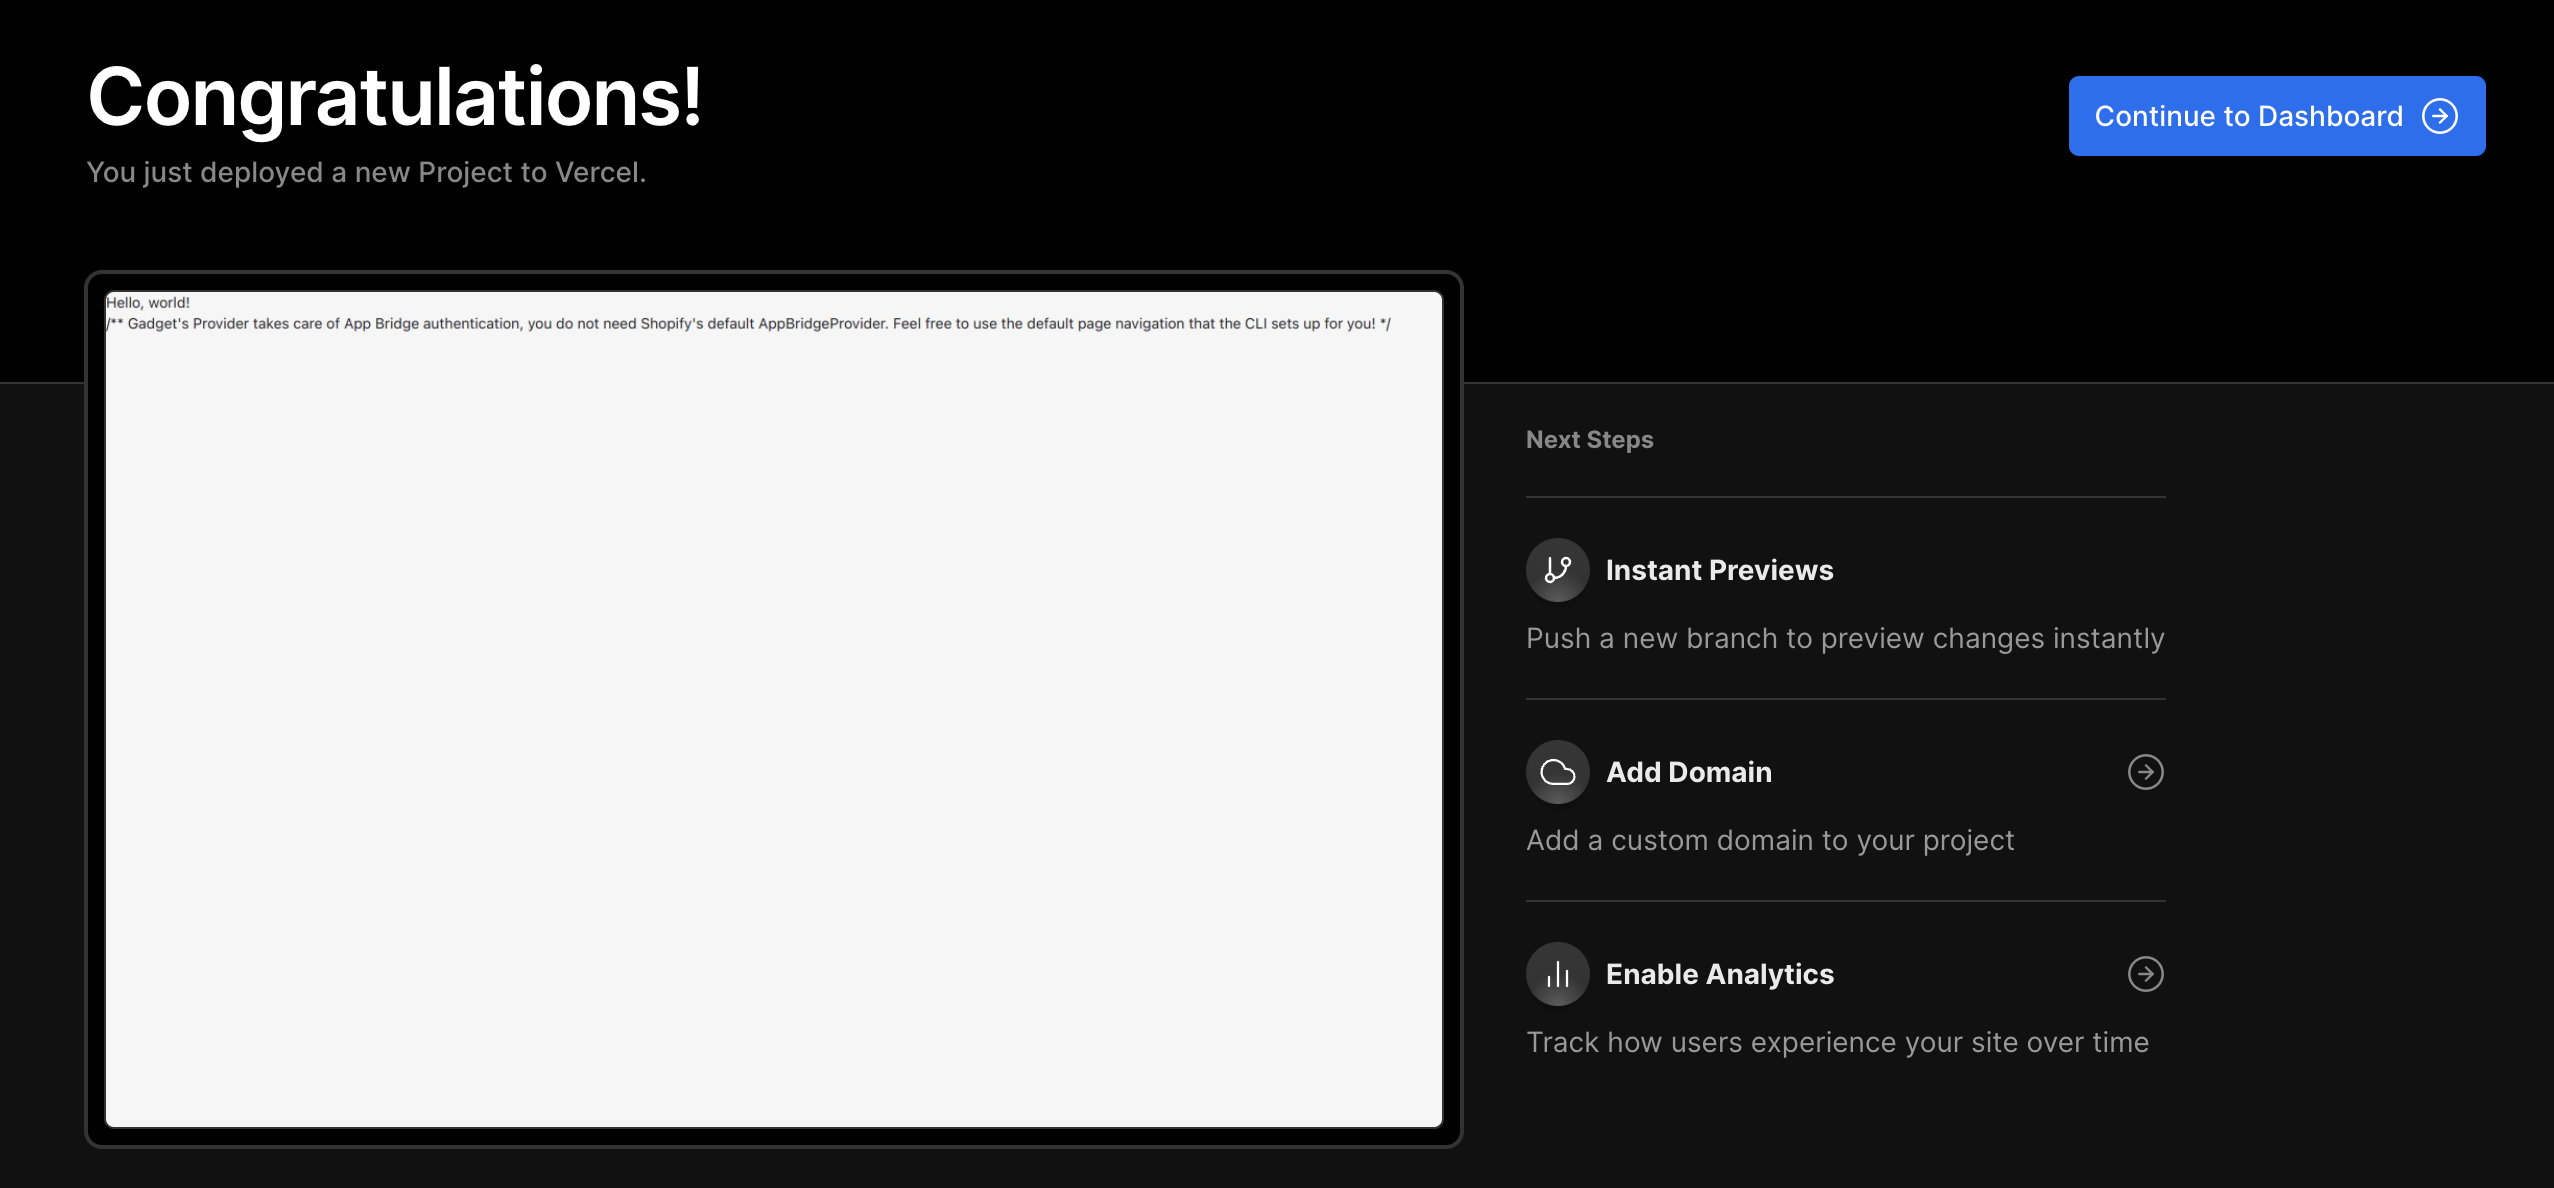
index.jsfile as a Node.js application to serve all the static files with correct headers In the Configure Project section, edit the Root Directory option to readweb/. This will direct Vercel to build and deploy the frontend for your Shopify app, and ignore any extensions or other files in your repo. Once this is complete, commit your changes to your repo and push to Vercel. Watch the logs to make sure that the deployment was
successful. Once deployment is complete, you should see a congratulations page with a preview of your live site to the left.
Once this is complete, commit your changes to your repo and push to Vercel. Watch the logs to make sure that the deployment was
successful. Once deployment is complete, you should see a congratulations page with a preview of your live site to the left.
 Congrats, your app should now be deployed on Vercel! You can now install your app on a store or view your app in a store admin on which it
has previously been installed.
Congrats, your app should now be deployed on Vercel! You can now install your app on a store or view your app in a store admin on which it
has previously been installed.
Netlify
You will need an account with Netlify.
Setting up your Netlify Site
First, we need to make sure that Netlify's build process can find the @gadget-client package for your application.
If you haven't already, ensure that you have a .npmrc file in your repo next to the package.json that manages the @gadget-client dependency. For example, if your frontend resides in the web/frontend folder of your repo, create the file web/frontend/.npmrc with these contents:
.npmrc next to your frontend package.json@gadget-client:registry=https://registry.gadget.dev/npm
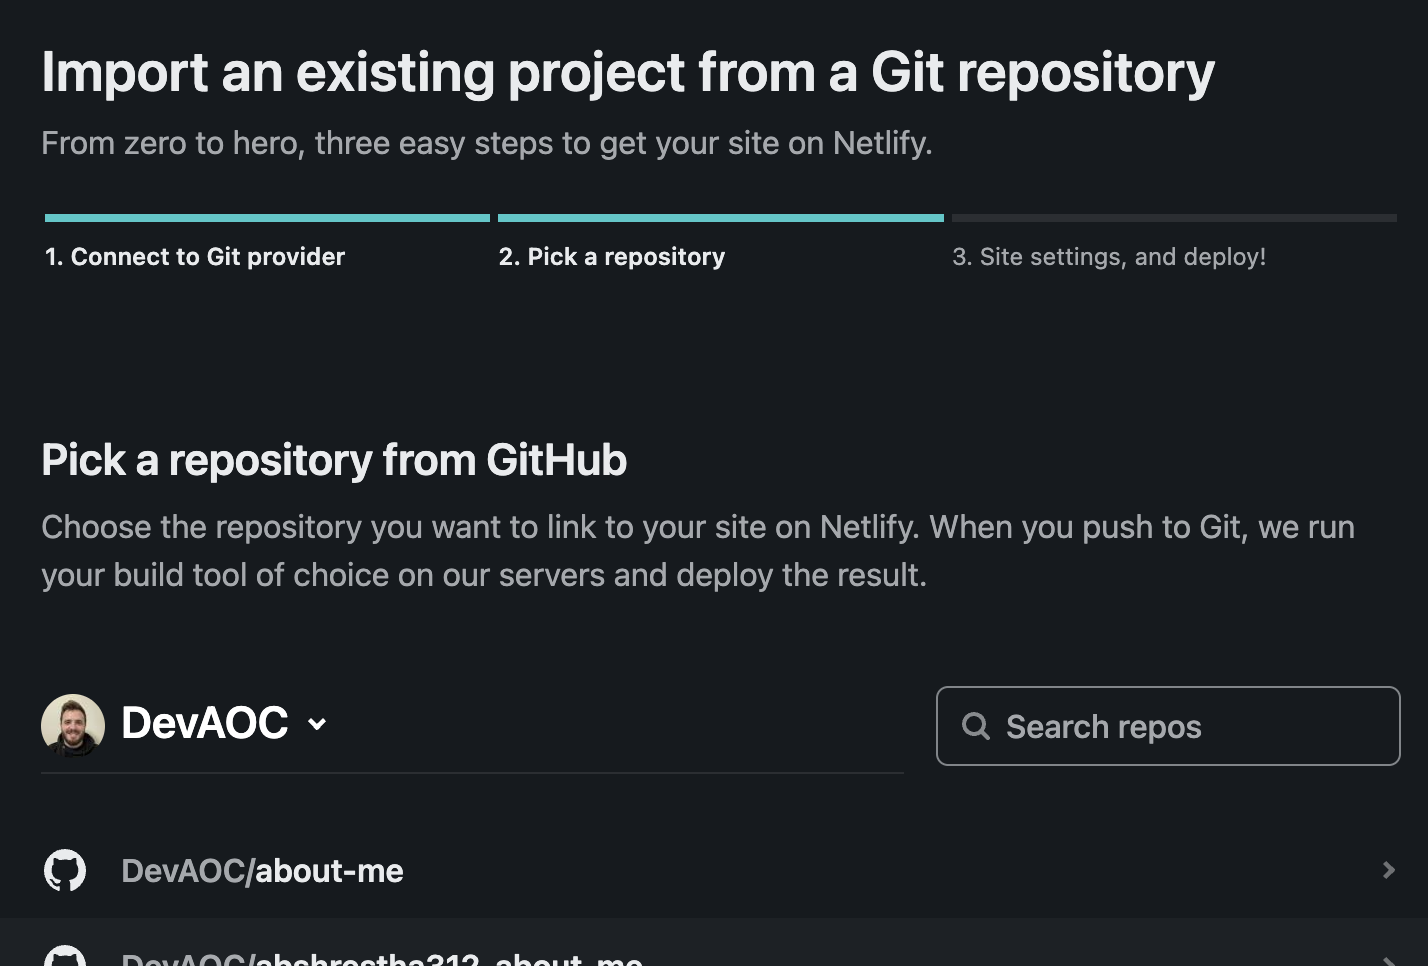
This configuration ensures that npm install or yarn install will correctly fetch your Gadget API client package from the Gadget registry. Next, we need to log in to Netlify and add a new site. To do so, click on the "Add new site" dropdown on the right side of the sites section and select "Import an existing project".
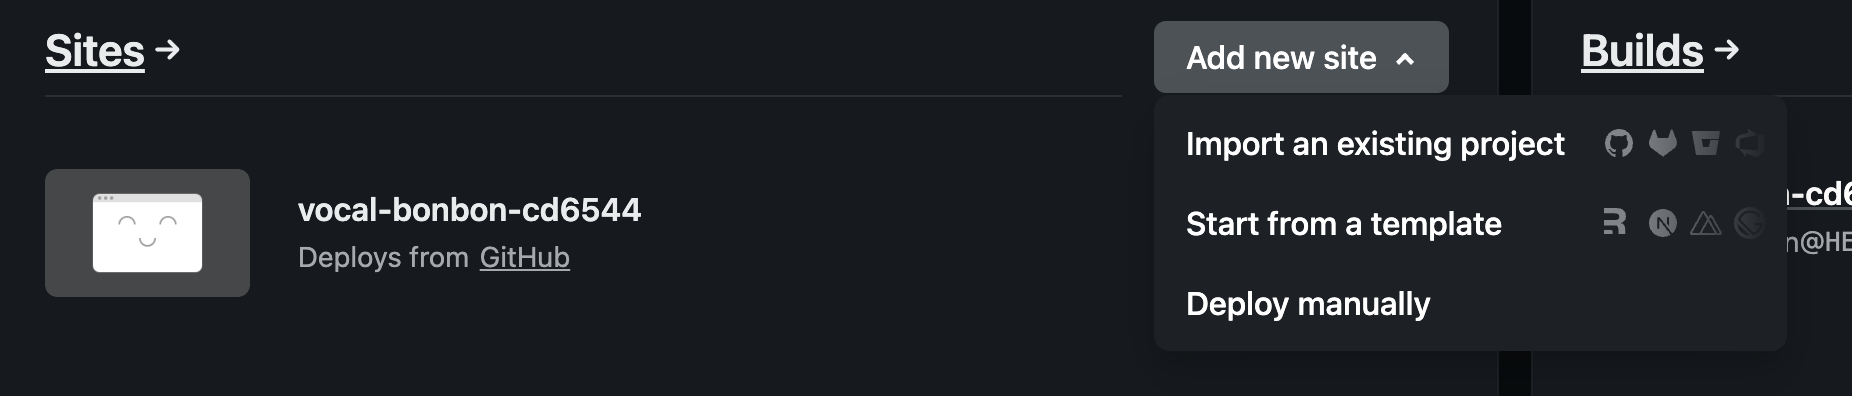
From here we can click on "GitHub" and search for the repository we want to deploy from.
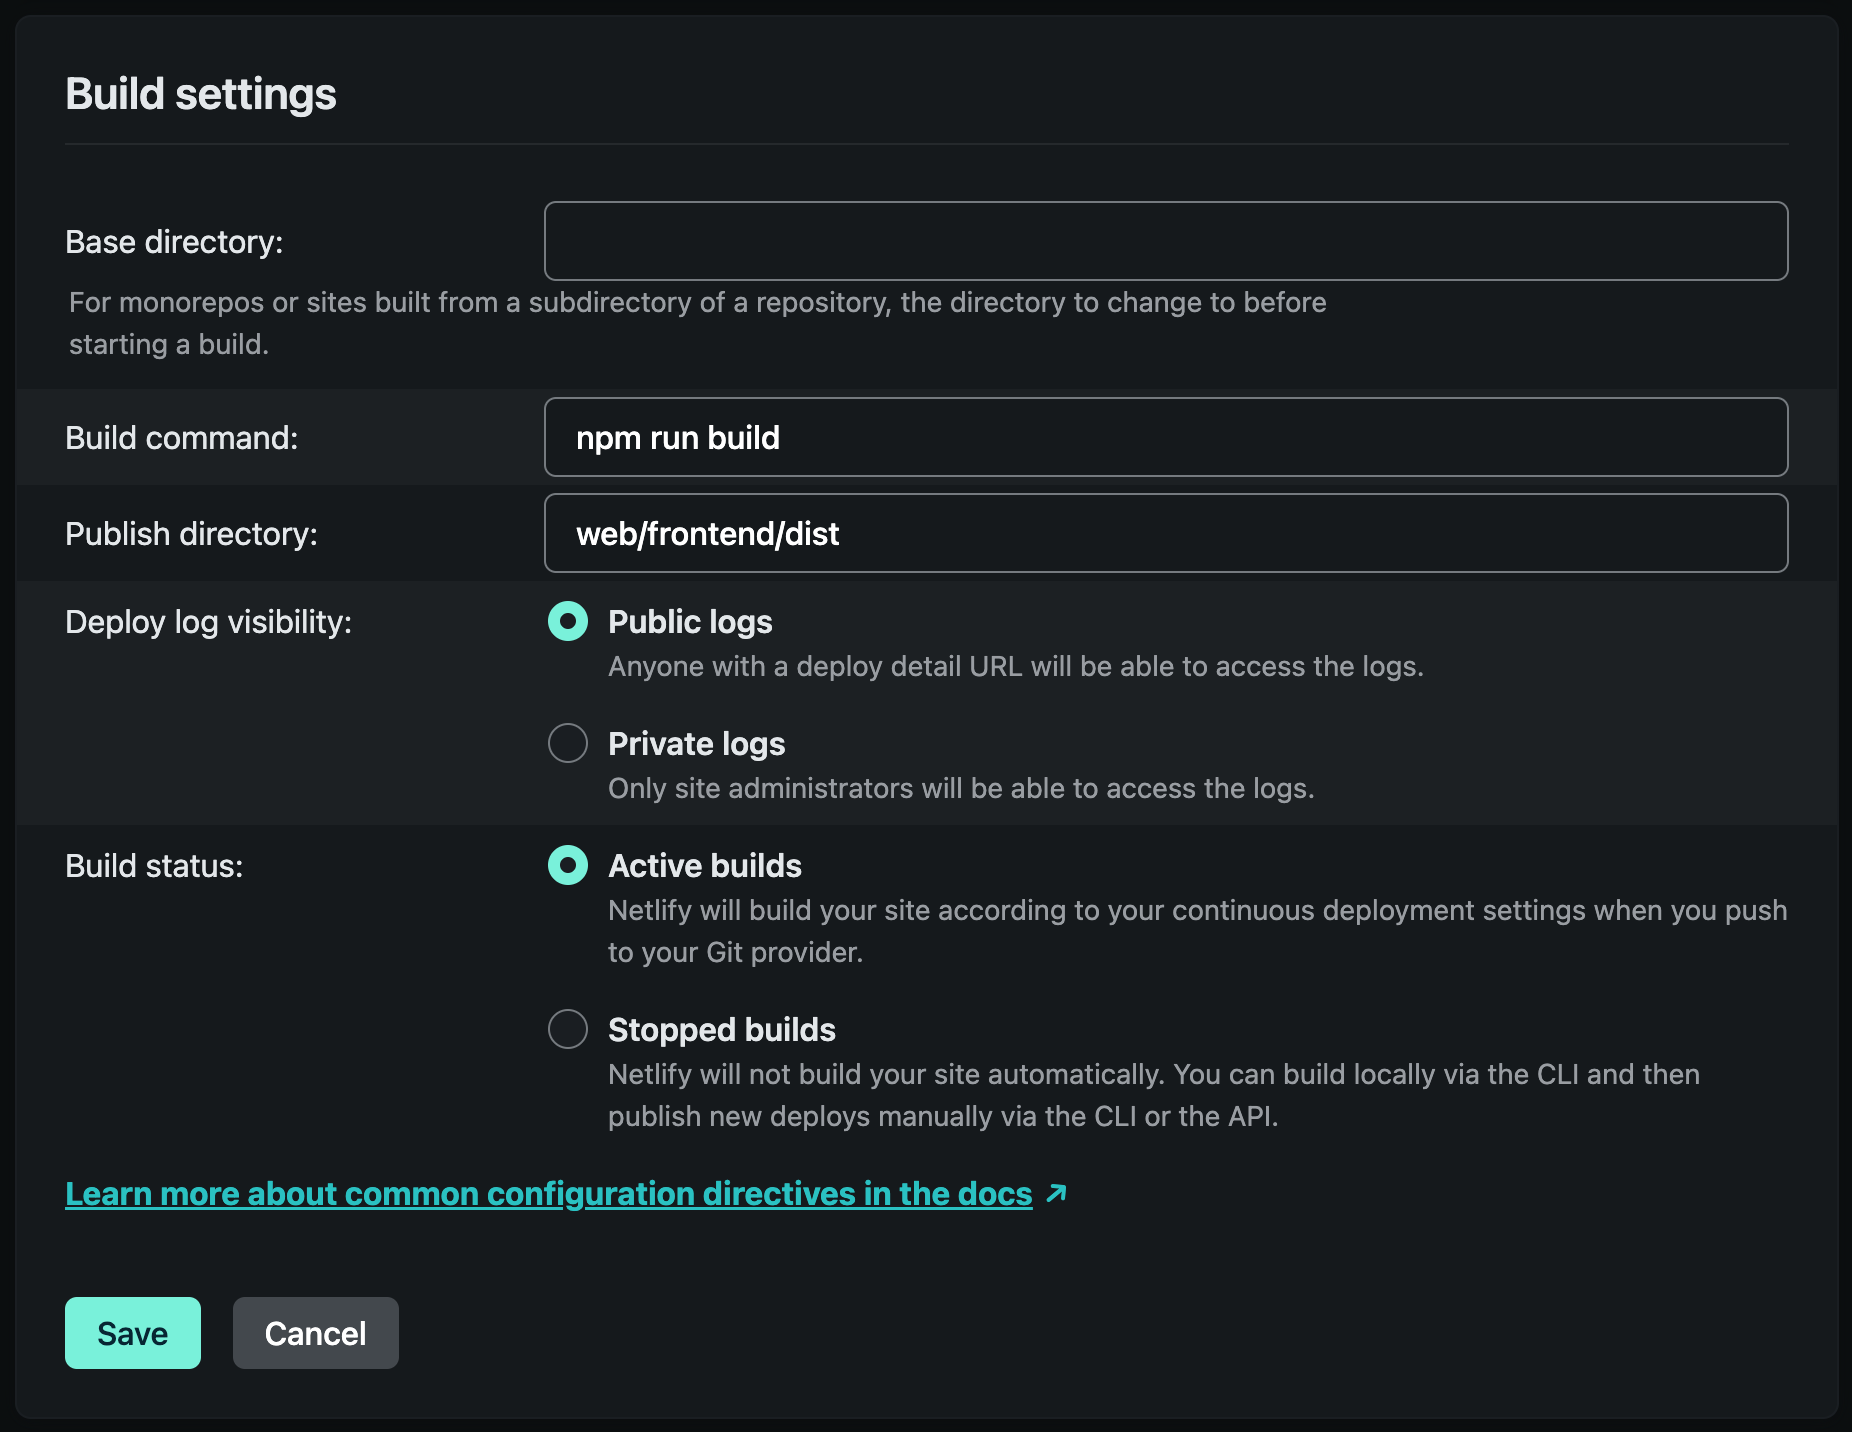
Clicking on the repository name will bring you to the next page where we can configure the project. From here you can modify Build settings and add environment variables to your site.
Embedded Shopify Apps
To deploy Shopify applications using external frontends to Netlify, some more set-up is required.
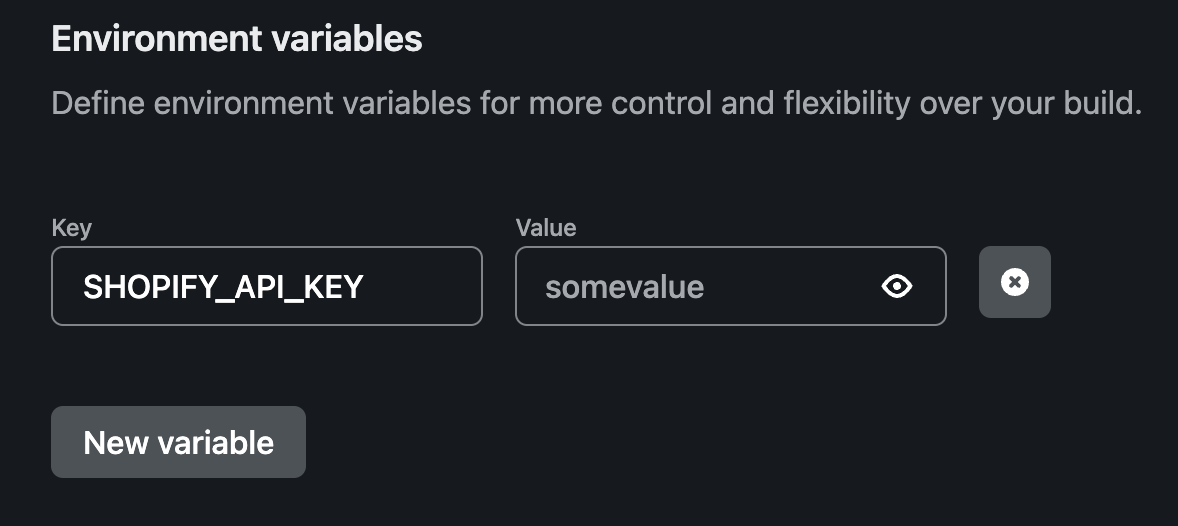
Add the environment variable SHOPIFY_API_KEY by clicking on Show advanced and New variable. You can find the value for SHOPIFY_API_KEY either on the "Overview" or "Client credentials" pages of your Shopify Partners Dashboard under the Client ID header.
If you forget to add environment variables or need to modify the build settings, you can do so again on the "Site settings" page later on.
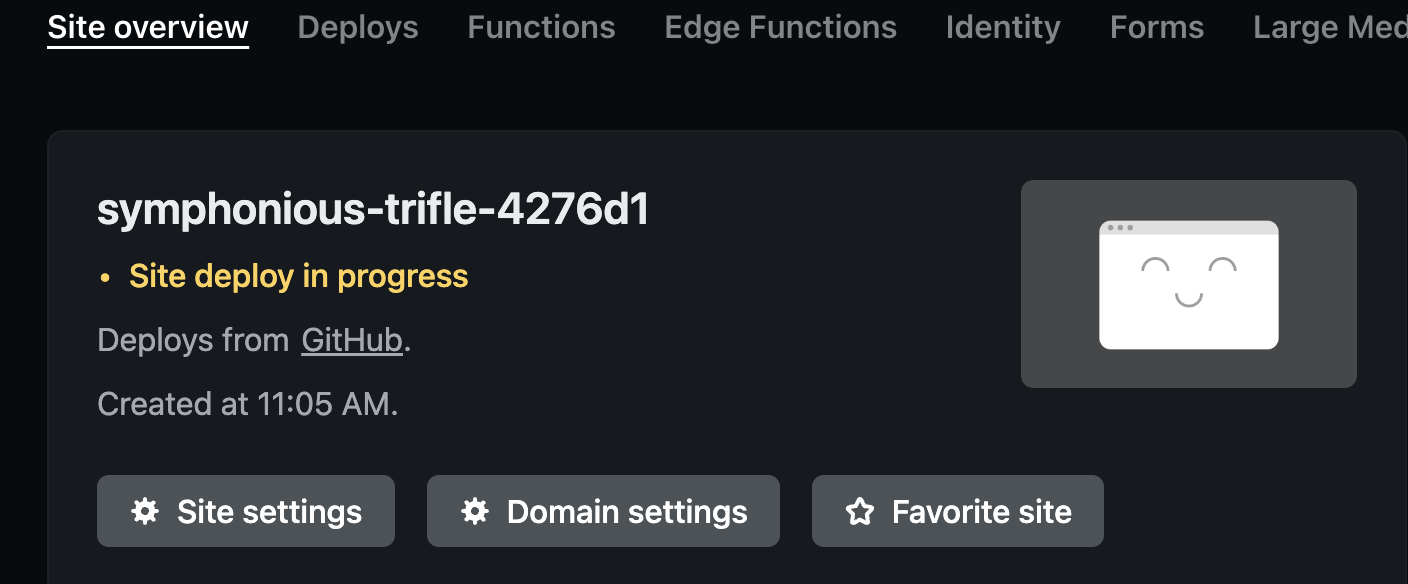
Once this is complete you can click on "Deploy site" and watch the logs, by clicking on the yellow 'Site deploy in progress' link, to make sure that the deployment was successful.
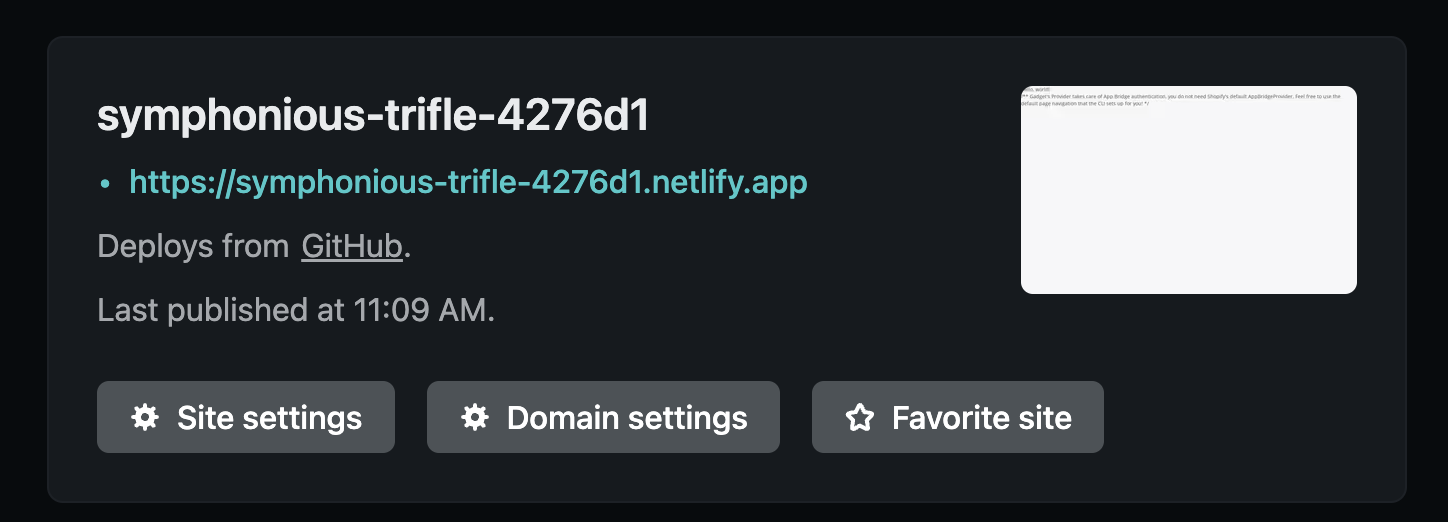
Once deployment is successful, you should see the text "Site is live" at the bottom of the build logs and a site preview on the "Site overview" page next to your site's domain. For your application to be accessed by users, you must first change the app URL on the Shopify Dev Dashboard and the Gadget Connections page. In the Netlify "Site overview" page for your deployed site, copy the URL beside the site preview.
In the Gadget editor, navigate to your app's Shopify connection through Settings -> Plugins -> Shopify and click on your connected app. Replace the App URL with your deployed application's domain.

On the Partners Dashboard in Shopify, navigate to the Configuration page, then to the URLs section. From here replace the current URL with your deployed application's domain and click save to confirm your changes.

Shopify CLI 3.X
Before submitting your app to Shopify for review, you will need to add a couple of files to conform with Shopify's Content Security Policy (CSP) header requirements. You can follow the Shopify iframe protection example to test that you are setting the CSP header correctly.
Ensure you have completed all the steps to set up your Shopify CLI application for Gadget backends in the Shopify CLI Connection tutorial before deploying to Netlify.
You need to create a Netlify Edge function. Edge functions are serverless functions that are hosted on AWS Lambda. Create a new folder at the root of your project, netlify/edge-functions, and add a file named csp.js. In this file, add the following code snippet:
To make sure that this Netlify Edge function deploys, you will need to add a netlify.toml at the root directory with the following configurations:
netlify.tomltoml[[edge_functions]] path = "/*" function = "csp"
You also need to navigate to the build settings and change the Publish directory input field to web/frontend/dist.
Once a new deployment is triggered, you're all finished.
Congrats, your app should now be deployed on Netlify! You can now install your app on a store or view your app in a store admin on which it has previously been installed.
Heroku
You will need an account with Heroku. We also recommend using GitHub to host your Git repository.
- Setting up your Heroku App
First, we need to make sure that Heroku's node buildpacks can find the @gadget-client package for your application. If you haven't already, ensure that you have a .npmrc file your repo next to the package.json referring to the @gadget-client repo. For example, if your frontend resides in the web/frontend folder of your repo, create the file web/frontend/.npmrc with these contents:
.npmrc next to your frontend package.json@gadget-client:registry=https://registry.gadget.dev/npm
This configuration ensures that npm install or yarn install will correctly fetch your Gadget API client package from the Gadget registry.
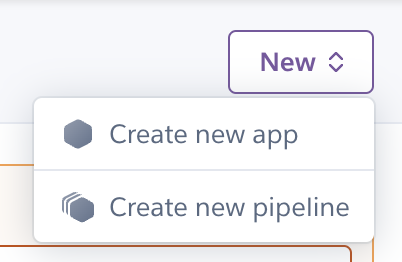
Next, we must log in to Heroku and create an app. To do so, click on the "New" dropdown on the right side and select "Create new app".
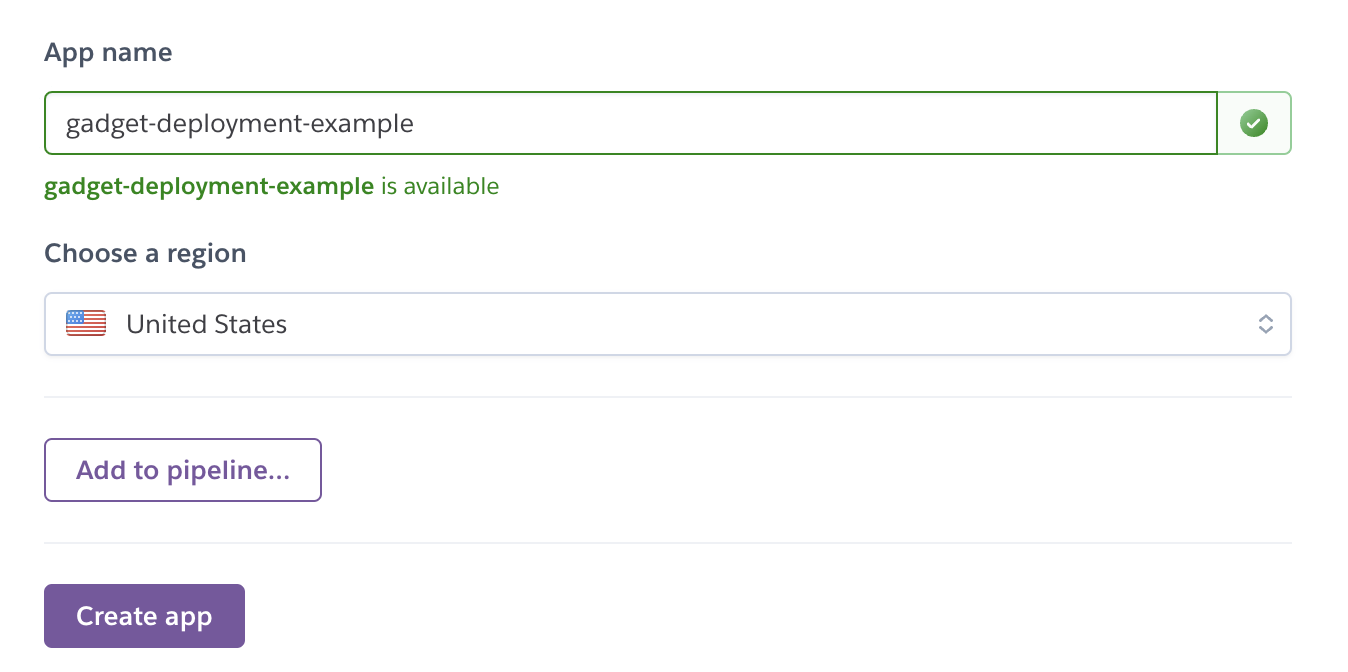
From here you can name your app as desired and select the region in which to deploy your app.
Once the app is created you can add environment variables by going to the Settings page and scrolling down to the Config Vars section and clicking "Reveal Config Vars".
Embedded Shopify Apps
To deploy Shopify applications using external frontends to Heroku, some more set-up is required.
Add the SHOPIFY_API_KEY to your Heroku app's environment variables. The SHOPIFY_API_KEY can be found in your Shopify Partners Dashboard on the "Overview" or "Client credentials" pages under the header Client ID. The environment variable should look something like the below image.

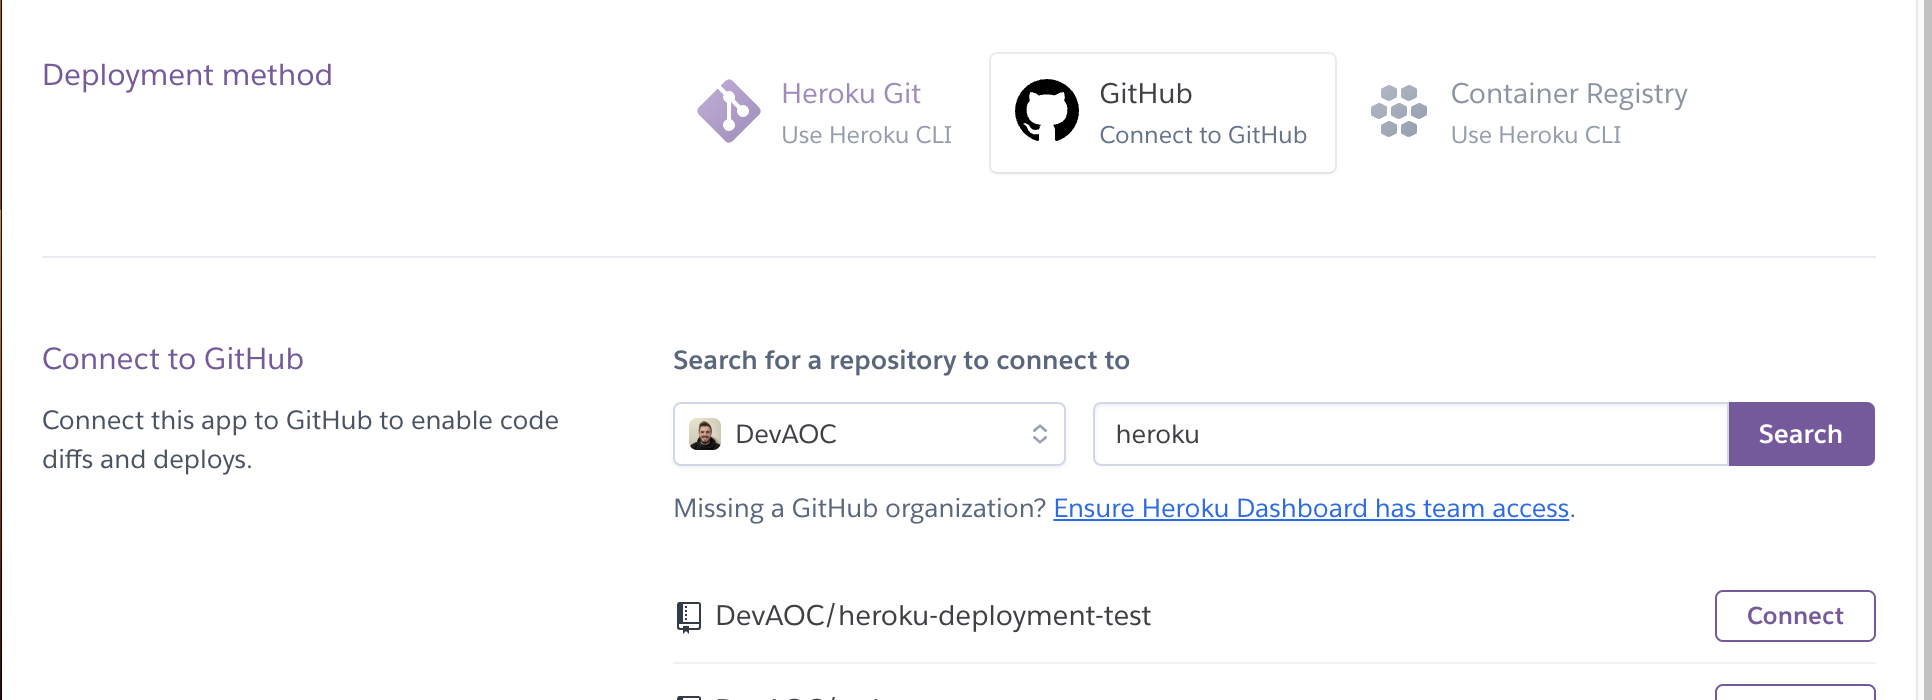
To deploy the application navigate to the "Deploy" tab. Click on the GitHub deployment method. From here you can select the repository you wish to deploy from. Type in the name of your repository and click enter, then connect that repository with Heroku.
Now that the repository is connected to Heroku, scroll down to the Manual deploy section, choose the branch you want to deploy from and click on "Deploy Branch".

To connect your frontend with your Gadget backend, you must first change the app URL on the Shopify Partner Dashboard and the Gadget Connections page. Copy the URL of the deployed app on Heroku under the "Settings" tab and Domains section.

In the Gadget editor, navigate to your app's Shopify connection through Settings -> Plugins -> Shopify and click on your connected app. Replace the App URL with your deployed application's domain.

On the Partners Dashboard in Shopify, navigate to the Configuration page, then to the URLs section. From here replace the current URL with your deployed application's domain and click save to confirm your changes.

Shopify CLI 3.X
Before deploying your site you will need to add a couple of files to conform with the Shopify Content Security Policy (CSP) header requirements. You can follow the Shopify iFrame protection example to test that you are setting the CSP header correctly.
You will need the Heroku CLI and Docker installed on your machine to follow these steps.
Log in to Heroku using the CLI:
zshheroku login
Once the login process is complete, you will need to log in to the Heroku container registry from the root folder of your application:
zshheroku container:login
You now need to set your existing Heroku app to act as a docker container. Make sure to modify the app name to match Heroku:
zshheroku apps:stacks:set -a <heroku-app-name> container
Now that the Heroku deployment configurations are set up, you will need to add a heroku.yml file at the root of your application. Replace <SHOPIFY_API_KEY> with your Shopify API key:
heroku.ymlymlbuild: docker: web: Dockerfile config: SHOPIFY_API_KEY: <SHOPIFY_API_KEY>
Once all these prior steps have been completed and you have committed your changes to the linked repository, you are ready to deploy!
Congrats, your app should now be deployed on Heroku! You can now install your app on a store or view your app in a store admin on which it has previously been installed.