Use Gadget to build an automated product tagging app for a Shopify store 

Topics covered: Shopify connections, Building models, Actions, React frontends
Time to build: ~20 minutes

A Shopify merchant needs an automated way to tag products being added to their Shopify store inventory. They source hundreds of products weekly from various dropshippers and upload the unstructured data to Shopify programmatically. Because the data is unstructured, Shopify is unable to power the merchant's storefront search. While the merchant can add tags inside the Shopify Admin, the experience of doing this on hundreds of products weekly is time-consuming.

To solve this, the merchant wants to build a custom Shopify app on Gadget that will run every new product description through an automated tagging script.

Screenshot of the completed product tagger app embedded in a Shopify store admin

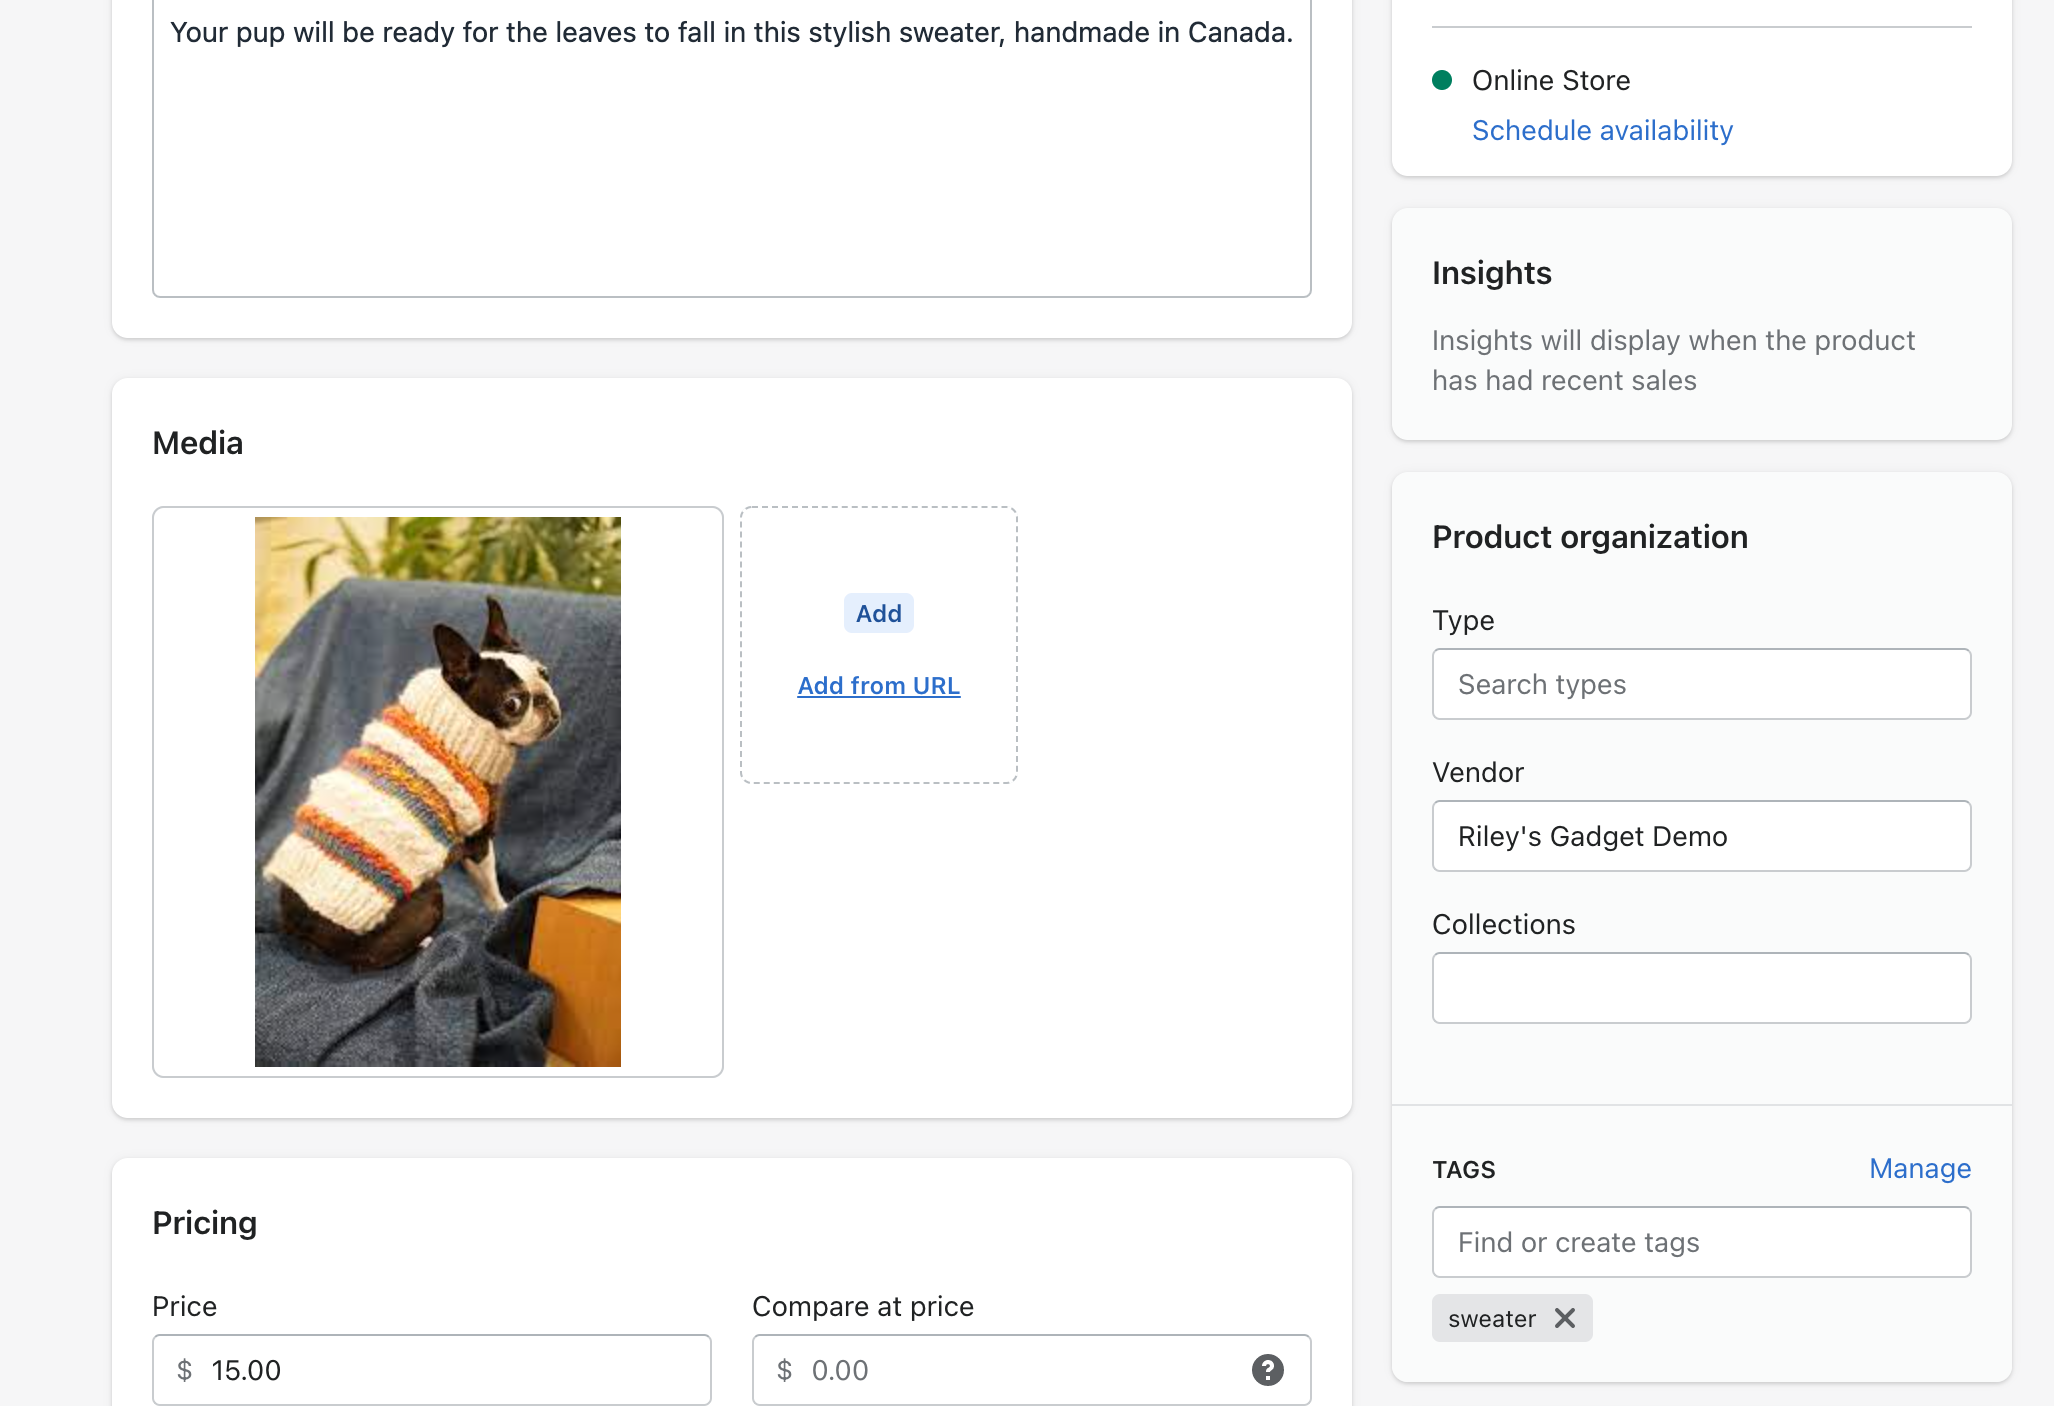
In this example, we'll build a custom product tagging app that listens to the product/create and product/update webhooks from Shopify, runs product descriptions through a tagging script, and sets tags back in Shopify.

Requirements

To get the most out of this tutorial, you will need:

You can fork this Gadget project and try it out yourself.

You will still need to set up the Shopify Connection after forking. Continue reading if you want to learn how to connect Gadget to a Shopify store!

Fork on Gadget

Step 1: Create a Gadget app and connect to Shopify 
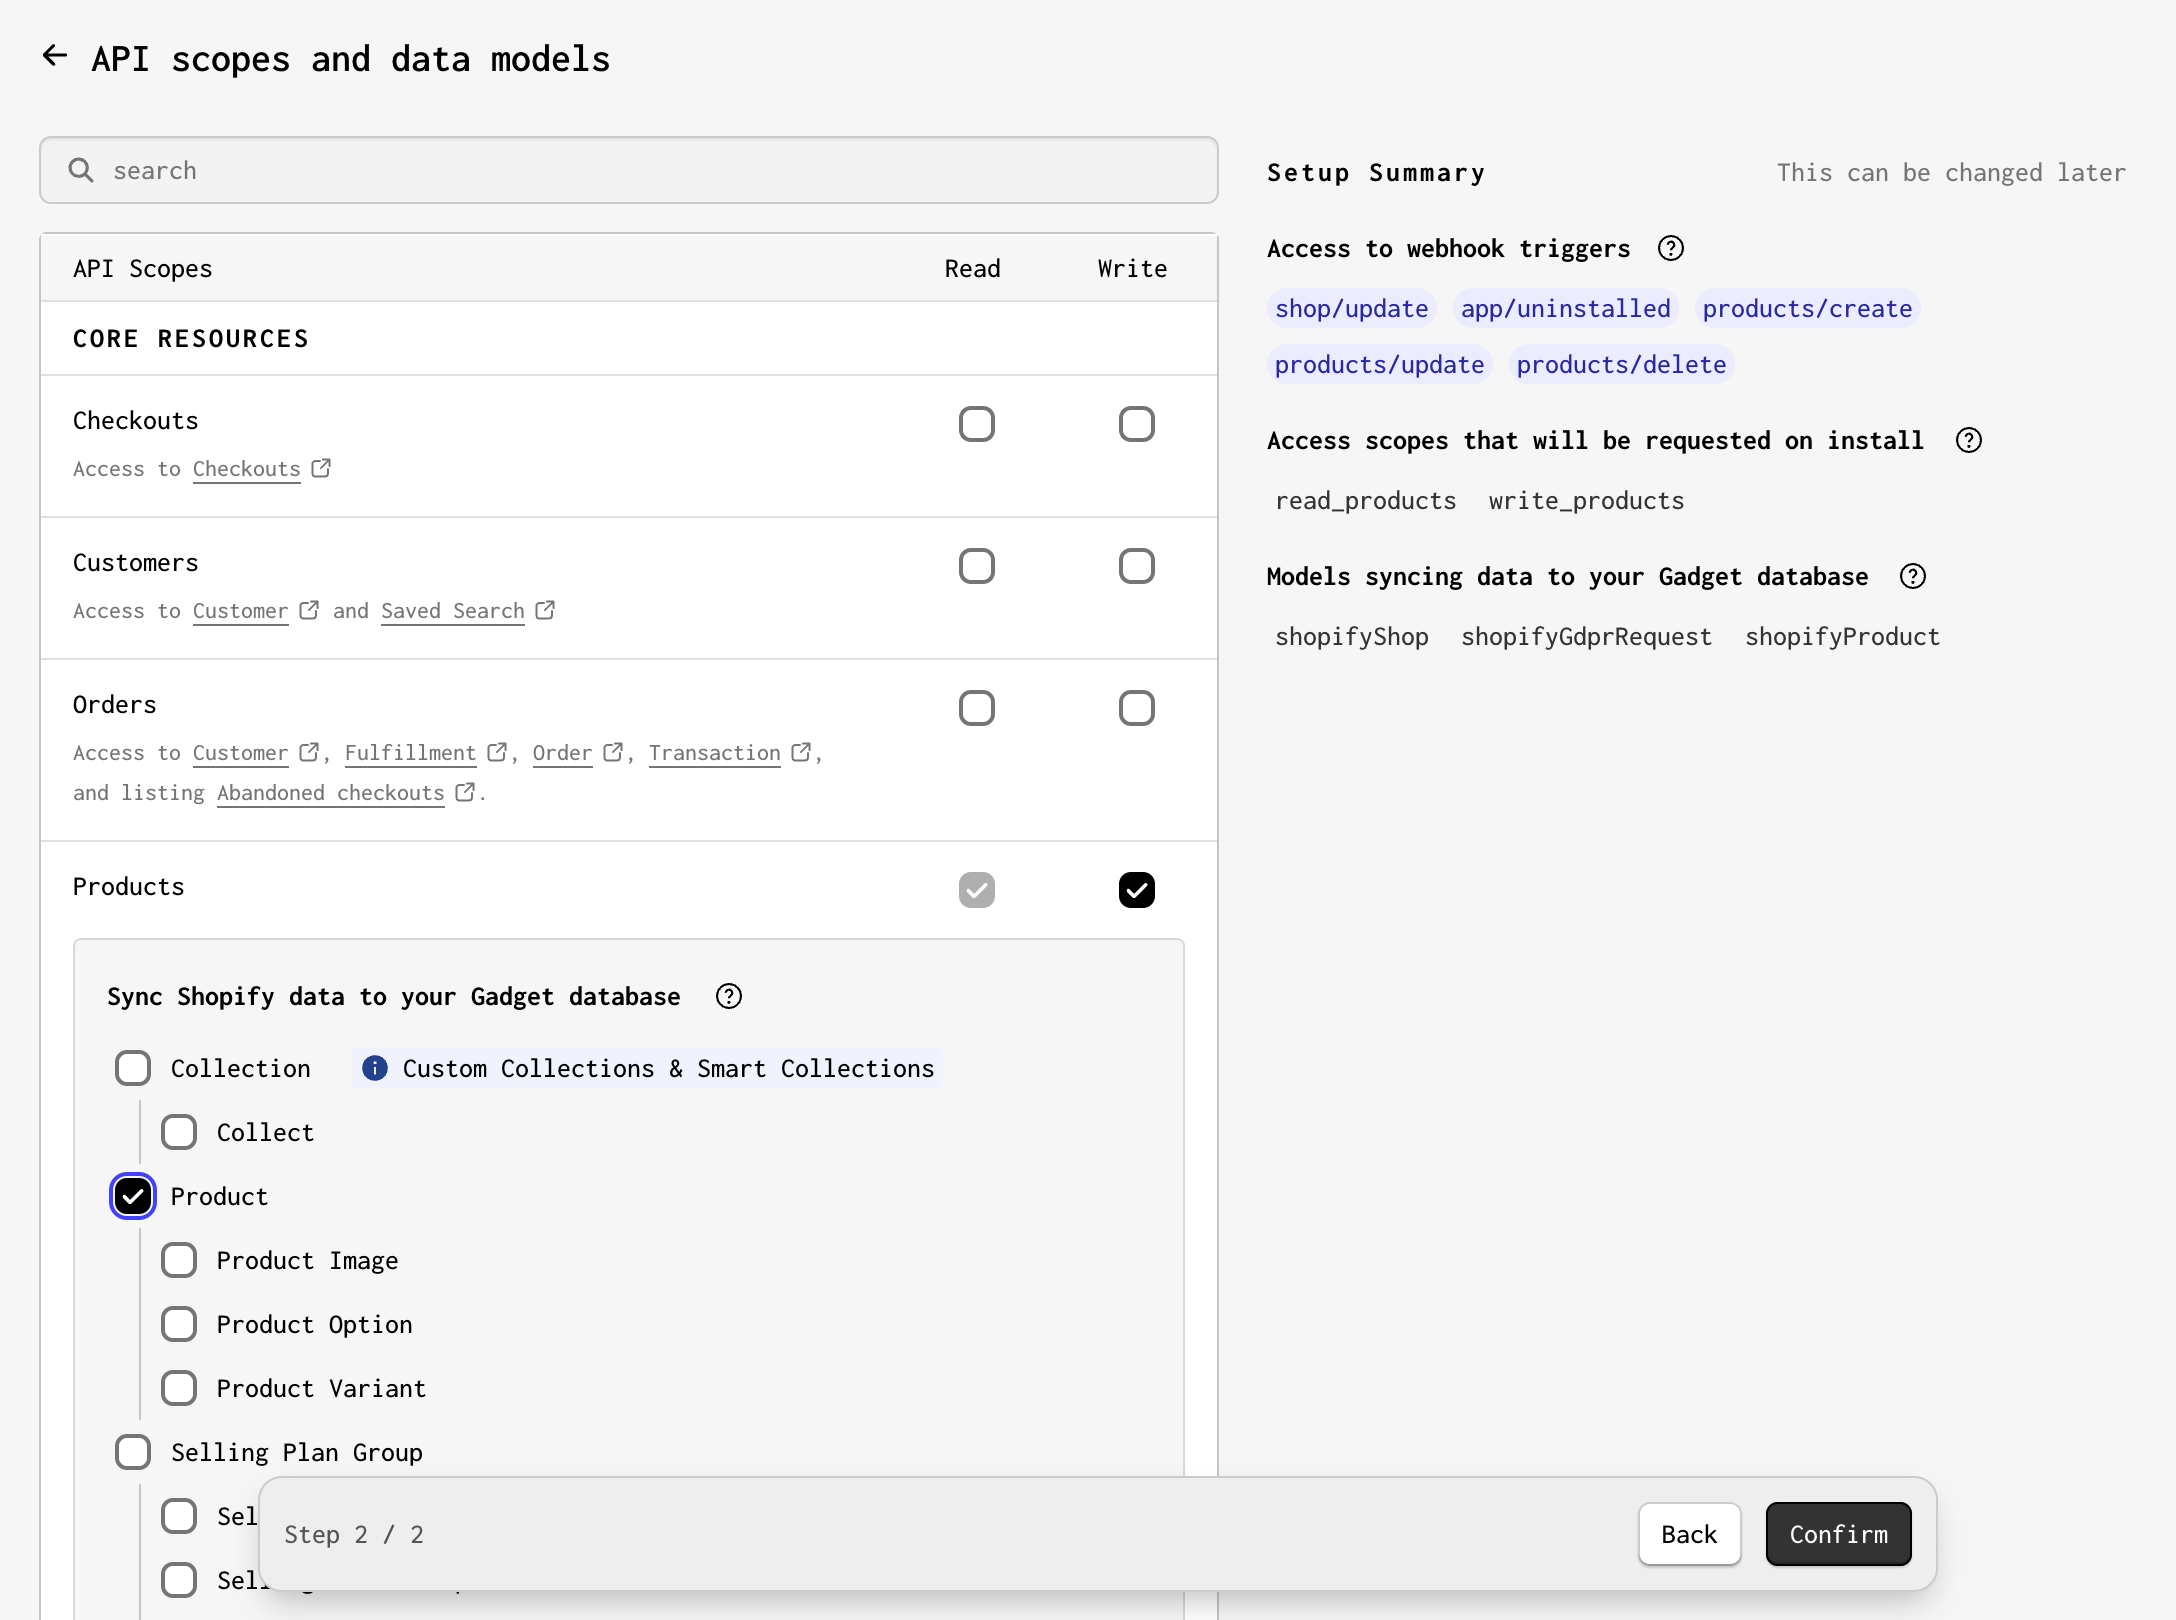
Our first step will be to set up a Gadget project and connect our backend to a Shopify store via the Shopify connection.

Create a new Gadget application at gadget.new and select the Shopify app template.

Because we are adding an embedded frontend, we are going to build an app using the Partners connection.

Now we will set up a custom Shopify application in the Partners dashboard.

  1. Go to the Shopify Partner dashboard
  2. Click on the link to the Apps page

Both the Shopify store Admin and the Shopify Partner Dashboard have an Apps section. Ensure that you are on the Shopify Partner Dashboard before continuing.

Click on Apps link in Shopify Partners Dashboard
  1. Click the Create App button
Click on Create app button
  1. Click the Create app manually button and enter a name for your Shopify app
Shopify's app creation landing page in the Partners Dashboard
  1. Click on Settings in the side nav bar
  2. Click on Plugins in the modal that opens
  3. Select Shopify from the list of plugins and connections
The Gadget homescreen, with the Connections link highlighted
  1. Copy the Client ID and Client secret from your newly created Shopify app and paste the values into the Gadget Connections page
Screenshot of the Partners card selected on the Connections page
  1. Click Connect on the Gadget Connections page to move to scope and model selection

Now we get to select what Shopify scopes we give our application access to, while also picking what Shopify data models we want to import into our Gadget app.

  1. Select the scopes and models listed below and click Confirm to connect to the custom Shopify app
  • Enable the read and write scopes for the Shopify Products API, and select the underlying Product model
Select Product API scope + model

Now we want to connect our Gadget app to our custom app in the Partner dashboard.

  1. In your Shopify app in the Partner dashboard, click on Configuration in the side nav bar so you can edit the App URL and Allowed redirection URL(s) fields
  2. Copy the App URL and Allowed redirection URL from the Gadget Connections page and paste them into your custom Shopify App
Screenshot of the connected app, with the App URL and Allowed redirection URL(s) fields

Now we need to install our Shopify app on a store.

  1. Go back to the Shopify Partner dashboard
  2. Click on Apps to go to the Apps page again
  3. Click on your custom app
  4. Click on Select store
Click on the Select store button
  1. Click on the store we want to use to develop our app
  2. You may be prompted about Store transfer being disabled. This is okay, click Install anyway
  3. Click Install app to install your Gadget app on your Shopify store
Having an issue installing?

If you are getting a permissions denied error when installing your app, try logging in to the Shopify store Admin!

Click Install app to authorize our Gadget app with our store

You will be redirected to an embedded admin app that has been generated for you. The code for this app template can be found in web/routes/index.jsx.

Step 2: Add new model for tag keywords 

The next step is to create a model that will store our list of vetted keywords that we can use to power our tagging script. These keywords can be different types of products or brands. Make sure to add keywords that will be found in your products' descriptions!

  1. Click + next to the api/models folder in the nav to add a model, and call it allowedTag
  2. Click + in the FIELDS section of the api/models/allowedTag/schema page to add a field, and name it keyword
The allowedTag model with keyword field

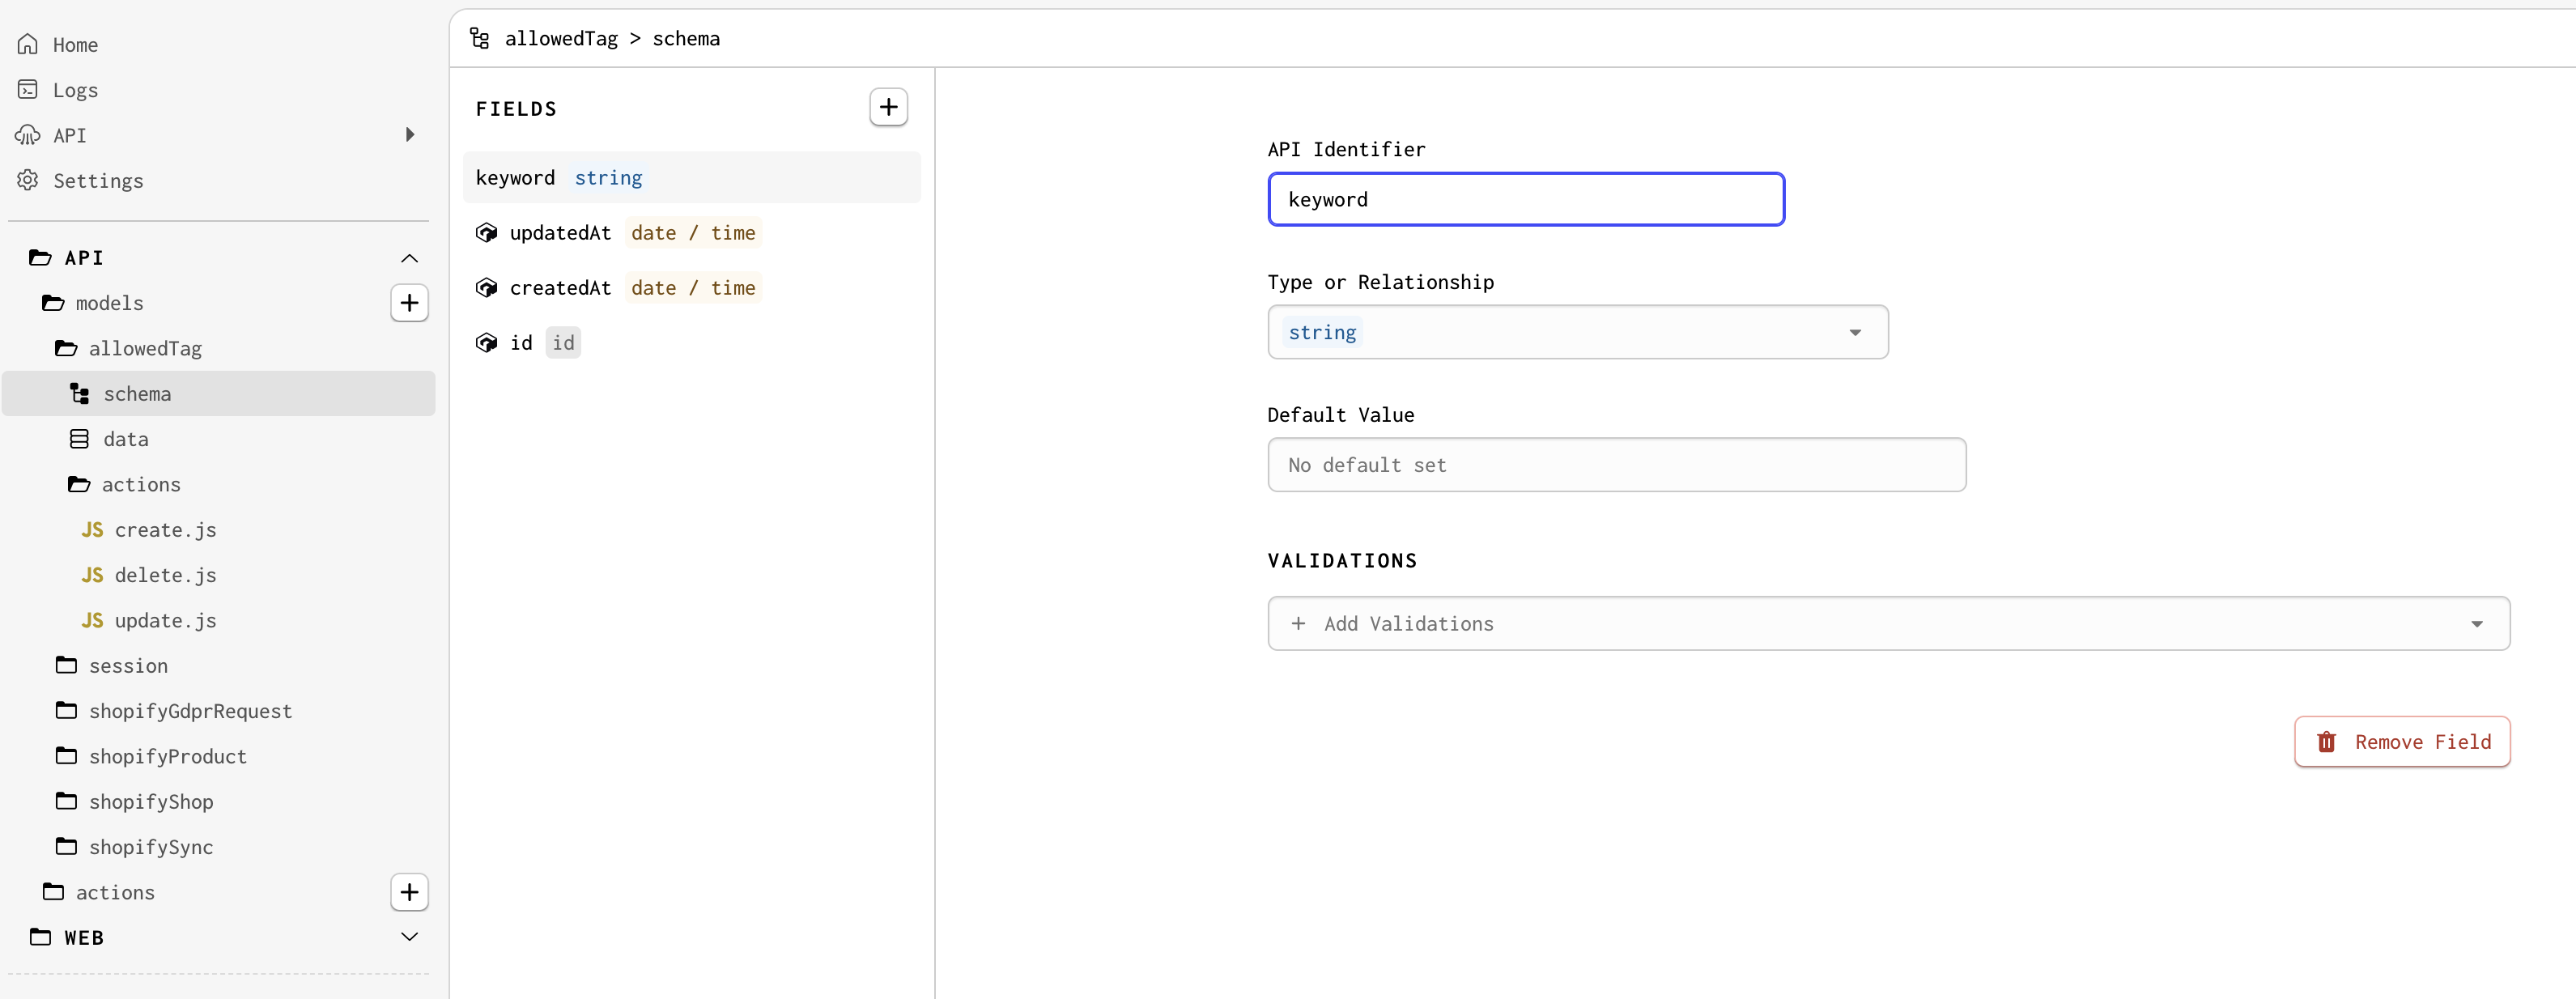
Gadget instantly creates a new table and column in the underlying database and generates a GraphQL CRUD API for this model. Test it out the API in the API Playground!

  1. Click on api/models/allowedTag/actions/create.js to open the allowedTag model's create action
  2. Click the Run action button in the TRIGGERS panel on the right of the editor to open up the create action in the API Playground

Using the API Playground, we can make a create call to our allowedTag model to store a new keyword. The JS action is already set up to take a keyword as a parameter.

  1. Enter a keyword to store in your database and run the action

We can also check to make sure our tag keywords have been saved.
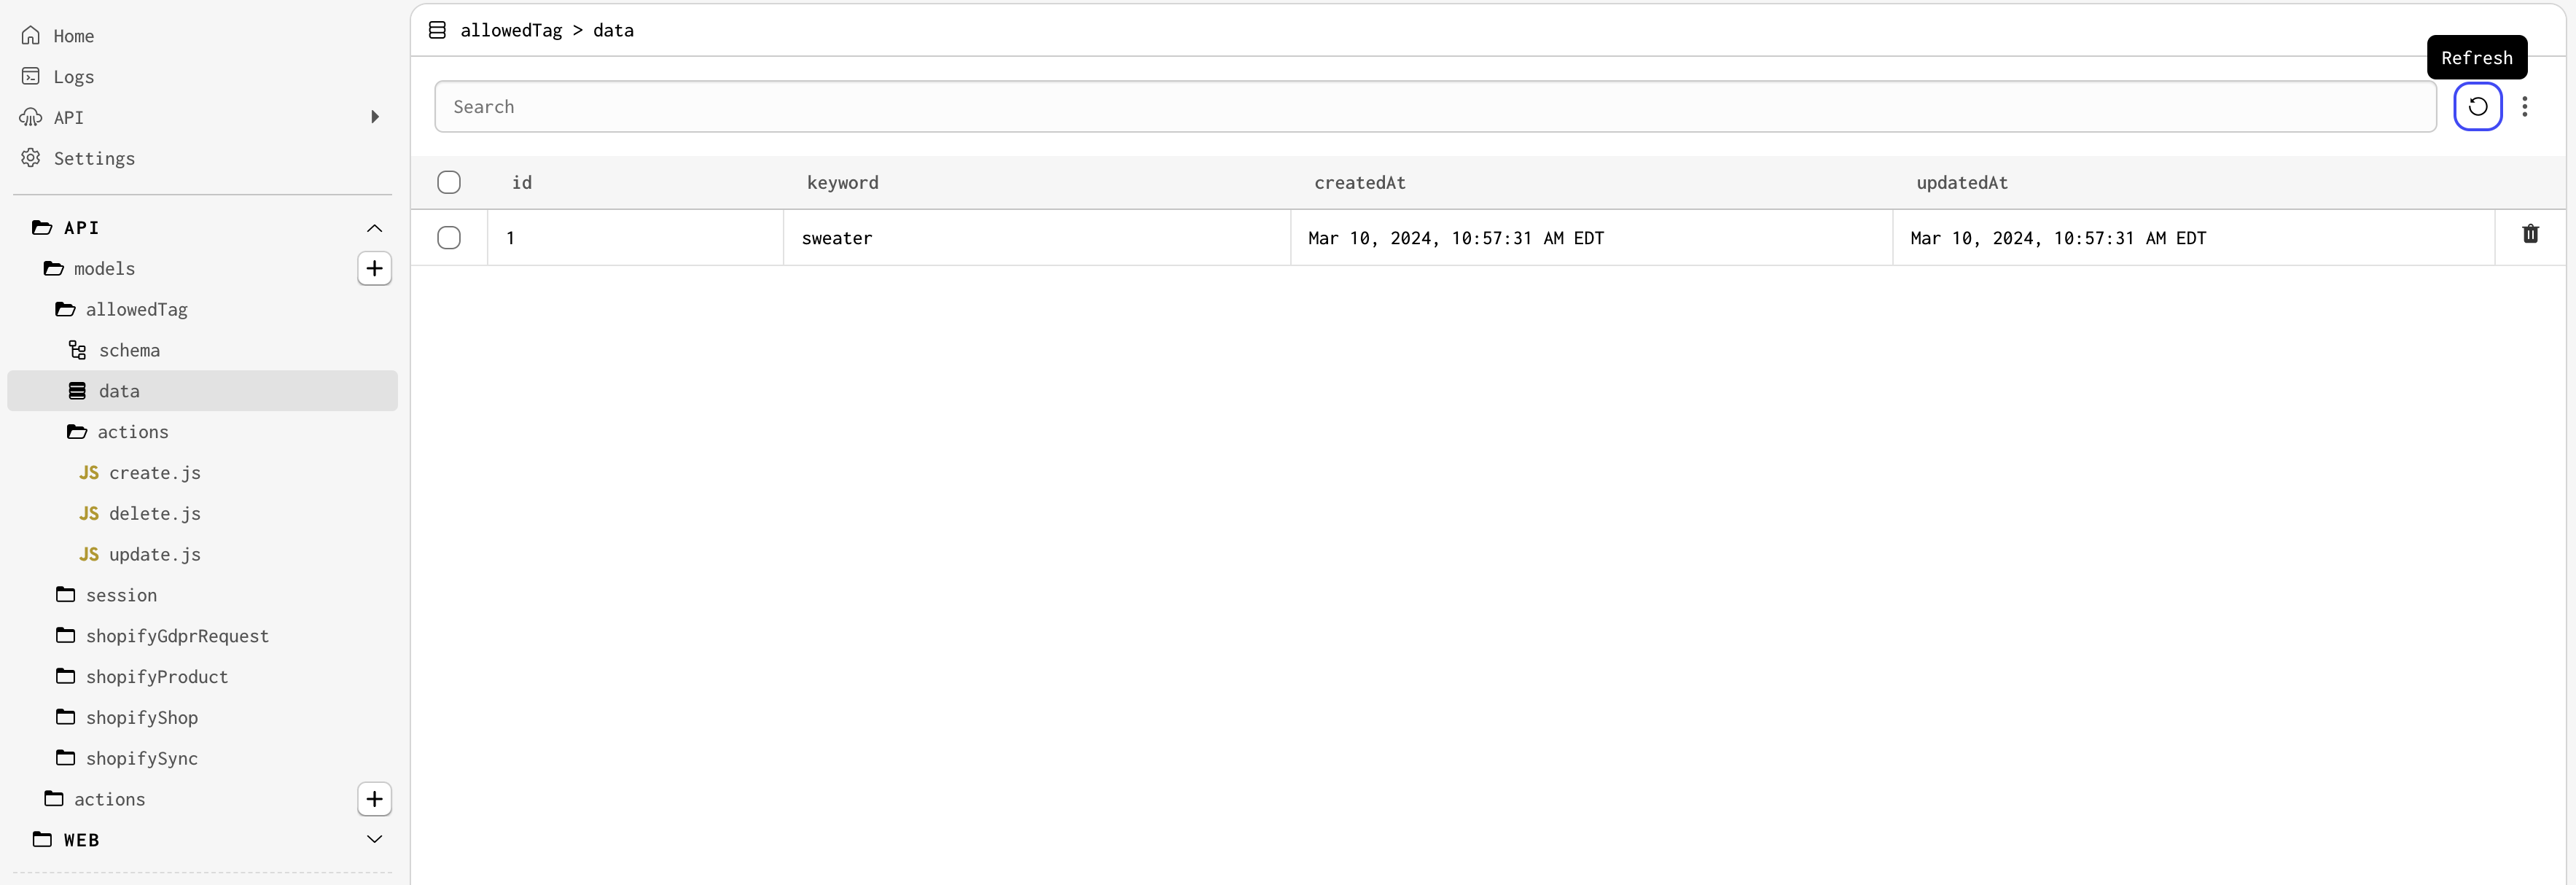
  1. Navigate to api/models/allowedTag/data to go to this model's data page

We can see our added allowedTag record!

The allowedTag Data page with our added keyword

Step 3: Build your tagging script 

Gadget auto-generates a CRUD (create, read, update, delete) API for each of your models. For Shopify models, these create, update, and delete actions are triggered by Shopify webhooks.

Actions are customizable, and you can add code to the run and onSuccess functions. Read more about these functions in the Gadget actions docs.

Next, as add some code to the create action for the shopifyProduct model to tag products based on the keywords we have stored in the allowedTag model.

  1. Navigate to api/models/shopifyProduct/actions/create.js
  2. Paste the following code into the file:
api/models/shopifyProduct/actions/create.js
JavaScript
1import {
2 applyParams,
3 preventCrossShopDataAccess,
4 save,
5 ActionOptions,
6 CreateShopifyProductActionContext,
7} from "gadget-server";
8
9/**
10 * @param { CreateShopifyProductActionContext } context
11 */
12export async function run({ params, record, logger, api }) {
13 applyParams(params, record);
14 await preventCrossShopDataAccess(params, record);
15 await save(record);
16}
17
18/**
19 * @param { CreateShopifyProductActionContext } context
20 */
21export async function onSuccess({ params, record, logger, api, connections }) {
22 if (record.body && record.changed("body")) {
23 // get a unique list of words used in the record's description
24 let newTags = [...new Set(record.body.match(/\w+(?:'\w+)*/g))];
25
26 // filter down to only those words which are allowed
27 const allowedTags = (await api.allowedTag.findMany()).map((tag) => tag.keyword);
28 // merge with any existing tags and use Set to remove duplicates
29 const finalTags = [
30 ...new Set(
31 newTags.filter((tag) => allowedTags.includes(tag)).concat(record.tags)
32 ),
33 ];
34
35 logger.info(
36 { newTags, allowedTags, finalTags },
37 `applying final tags to product ${record.id}`
38 );
39
40 // write tags back to Shopify
41 const shopify = connections.shopify.current;
42 if (shopify) {
43 await shopify.product.update(parseInt(record.id), {
44 tags: finalTags.join(","),
45 });
46 }
47 }
48}
49
50/** @type { ActionOptions } */
51export const options = {
52 actionType: "create",
53};

That's not a lot of code!

This snippet will run on every incoming products/create webhook that is sent by Shopify, and determines if tags need to be added by cross-referencing the body of the incoming payload against the stored keyword records by making an internal API request to Gadget. Should any words match, they're sent back to Shopify as new tags for the product.

Gadget gives us a connections object as an argument to our effect function, which has an authenticated Shopify API client ready to go. We use this object to make API calls back to Shopify to update the tags and complete the process.

Sharing code between actions 

If we want to run this same code on the update action, we can create a shared utility function to avoid duplicating code.

  1. Create a new api/models/shopifyProduct/utils.js file:
api/models/shopifyProduct/utils.js
JavaScript
1export async function applyTags({ record, logger, api, connections }) {
2 if (record.body && record.changed("body")) {
3 // get a unique list of words used in the record's description
4 let newTags = [...new Set(record.body.match(/\w+(?:'\w+)*/g))];
5
6 // filter down to only those words which are allowed
7 const allowedTags = (await api.allowedTag.findMany()).map((tag) => tag.keyword);
8
9 // merge with any existing tags and use Set to remove duplicates
10 const finalTags = [
11 ...new Set(
12 newTags.filter((tag) => allowedTags.includes(tag)).concat(record.tags)
13 ),
14 ];
15
16 logger.info(
17 { newTags, allowedTags, finalTags },
18 `applying final tags to product ${record.id}`
19 );
20
21 // write tags back to Shopify
22 const shopify = connections.shopify.current;
23 if (shopify) {
24 await shopify.product.update(parseInt(record.id), {
25 tags: finalTags.join(","),
26 });
27 }
28 }
29}
  1. Import the applyTags function into api/models/shopifyProduct/actions/create.js and call applyTags from the onSuccess function:
api/models/shopifyProduct/actions/create.js
JavaScript
1import {
2 applyParams,
3 preventCrossShopDataAccess,
4 save,
5 ActionOptions,
6 CreateShopifyProductActionContext,
7} from "gadget-server";
8import { applyTags } from "../utils";
9
10/**
11 * @param { CreateShopifyProductActionContext } context
12 */
13export async function run({ params, record, logger, api }) {
14 applyParams(params, record);
15 await preventCrossShopDataAccess(params, record);
16 await save(record);
17}
18
19/**
20 * @param { CreateShopifyProductActionContext } context
21 */
22export async function onSuccess({ params, record, logger, api, connections }) {
23 await applyTags({ record, logger, api, connections });
24}
25
26/** @type { ActionOptions } */
27export const options = {
28 actionType: "create",
29};
  1. Do the same in api/models/shopifyProduct/actions/update.js, import applyTags and call the function in onSuccess:
api/models/shopifyProduct/actions/update.js
JavaScript
1import {
2 applyParams,
3 save,
4 ActionOptions,
5 UpdateShopifyProductActionContext,
6} from "gadget-server";
7import { preventCrossShopDataAccess } from "gadget-server/shopify";
8import { applyTags } from "../utils";
9
10/**
11 * @param { UpdateShopifyProductActionContext } context
12 */
13export async function run({ params, record, logger, api }) {
14 applyParams(params, record);
15 await preventCrossShopDataAccess(params, record);
16 await save(record);
17}
18
19/**
20 * @param { UpdateShopifyProductActionContext } context
21 */
22export async function onSuccess({ params, record, logger, api, connections }) {
23 await applyTags({ record, logger, api, connections });
24}
25
26/** @type { ActionOptions } */
27export const options = {
28 actionType: "update",
29};

Now this code will be run every time a product is created or updated in a Shopify store.

Avoid webhook loops

The record.changed helper is a special field that Gadget has included to help prevent an infinite loop when updating Shopify records.

When we call shopify.product.update(...) the product in our Shopify store will be updated. This update action will fire Shopify's products/update webhook. If we are using this webhook as a trigger for running custom code that updates a product, we will be stuck in an endless loop of updating our products and running our action.

We can use record.changed to determine if changes have been made to the key on this record and only run our code if changes have occurred.

For more info on change tracking in Gadget, refer to the documentation.

Step 4: Access control 

To ensure that only the right people can access your app, you can set up access control rules in Gadget. This will allow you to restrict access to certain parts of your app based on the user's role.

By default, merchants will not have access to your custom model APIs, such as allowedTag. You can grant permissions to the shopify-app-users role to allow merchants to access these APIs.

  1. Navigate to the accessControl/permissions page
  2. Grant the shopify-app-users role access to the allowedTag/ model's read, create, and delete actions

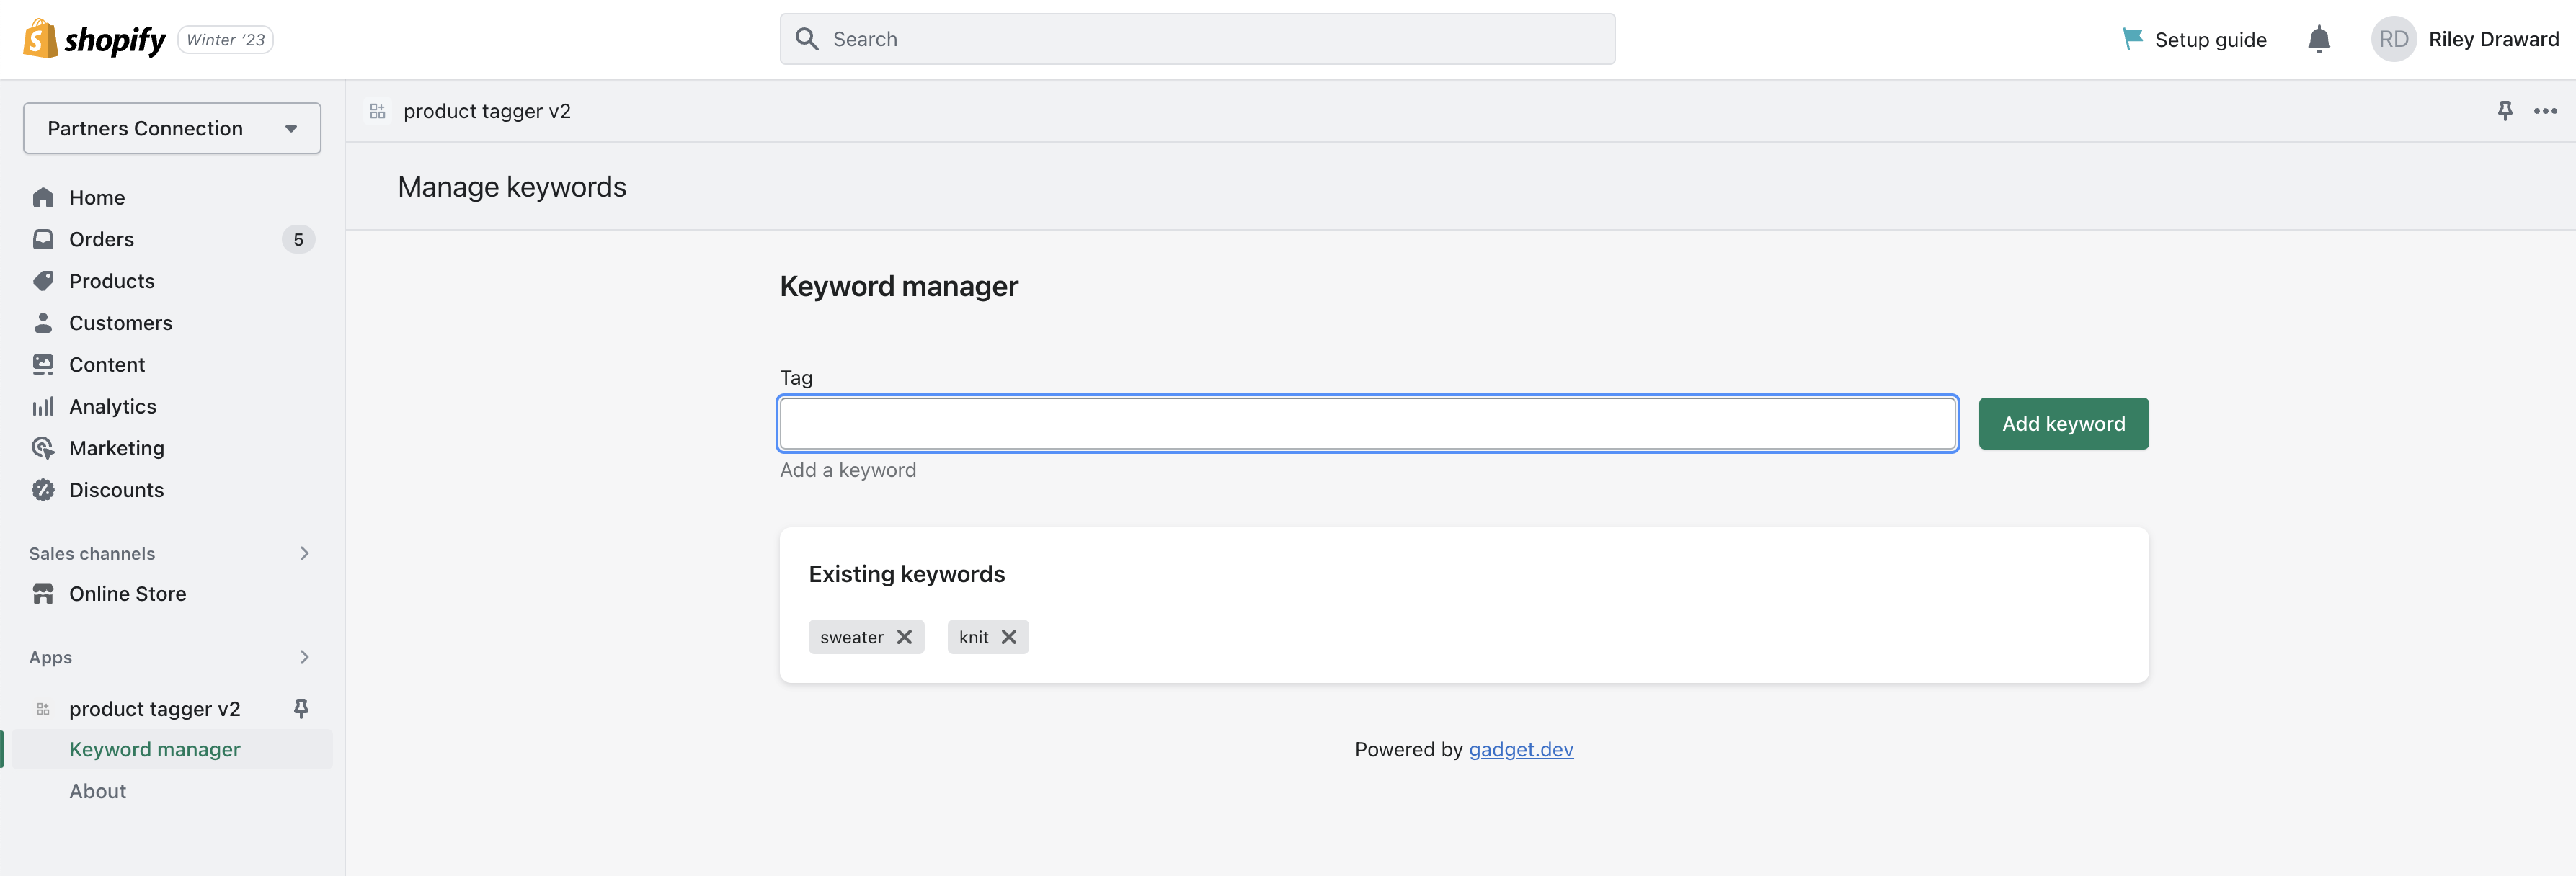
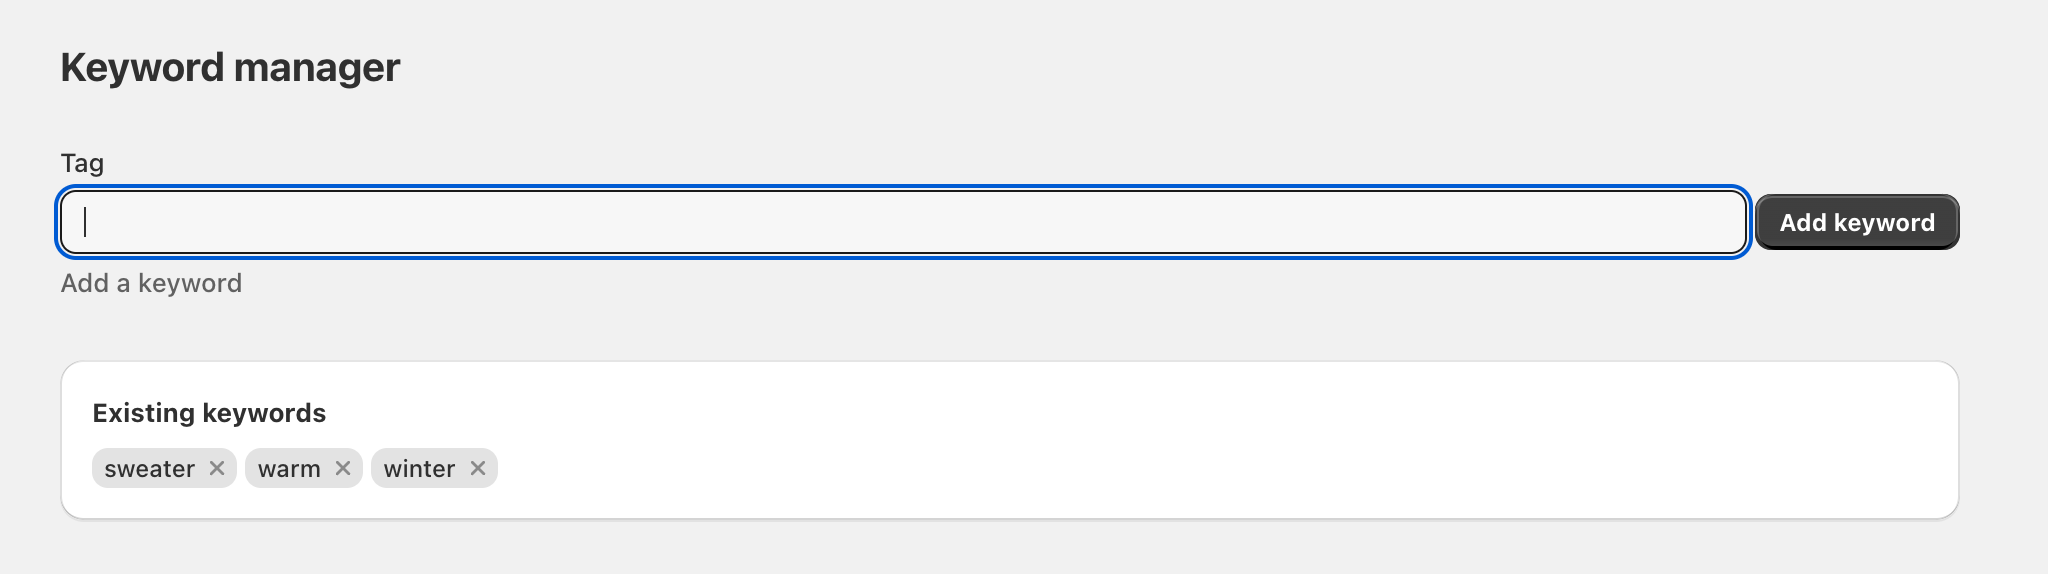
Now merchants will be able to manage allowedTag records from the embedded frontend in their Shopify store admin.

Step 5: Build a Shopify admin frontend 

Gadget apps include a web folder for your frontend. This folder contains the following:

  • your Gadget API client in web/api.js
  • a default React app in web/main.jsx
  • router setup in web/App.jsx
  • two pages at web/routes/index.jsx and web/routes/about.jsx

Additional packages have also been added to your package.json upon connecting to Shopify:

  • @gadgetinc/react: provides Gadget's React hooks for fetching data and calling your API
  • @shopify/polaris: Shopify's design system components

The entire tagger frontend code snippet is below. Additional details on some of Gadget's provided tooling are below the snippet.

  1. Paste the following code into web/routes/index.jsx
web/routes/index.jsx
jsx
1import { useFindMany, useAction, useActionForm, Controller } from "@gadgetinc/react";
2import { TitleBar } from "@shopify/app-bridge-react";
3import {
4 Banner,
5 Button,
6 Form,
7 FormLayout,
8 Layout,
9 Page,
10 Spinner,
11 Tag,
12 TextField,
13 Card,
14 BlockStack,
15 Text,
16 InlineStack,
17} from "@shopify/polaris";
18import { api } from "../api";
19
20// component used to display error messages
21const ErrorBanner = ({ title, error }) => {
22 return (
23 <Banner tone="critical" title={title}>
24 <code>{error.toString()}</code>
25 </Banner>
26 );
27};
28
29export default function () {
30 // a useFindMany hook to fetch allowedTag data
31 const [{ data, fetching, error }] = useFindMany(api.allowedTag);
32
33 // the useAction hook is used for deleting existing tags
34 const [{ error: deleteTagError }, deleteTag] = useAction(api.allowedTag.delete);
35
36 // useActionForm used to manage form state and submission for creating new tags
37 const { submit, control, reset, error: createError, formState } = useActionForm(api.allowedTag.create);
38
39 // render the page, using data, fetching, and error from the useFindMany, useAction, and useActionForm hooks to display different widgets
40 return (
41 <Page title="Keyword manager">
42 <Layout>
43 <Layout.Section>
44 <TitleBar title="Manage keywords" />
45 <Form
46 onSubmit={async () => {
47 // submit the form and save the keyword as a new allowedTag record
48 await submit();
49 // reset the form input to empty
50 reset();
51 }}
52 >
53 <FormLayout>
54 {createError && <ErrorBanner title="Error adding keyword" error={createError} />}
55 <Controller
56 name="keyword"
57 control={control}
58 required
59 render={({ field }) => {
60 // Functional components like the Polaris TextField do not allow for 'ref's to be passed in
61 // Remove it from the props passed to the TextField
62 const { ref, ...fieldProps } = field;
63 // Pass the field props down to the TextField to set the value value and add onChange handlers
64 return (
65 <TextField
66 label="Tag"
67 type="text"
68 autoComplete="tag"
69 helpText={<span>Add a keyword</span>}
70 disabled={formState.isSubmitting}
71 connectedRight={
72 <Button variant="primary" submit disabled={formState.isSubmitting}>
73 Add keyword
74 </Button>
75 }
76 {...fieldProps}
77 />
78 );
79 }}
80 ></Controller>
81 </FormLayout>
82 </Form>
83 </Layout.Section>
84 <Layout.Section>
85 <Card>
86 <BlockStack gap="200">
87 <Text variant="headingSm" as="h5">
88 Existing keywords
89 </Text>
90 {fetching && <Spinner />}
91 {error && <ErrorBanner title="Error reading tags" error={error} />}
92 {deleteTagError && <ErrorBanner title="Error removing keyword" error={deleteTagError} />}
93 <InlineStack gap="100">
94 {data?.map((allowedTag, i) => (
95 <Tag key={i} onRemove={async () => await deleteTag({ id })}>
96 {allowedTag.keyword}
97 </Tag>
98 ))}
99 </InlineStack>
100 {data?.length === 0 && <p>No keywords added</p>}
101 </BlockStack>
102 </Card>
103 </Layout.Section>
104 </Layout>
105 </Page>
106 );
107}

If you go to your development app, you should now be able to test it out! Go back to the embedded frontend in your store admin and start adding custom tags. You'll be able to see the created tags, along with the related shop ID, in the allowedTag Data page in Gadget.

A screenshot of the completed embedded tagger app
@gadgetinc/react hooks

The @gadgetinc/react library is used to read and write data in your frontend.

  • useFindMany is used to fetch data, and a fetching boolean can be used to display a loading state
  • useAction provides a callback used to call the api.allowedTag.delete action
  • useActionForm is used to manage form state and submission for creating new tags
Read the building frontends guide for more information.

Congrats! You have built a full-stack and fully functional embedded product tagger application! Now you can test it out.

Step 6: Test it out 

  1. First, add some keywords to your product tagger. You want to make sure to add words that are in your product descriptions. If using Shopify's default store data, SUPER and DUPER both appear in the product description of The Complete Snowboard.
  2. Go back to the Connections page in Gadget and click Shop Installs and then Sync on the connected store if you set up a custom app through the Partners dashboard, or just click Sync if you used the store Admin to set up your app.
The Installs page for the connection, displaying the store name, and the Sync button

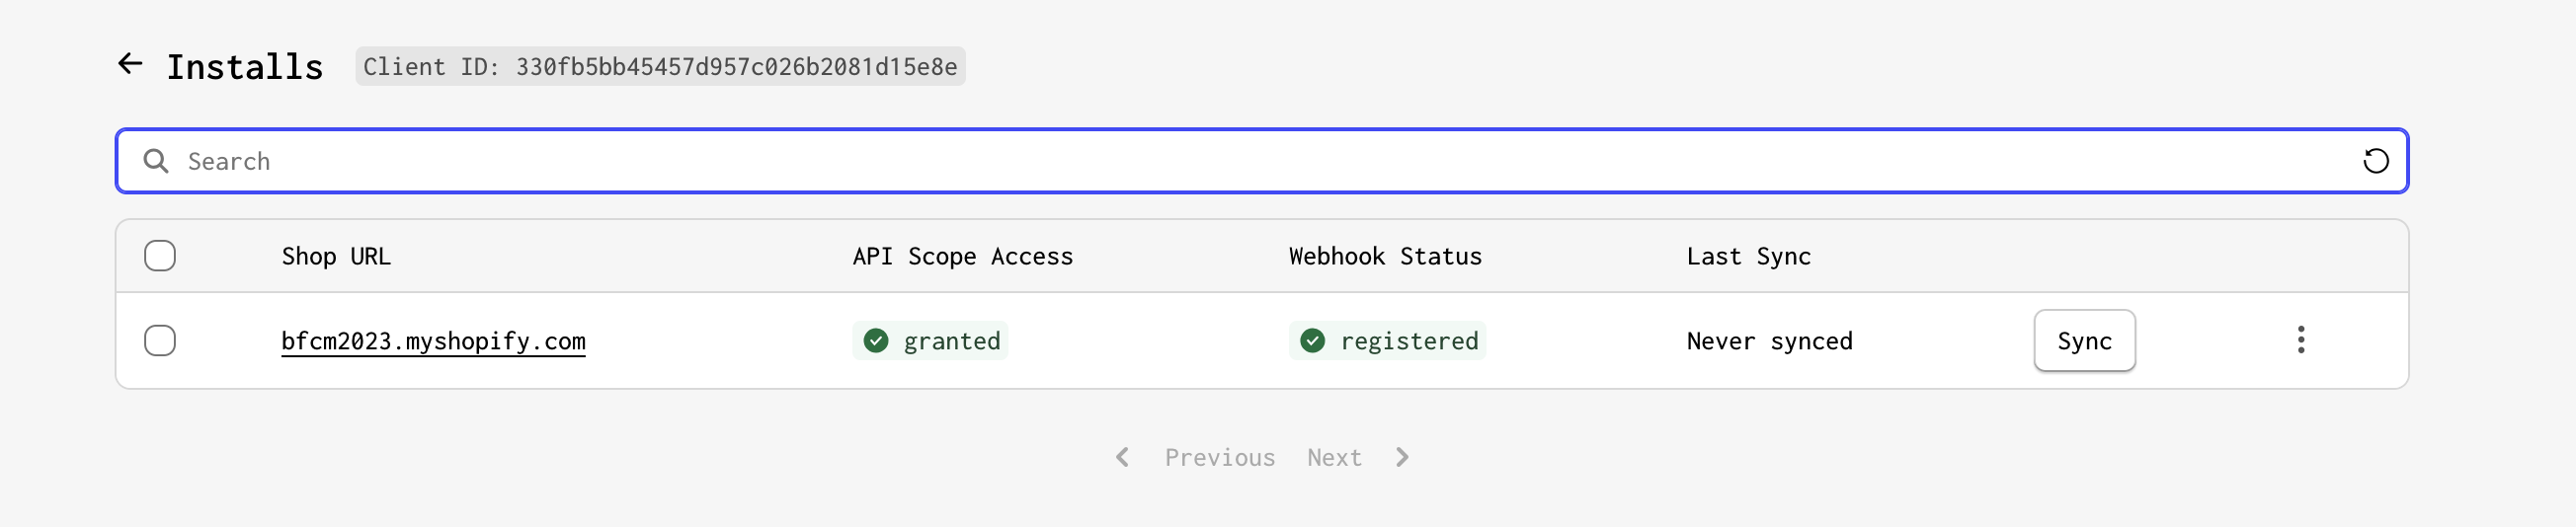
Gadget will fetch each of the records in Shopify and run them through your actions. Not only will this populate your Gadget backend with the store's inventory, but it will also run the effects we added, updating the tags for each synced product. Our tagging application will also run on products when they are added to the store, so any new products will also be tagged for us automatically.

Display the tag added on one of the demo products

Congratulations! In about 20 minutes you were able to build a custom app that updates tags in Shopify each time there is a match against the list of allowed tags.

Next steps 

Now that you can add keywords using an admin UI, you may want to try adding a global action to run through all existing products that have been synced to Gadget to apply tags!

Want to build apps that use Shopify extensions? Check out our pre-purchase checkout UI extension tutorial: