Shopify app frontends
Gadget offers a comprehensive toolkit for quickly constructing frontends for Shopify Apps. When connecting a Gadget app to Shopify, it automatically includes a basic, hosted frontend powered by Vite. This frontend comes preloaded with support for OAuth, Shopify's Polaris design system, multi-tenant data security, and integration with Shopify's App Bridge for embedded applications. You have the flexibility to customize this frontend according to your preferences, or you can create an entirely new external frontend from scratch using Gadget's React packages.
Frontends for Shopify apps interact with Gadget backends through the GraphQL API specific to your Gadget app, along with the corresponding JavaScript client for your application. To work with Gadget from a Shopify app frontend, there are several npm packages that are essential:
| Package | Description | Available from |
|---|---|---|
@shopify/app-bridge | Shopify's App Bridge library for embedded applications within the Shopify Admin | npm |
@gadget-client/example-app | The JS client for your specific Gadget application | Gadget NPM registry |
@gadgetinc/react | The Gadget React bindings library, providing React hooks for making API calls | npm |
@gadgetinc/react-shopify-app-bridge | The Gadget Shopify wrapper library for Shopify Embedded App setup and authentication | npm |
Gadget installs these packages into your Gadget-hosted frontend automatically, but if you're building an external frontend you must install them yourself.
Once you've set up your Shopify connection, your Gadget app will have a built-in frontend ready for construction in your app's web folder. This frontend can access data from your backend, including both models synced from Shopify and models created within your application. By default, new Shopify apps use React, Polaris web components, and Gadget's Shopify App Bridge helpers, so authentication, embedded navigation, and data fetching are ready to use.
Gadget frontends for Shopify include Polaris web components out of the box, so new apps match Shopify's design system by default. Existing apps that still use @shopify/polaris can continue to do so.
AppLink
New Shopify frontends also include an web/components/AppLink.jsx helper. This is only necessary when you
are using Polaris web components and want to link to another route with <s-link> inside your frontend. Use AppLink instead of raw
<s-link> for those in-app links. AppLink forwards clicks to react-router, so navigation stays client-side inside the Shopify admin.
For external URLs or links with target="_blank", the normal link behavior still applies.
If you'd like to build your frontend outside of Gadget, refer to the external frontends guide.
Reading data from your backend
To facilitate easy access to data from your Gadget application, including both the non-rate-limited copies of Shopify models and your custom models, you can leverage the @gadgetinc/react hooks library in your frontend. This library provides a set of hooks, such as useFindOne, useFindMany, and useFindFirst, specifically designed for fetching data from your Gadget app.
When utilizing these hooks, each one returns an object that includes the requested data, the current fetching state, and an error object if any error occurred during the data retrieval process. Additionally, the returned object includes a refetch function that allows you to refresh the data if needed.
By using the provided hooks from the @gadgetinc/react library, you can easily fetch and manage data from your Gadget app within your frontend code. These hooks simplify the process of data retrieval, provide relevant states and error handling, and offer a convenient mechanism for refreshing the data when necessary.
For example, if you have the Shopify Product model enabled in your Connection, we can fetch product records in a variety of ways:
Data from other models that you've created in your application is accessed the same way. For example, if we're building a free shipping banner app, you might create a Banner model that stores details about each shipping banner created. We can fetch banner records with the same React hooks:
Each of these hooks must be wrapped in a React component to render. For example, we can use useFindMany to display a list of products in a component:
For more on reading data in the frontend, see the building frontends guide and the @gadgetinc/react reference.
Shopify permissions
Gadget incorporates multi-tenant data permissions as the default configuration for your application. By default, an app loaded for a specific Shopify shop can only access data within that particular shop and is not authorized to access data from other shops. This default setup utilizes the Shopify App User role for enforcing these permissions, and you have the flexibility to customize the permissions for this role on the Roles & Permissions page.
In Gadget, multi-tenant data permissions are automatically enforced for Shopify models. However, access to your own models is not automatically granted. To enable frontend access to your models, you need to assign permissions to the Shopify App User role for each model you wish to make accessible. For instance, if you want to access a model named Banner, you can navigate to the Roles & Permissions screen and select the Read permission checkbox for the Banner model.
For further guidance and details on managing access control, refer to the access control guide, which provides comprehensive information on configuring and customizing data permissions in Gadget.
Writing data back to your backend
Shopify app frontends can use the useActionForm, useAction and useGlobalAction hooks from the @gadgetinc/react hooks library to write data back to your database.
To update data within Shopify, you must make an API call to Shopify directly from your backend. See the Calling Shopify API section for more information.
To write data back to your database for models you've created, or fields you've added to Shopify Models, use useActionForm, useAction or useGlobalAction hook in a React component.
For example, if we create a new model within our app called banner, we can use the useActionForm hook to create a form for new banner records:
For more details on the useActionForm hook, see the @gadgetinc/react reference, and see the Building Frontends guide for more examples.
Calling Global Actions
Shopify app frontends can call your backend's Global Actions with the useGlobalAction hook. See the Building Frontends guide for more information.
Calling HTTP routes
Shopify app frontends can call your backend's HTTP Routes with api.fetch, or any other HTTP client for React. See the Building Frontends guide for more information.
If your HTTP routes require authentication, or need to access the connections object server side, you must ensure you pass the correct
authentication headers to your HTTP route from your frontend. You can do this automatically by using api.fetch instead of the built-in
browser fetch.
For more information, see the Building Frontends
guide.
Calling the Shopify API
In Gadget, it is generally recommended to read data through Gadget's API, as Gadget's API does not impose the same access restrictions as Shopify's API. Unlike Shopify's API, your Gadget app's API is not rate-limited, allowing you to fetch data without the need for meticulous request management.
However, if you require access to data that your Gadget app doesn't sync or if you need to retrieve data that Gadget doesn't have direct access to, you can utilize Shopify's API directly.
To make requests to Shopify's Admin API, it is best to initiate the calls from the backend of your Gadget app's API. This involves making a request from your frontend application to your Gadget backend, which in turn makes the necessary calls to Shopify's API. The results are then returned from your Gadget backend to your frontend application.
Calling Shopify within actions
Code within a model actions or global actions can make API calls to Shopify using the connections.shopify.current Shopify API client Gadget provides.
For example, if we want to create a product from the frontend of our Gadget application, we can create an global action that calls the Shopify API:
First, we create a new global action called createProduct.js within the api/actions folder in Gadget.
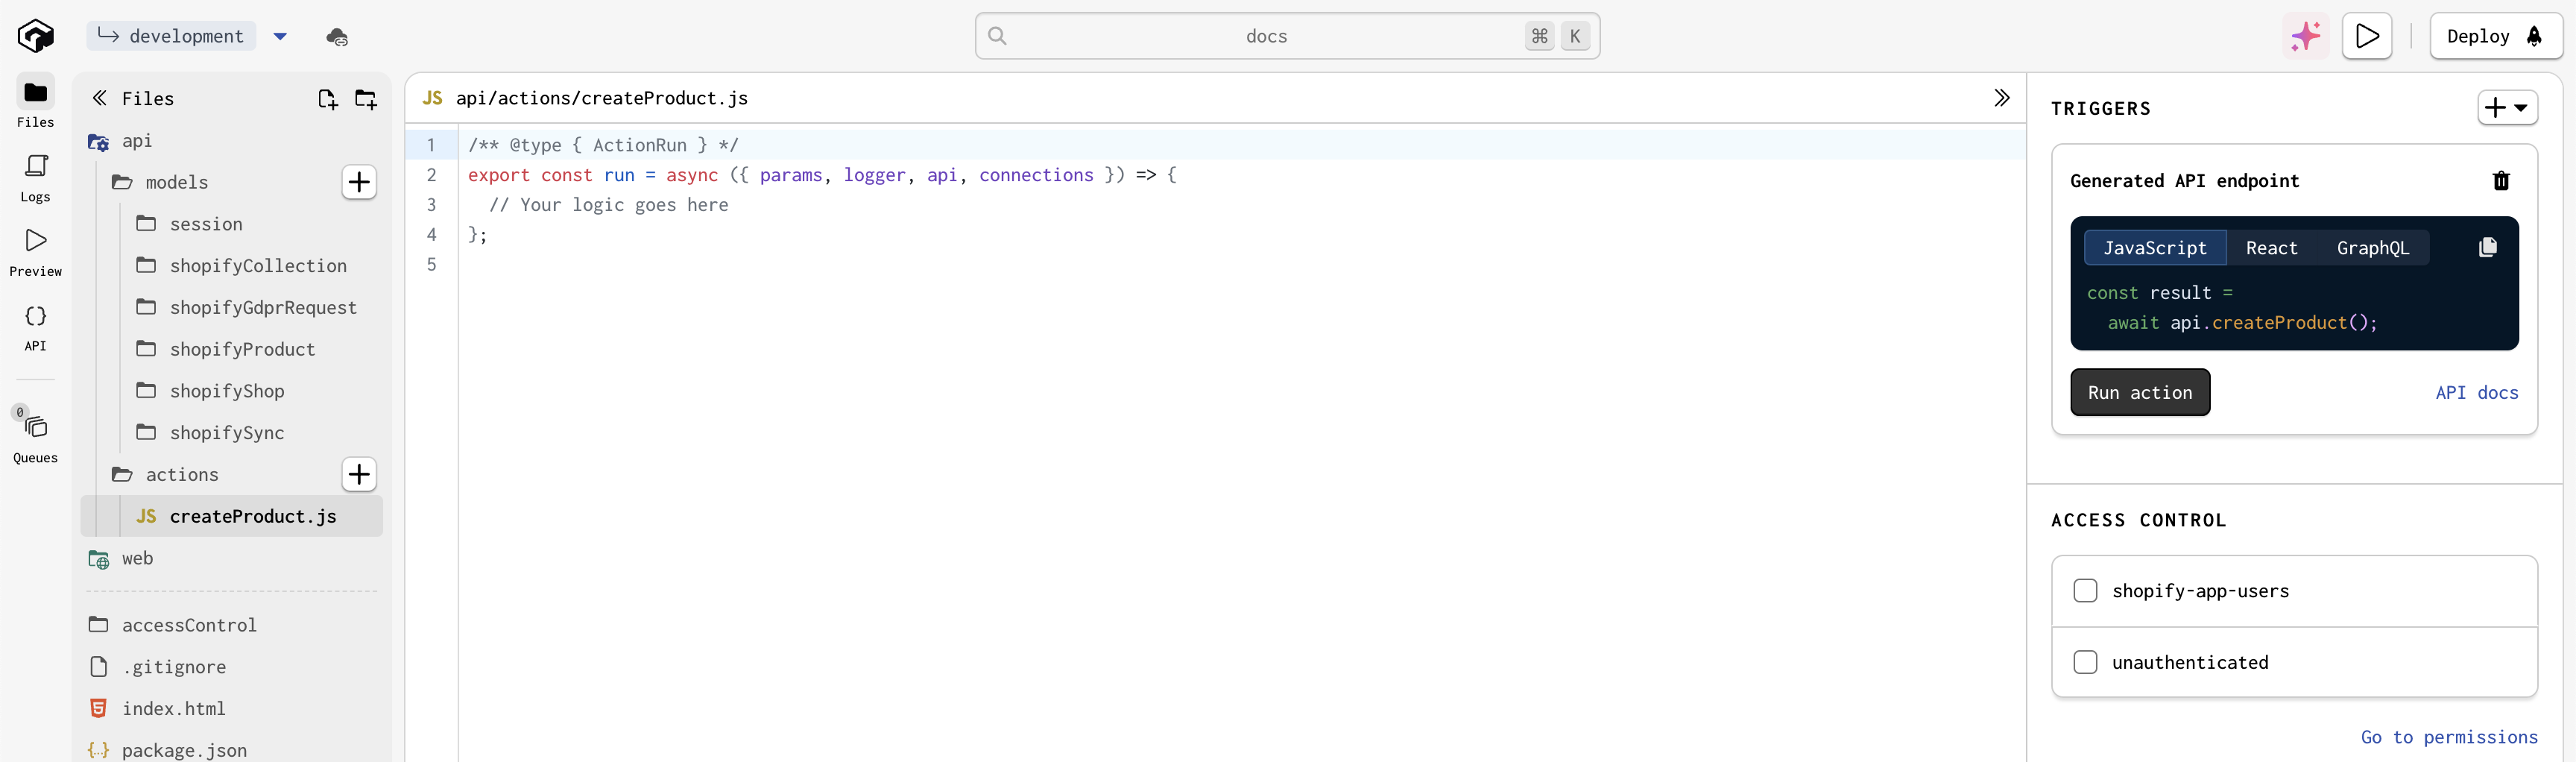
Then, we can add the following code to the global action:
This action uses Gadget's connections object to access the Shopify API client, and then calls the product.create method to create a new product in Shopify.
We can then call this global action from our Shopify frontend with the useGlobalAction React hook. For example, we can call this action when a button is clicked in the app:
Gadget's synced Shopify models are one-way synced out of Shopify. You can't call the api.shopifyProduct.create action from the frontend
to create a product, as that would put your Gadget app out of sync with Shopify. You must use the Shopify API to create resources that
Shopify owns.
Calling Shopify in HTTP Routes
Route code within HTTP Routes can access the Shopify API using request.connections.shopify to create a Shopify API client object, similarly to Actions or Global Actions.
From authenticated API clients
If you are calling your HTTP route from an API client that has been authenticated with a Shopify session token, for example, you are using useFetch inside your embedded frontend, the value of connections.shopify.current can be used in the exact same way as you would from an action.
For example, an HTTP route could return an up-to-date list of products from the Shopify API:
From unauthenticated API clients
If you are calling your HTTP route from an unauthenticated API client, for example, from a Shopify theme app extension, the value of connections.shopify.current will not be set. Instead, you can use one of the following methods to create a Shopify API client object:
If your route has access to the shop id, you can use the forShopId method to create a Shopify API client object:
If your route has access to the shop domain, you can use the forShopDomain method to create a Shopify API client object:
Because the previous two methods need to make a database query to get the shop by id or domain, if you also need to load the shop record in your route, you can save a database query by using the forShop method:
When calling HTTP routes from an unauthenticated client, take care to ensure that you are safe guarding sensitive data.
Standalone Shopify Apps
With a standalone Shopify app, you'll need to handle authentication and tenancy yourself as there is no Shopify session token to derive this from.
If your Shopify app is not an embedded app, you can still use the Gadget frontends to build your app. To do so, you will need to set the type prop on GadgetProvider to AppType.Standalone.
Shopify frontend security requirements
Shopify requires app developers to meet a set of important security requirements when building embedded apps. Gadget meets each security requirement out of the box:
- Gadget apps are always served over HTTPS
- Gadget apps run behind a production-grade firewall and only expose the necessary services
- Gadget apps use robust, multi-tenant authentication that limits access to data to the current shop (see the access control guide)
- Gadget sets up GDPR webhook listeners automatically for Shopify apps (see the GDPR docs)
- Gadget uses Shopify's Session Token authentication mechanism for authenticating the frontend to the backend.
- Gadget automatically sets the
Content-Security-Policyheader necessary for Shopify's IFrame protection when serving Shopify apps (see Shopify's security docs)
If you have any questions about the security posture of Gadget applications for Shopify, please join us in our Discord to discuss!
Reference
The Provider
The @gadgetinc/react-shopify-app-bridge library handles authentication of your embedded app via the Provider component. This provider has two main benefits - it handles authentication and the series of redirects required to complete an embedded app OAuth flow in Shopify, and it handles retrieving a Shopify session token from the App Bridge and passing it along to Gadget for authenticated calls.
The Provider handles these key tasks automatically:
- Starts the OAuth process with new users of the application using Gadget, escaping Shopify's iframe if necessary
- Establishes an iframe-safe secure session with the Gadget backend using Shopify's Session Token authentication scheme
- Sets up the correct React context for making backend calls to Gadget using
@gadgetinc/react
The Provider has the following required props:
The Gadget provider will handle detecting if your app is being rendered in an embedded context and redirect the user through Shopify's OAuth flow if necessary.
The useGadget React hook
The Provider handles initializing the App Bridge for us. Now we can build our application component and use the initialized instance of App Bridge via the appBridge key returned from the embedded React hook useGadget.
useGadget provides the following properties:
Using Provider and useGadget to set up App Bridge
Here is an example of how to set up App Bridge, and use it to open an App Bridge resource picker:
Once isAuthenticated is true, you will be able to make authenticated API requests using your Gadget API client and the @gadgetinc/react hooks.
The Provider and useGadget are already set up for you when you connect to Shopify using Gadget's frontends.
GraphQL queries
When developing embedded Shopify apps, it is possible that the installed scopes of a Shop may not align with the required scopes in your Gadget app's connection. In such cases, it becomes necessary to re-authenticate with Shopify in order to obtain the updated scopes. To determine if re-authentication is required and gather information about missing scopes, you can execute the following GraphQL query using the app client provided to the Provider:
GraphQLquery { shopifyConnection { requiresReauthentication missingScopes } }
Session model management
The Shopify connection in Gadget automatically manages records of the backend Session model when using @gadgetinc/react-shopify-app-bridge. When a merchant first loads up the frontend application, the <Provider/> will retrieve a Shopify Session Token from Shopify's API, and pass it to your Gadget backend application. The Gadget Shopify connection will then validate this token. If valid, the connection will provision a new record of the Session model with the correct shopId field set up. This session is then passed to all your backend application's model filters and is available within Action code snippets.
Embedded app examples
Want to see an example of an embedded Shopify app built using Gadget?
Check out some of our example apps on GitHub, including:
Shopify App Bridge V4 support
Gadget supports using Shopify's App Bridge V4, which is the first version from Shopify to use their new CDN-based delivery mechanism. Read more about the App Bridge in Shopify's docs.
Requirements
When using version 4 of Shopify's App Bridge, applications must depend on 3 pieces:
- a
<script/>tag to import the code for the app bridge from Shopify's CDN (automatically added at runtime by Gadget) - the
@shopify/app-bridge-reactpackage from npm, version 4 or higher - the
@gadgetinc/react-shopify-app-bridgepackage from npm, version0.14or higher
If you were previously using the @shopify/app-bridge package from npm, it must be removed.
CDN Script Tag
Shopify requires that the basic code for the app bridge is required from their CDN, instead of bundled into your application. This allows Shopify to ship changes to the app bridge like bug fixes and performance improvements without requiring you to redeploy your application. The CDN-based approach is what Shopify endorses, is required for the Built For Shopify badge, and the only version of the app-bridge still receiving updates. Gadget recommends adopting this CDN-based approach for all Shopify applications.
Gadget will automatically insert the <script/> tag to import the App Bridge from Shopify's CDN when using @gadgetinc/react-shopify-app-bridge version 0.14 or later.
Upgrade procedure
For existing apps on older versions who wish to upgrade, follow these steps:
- Upgrade the
@shopify/app-bridge-reactpackage to4.x.xby installing the latest version. For reference on using terminal commands within Gadget check out our guide here.
Run in the Gadget command paletteyarnyarn upgrade @shopify/app-bridge-react@latest
- Upgrade the
@gadgetinc/react-shopify-app-bridgepackage to0.14.1by installing the latest version.
Run in the Gadget command paletteyarnyarn upgrade @gadgetinc/react-shopify-app-bridge@latest
- Now remove
@shopify/app-bridgedependency by uninstalling it.
Run in the Gadget command paletteyarnyarn remove @shopify/app-bridge
- Finally follow Shopify's guide here on updating your components and hooks to work with Shopify App Bridge V4.
Resulting code
Each app's code for working with the new library may need to be different, depending on which hooks are being used. As an example, here's the base code for the web/components/App.jsx file for the new version of the Shopify App Bridge:
If main.jsx still references BrowserRouter, it should be removed as it will not be compatible with RouterProvider in App.jsx