In this tutorial you will build an app that creates and displays custom Gadgémon. Custom sprites for your Gadgémon will be generated using OpenAI's DALL-E API and Gadget's built-in OpenAI connection.
What you will learn
After finishing this tutorial, you will know how to:
Select the Web app type. Make sure to use the Yes, enable auth option
Click the Continue button
Enter an app name and create the app
Step 2: Build your model
Models in Gadget work similarly to models in an ORM (object relational mapper) and map to tables in a database. They have one or more fields which are columns in your tables and are used to store your application data.
Create a new model to store your Gadgémon:
Click the + button next to api/models to create a new model
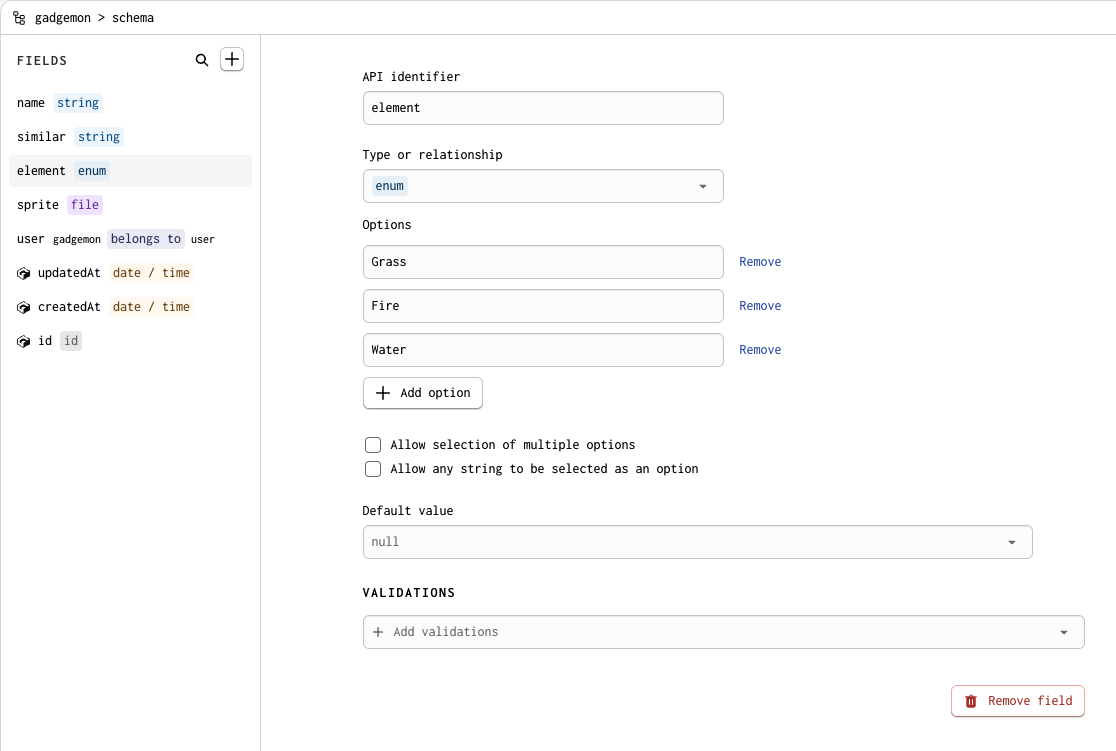
Name the model gadgemon and add the following fields:
name: a string field
similar: a string field
element: an enum field with options grass, fire, and water
sprite: a file field
Add a Required validation to name, similar, and element. The action needs all three values to generate a sprite.
Gadget has built-in plugins you can use to connect your app with external services, such as OpenAI.
You can add the OpenAI plugin to your app by following these steps:
Click on Settings in the sidebar
Click on Plugins
Select OpenAI from the list of plugins
Leave the default Gadget development keys selected and click Add connection
More on plugins
You can now use the OpenAI connection in your app to generate sprites for your Gadgémon. To learn more about
plugins check out the plugins documentation.
Step 4: Write your backend action
As you build models in Gadget, a CRUD (create, read, update, delete) API is automatically generated. You can see these actions and the code that powers them in the api/models/gadgemon/actions folder.
Now add code to your gadgemon.create action that generates a sprite for your Gadgémon using the OpenAI plugin:
Go to api/model/gadgemon/actions/create.js
Paste the following code (replace the entire file):
api/models/gadgemon/actions/create.js
JavaScript
import { applyParams, save, ActionOptions } from "gadget-server";
import { preventCrossUserDataAccess } from "gadget-server/auth";
export const run: ActionRun = async ({ params, record, logger, api }) => {
applyParams(params, record);
await preventCrossUserDataAccess(params, record);
await save(record);
};
export const onSuccess: ActionOnSuccess = async ({
params,
record,
logger,
api,
connections,
}) => {
// "record" is the newly created Gadgemon, with name, similar and element fields that will be added by the user
const { id, name, similar, element } = record;
// prompt sent to OpenAI to generate the Gadgemon sprite
const prompt = `A pixel art style pokemon sprite named ${name} that looks similar to a ${similar} that is a ${element} element. Do not include any text, including the name, in the image`;
// call the OpenAI images generate (DALL-E) API: https://github.com/openai/openai-node/blob/v4/src/resources/images.ts
const response = await connections.openai.images.generate({
prompt,
n: 1,
size: "256x256",
response_format: "url",
});
const imageUrl = response.data?.[0]?.url;
// write to the Gadget Logs
logger.info({ imageUrl }, `Generated image URL for Gadgemon id ${id}`);
// save the image file to the newly created Gadgémon record
await api.gadgemon.update(id, {
gadgemon: {
sprite: {
copyURL: imageUrl,
},
},
});
};
export const options: ActionOptions = {
actionType: "create",
timeoutMS: 60000,
};
This code will run every time your gadgemon.create API action is called.
Test your action
Gadget apps include an API playground that can be used to test your actions.
Use the playground to run your code in the gadgemon.create action:
While in api/models/gadgemon/actions/create.js, click the Run Action button.
Use the playground's API client to create a Gadgémon:
You should see a success: true response in the playground, which means you created a new gadgemonrecord.
Go to api/models/gadgemon/data to view your model records
More on actions
Actions define your application's API. To learn more about actions, see the actions guide.
Step 5: Build your frontend
You need an interface to create and display your Gadgémon. In Gadget, your Vite + React frontend is found inside the web folder, and an API client has been set up for you in web/api.js.
You will use this client and Gadget's React hooks to call your gadgemon.create action and read gadgemon model records.
Go to web/routes/_app.signed-in.jsx and replace the contents with the following code:
Like your database and backend, your Gadget frontends are already hosted and live on the internet. For more information on frontends, read
the frontend docs.
Test your app
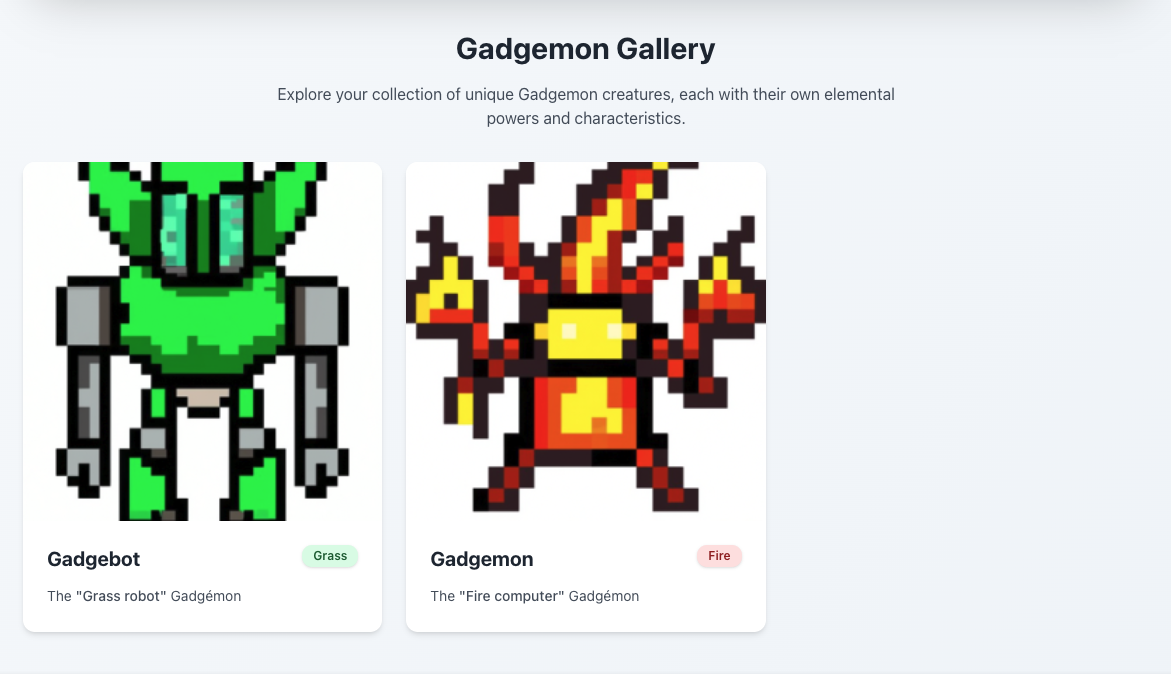
Now you can view your completed app (and your Gadgémon!) in the frontend:
Click Preview in the top right of the Gadget editor
Sign up and sign in to your app
You should see your Gadgémon displayed on the page.
Try creating new Gadgémon using the form!
Next steps
Dig deeper into the concepts used in this tutorial: